filmov
tv
I wrecked the WanpTek 60V/20A adjustable power supply 💥 ... and repaired it again WITH THIS!

Показать описание
It was totally my own fault that the #Wanptek adjustable power supply got so sick! I connected it the wrong way around to my battery and turned it on. It warned me with big sparks but I decided to ignore these warning und it was too late. The power supply was dead, still showed some numbers on the display but neither voltage nor current could be adjusted any more. Some common sense and a quick sniffing test got me on the right track and I could order some spare parts. Luckily it was the two #diodes which died and nothing more.
With the right soldering iron, I could quickly #repair the device. Let me know in the comment section how you solder these larger MOSFETS if not with such a huge device.
WanpTek Adjustable Power Supplies 0V-220V /5A-100A DC
Soldering iron with chisel tip for trains, space ships or semiconductors:
Please subscribe and join me on my journey of the Off-Grid Garage!
The 'Buy me a Beer🍻'-link is here (on the website, scroll all the way down):
You can also click on the Thanks button under the video to support the channel. Thank you, if you have already!
T-Shirts, caps, mugs and more in our merch-shop:
***** These are the batteries you are looking for *****
Best prices for Victron gear in Australia: Auto Parts Co has you covered.
(they have 4WD parts and accessories too)
Take a live sneak peek at the Off-Grid-Garage in the Victron VRM World (link at top of the page):
My other (German) YouTube channels:
Please don't leave any links in your reply. YouTube will not publish your comment in this case.
If you decide to sent me an email, I really appreciate your time and effort for doing this. However, please consider leaving a comment under my videos instead as I may not be able to reply to your email due to the sheer amount of messages I'm receiving.
 0:16:42
I wrecked the WanpTek 60V/20A adjustable power supply 💥 ... and repaired it again WITH THIS!
 0:14:37
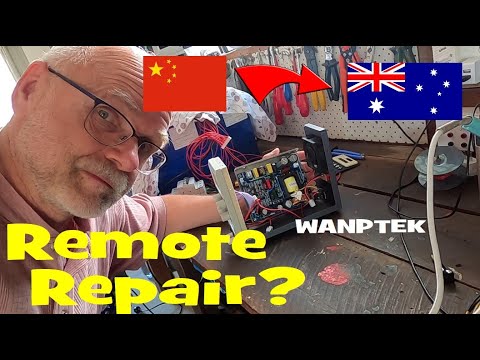
Wanptek Power Supply remote repair from China. Best service ever!
 0:28:24
👷♂️Make a better DC Power supply: Modification to Wanptek DPS3010U👷♂️
 0:08:28
Schmaumstoff und Kunststoff schneiden mit einem Labornetzteil
 0:10:27
Блок питания Wanptek KPS6030D. Незавершённый ремонт.
 0:12:16
Why you should compress your LiFePO4 battery! And why it does not matter... 🤷♂️
 0:40:54
They took all my solar panels off... and replaced them with new ones 😉
 0:34:59
First charge of the Frankenstein battery... But look at this GobelPower BMS!!!
 0:12:44
Bench Power Supply no voltage repair.
 0:10:26
Current Limiter Test Seplos BMS 10C, 10E and QSO Tiangbangda BMS
 0:14:27
BMS Active Current Limiter - Safety Feature or Gimmick?
 0:21:11
Using batteries with different capacities in series! Total balance chaos?
 0:18:00
What's inside $70 10A bench power supply? PS-3010DF
Комментарии