filmov
tv
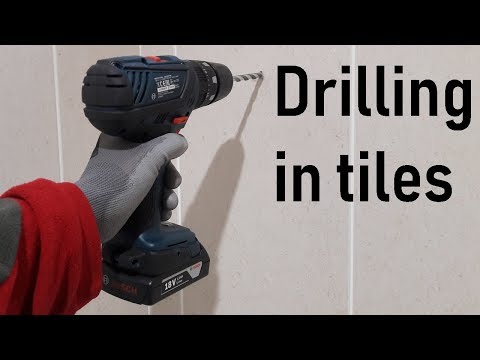
How to drill in ceramic tiles

Показать описание
Not sure how to drill in ceramic tiles? It might seem like a daunting task at first if you’ve never done it before. The drill slips on the smooth surface and even worse, the tile might crack, which is the last thing you want to happen to your already finished bathroom. It isn't a problem though if you follow a few golden rules and use the correct tools.
So if you need to attach a mirror, rail or hook do not procrastinate the job forever. Watch my step–by-step tutorial and find out how to drill with confidence and not damage the tile in the process. Here are some useful tips you could find helpful.
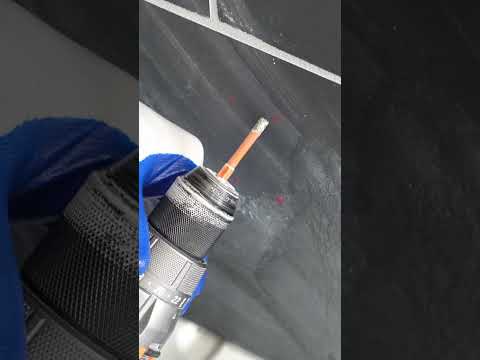
* Choose an appropriate drill bit, if you need to drill only a few holes the easiest option is to use a carbide-tipped masonry one.
* Use any kind of sticky tape to prevent the drill from slipping. The job will be easier and you won't have an ugly scratch on highly polished surface if the drill bit accidentally slides.
* To steady the drill bit you can make a tiny hole before you make a start. You need to tap the drill gently with the hammer and rotate it at the same time until you make a small dent in the surface of the tile.
* Drill slowly, the lowest speed possible. It will take some time before you make a hole so be patient. Be careful not to overheat the drill bit or it will be ruined. You can cool it down in cold water from time to time, if the tiles are very hard.
* Never set hammer mode while drilling, more likely the tile will crack. Try not to push hard but apply moderate even pressure instead.
* If you don't have any experience at all but have some leftover tiles (or you can buy one in the shop) practice making a hole in one of these. Try to replicate the real situation by clamping it to a piece timber lying vertically or horizontally, depending whether you need to drill in the wall or the floor. Once you have drilled into an un-needed tile successfully you will be more competent and confident when you do the real thing.
Good luck
Amazon UK:
Amazon USA:
***********************************
- I'd love to hear your thoughts. Please comment, like and let me know what you'd like to see next.
Subscribe for the latest videos:
#knemo #DIY #DrillTiles #drilling #DrillingTiles #DrillHolesInTiles #Drilling
So if you need to attach a mirror, rail or hook do not procrastinate the job forever. Watch my step–by-step tutorial and find out how to drill with confidence and not damage the tile in the process. Here are some useful tips you could find helpful.
* Choose an appropriate drill bit, if you need to drill only a few holes the easiest option is to use a carbide-tipped masonry one.
* Use any kind of sticky tape to prevent the drill from slipping. The job will be easier and you won't have an ugly scratch on highly polished surface if the drill bit accidentally slides.
* To steady the drill bit you can make a tiny hole before you make a start. You need to tap the drill gently with the hammer and rotate it at the same time until you make a small dent in the surface of the tile.
* Drill slowly, the lowest speed possible. It will take some time before you make a hole so be patient. Be careful not to overheat the drill bit or it will be ruined. You can cool it down in cold water from time to time, if the tiles are very hard.
* Never set hammer mode while drilling, more likely the tile will crack. Try not to push hard but apply moderate even pressure instead.
* If you don't have any experience at all but have some leftover tiles (or you can buy one in the shop) practice making a hole in one of these. Try to replicate the real situation by clamping it to a piece timber lying vertically or horizontally, depending whether you need to drill in the wall or the floor. Once you have drilled into an un-needed tile successfully you will be more competent and confident when you do the real thing.
Good luck
Amazon UK:
Amazon USA:
***********************************
- I'd love to hear your thoughts. Please comment, like and let me know what you'd like to see next.
Subscribe for the latest videos:
#knemo #DIY #DrillTiles #drilling #DrillingTiles #DrillHolesInTiles #Drilling
 0:04:15
How to Drill Drainage Holes into Ceramic Pots - Glazed & Unglazed
 0:00:25
How to drill a drainage hole in your ceramic pot🪴#houseplantDIY
 0:06:27
Drill Drainage Holes in Pots WITHOUT Breaking Them! (Foolproof Method)
 0:02:03
Drilling hole in ceramic tile. How to make a hole in a tile. What drill to use.
 0:07:22
How to Drill Tiles Without Cracking Them - Perfect Results Every Time!
 0:00:11
How to Drill into Porcelain Tile #shorts #diy #homedecor #repair #tiles #viral #home #tools
 0:02:57
How to Drill a Drain Hole in Ceramic
 0:00:26
Tile tips: How to drill without cracking! #DIYTips #BandQ
 0:00:35
How to Drill Through Tile Without Cracking It! #diy #tile
 0:00:13
Drill Bits Set for Tile Glass Ceramic Brick Wood | Amzon Best Tools | How To Work
 0:01:00
How to drill a hole on ceramic pot 1/2
 0:00:10
How to drill a hole in tile #tile #howto #drill #construction
 0:00:23
⛏️🤫Remember This Trick To Precisely Drill A Hole In Smooth Ceramic Tile
 0:00:22
How to Drill a Hole in a Ceramic Plant Pot | Increase drainage in houseplants & outdoor containe...
 0:01:47
How to Select & Drill into Ceramics with Ruwag Ceramic Drill Bits
 0:02:25
How to drill in ceramic tiles
 0:01:15
How To Drill Into Ceramic Tile - Ace Hardware
 0:01:45
How to Drill a Hole in Porcelain or Ceramic Tile
 0:00:43
How to drill tiles without cracking them! #shorts
 0:00:32
How To Drill Porcelain Tile! #tile #drill #tools #diy #construction #shorts
 0:01:26
How To Drill Into Ceramic or Porcelain Tile in 1 Minute (Anyone can do it)
 0:02:59
How To Drill Tiles Without Breaking Them! No One Knows This Secret
 0:02:04
How to Drill Through Tiles Without Cracking Them
 0:05:22
How To Drill Through Hard Porcelain Tile Using Cheap Drill Bits | AKA The Tape Trick
Комментарии