filmov
tv
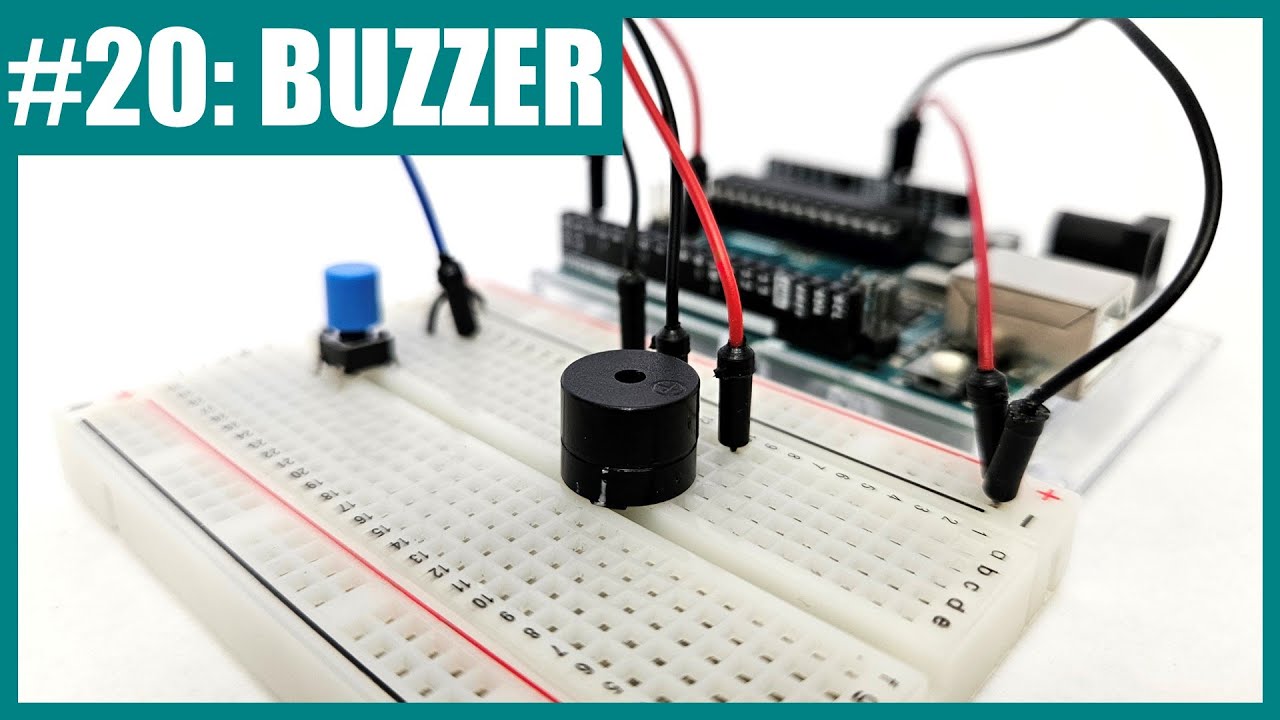
How to Use Buzzers (Active and Passive) with an Arduino (Lesson #20)
Показать описание
0:00 introduction
0:23 active buzzer
1:34 passive buzzer
#STEM #sciencebuddies #arduino #electronics #programming
*******************************
Connect with Science Buddies:
 0:03:35
How to Use Buzzers (Active and Passive) with an Arduino (Lesson #20)
 0:01:54
Active vs. Passive Buzzer: What's the Difference?
 0:00:21
Buzzer Projects | Buzzer 5v | Simple Door Bell Alarm | Mini Buzzer Project | Simple Alarm Circuit |
 0:00:13
Active (DC) vs Passive (AC) Buzzer! #electronics #buzzer #tone #diy
 0:03:46
Difference between Active Buzzer and Passive Buzzer
 0:00:07
Arduino Buzzer IDE 2.0.4
 0:00:08
Buzzer Project #arduino #buzzer #projects
 0:06:25
Simple buzzer circuit
 0:01:04
Active and Passive Buzzers: What's the Difference? 🤔 How to Use Them? 🔧 Arduino Tips! 💡...
 0:02:33
Learn electronics quick video series tutorials 11 active and passive buzzers
 0:07:34
Active and passive buzzers demonstration using astable mode 555 timer
 0:00:29
Control a buzzer by the ESP32 card
 0:00:17
Buzzer Sound Comparison
 0:00:16
Play simple melodies and sounds with an Arduino and a piezo speaker
 0:17:45
Active Buzzer Arduino Tutorial #5 - Elegoo Uno R3 Basic Starter Kit
 0:03:39
Arduino Uno buzzer button setup! Easiest way to wire a buzzer to a button!
 0:10:35
How to Use Active and Passive Buzzers on the Arduino - Ultimate Guide to the Arduino #27
 0:05:59
Arduino Tutorial 23: Changing Tone of an Active Buzzer
 0:00:22
3-in-1 Piezo Magic
 0:00:28
Buzzer with Red LED Light AD16-22SM ACDC220V 22mm Diameter | Brandrethroad. pk
 0:00:16
12v Dc Buzzer
 0:00:23
Active vs Passive Buzzers Explained in 22 Seconds! 🎤 | Arduino Basics
 0:03:05
How to connect A buzzer to Arduino
 0:00:12
Electric Mini buzzer testing |Amazing sound|Buzzer testing|Only Rs.10 #shorts#buzzer#rs10 #testing
Комментарии