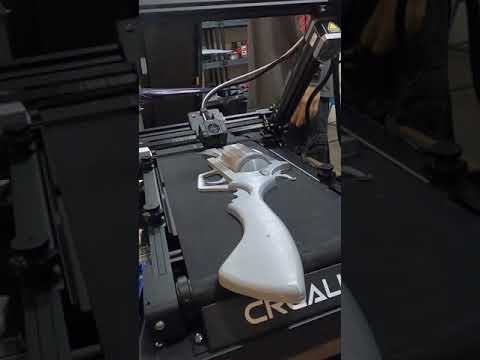
It's Finally Working! 5-Axis 3D Printer Upgrades

preview_player
Показать описание
Hello everyone! After months of hard work, I’m thrilled to share the latest progress on my 5-axis 3D printer. In this video, I walk you through the steps and upgrades that made this possible. 🛠️

Despite unexpected issues, moving houses, and taking a holiday, we’re finally here! I’ve made several mechanical and software improvements that I can't wait to show you.

🔧 Highlights:
- Added a motor for the A axis
- Upgraded linear rails for X and Y axes
- Fixed bugs in Klipper
- Generated 5-axis G-code with custom Python script
💡 Special Thanks:

00:00:00 - Intro
00:02:48 - The changes to the hardware
00:11:16 - The struggles for the first print
00:18:21 - Printing in 5 axis!
00:23:27 - Next steps
Рекомендации по теме
Комментарии
Автор

All hail open-source. The fact that people can achieve this in their own workspace is mind-blowing . No more waiting for sponsorships and funding - think it - build it. Incredible.

josephpk
Автор

I'm thrilled to follow along with this. The community NEEDS more projects like this actually getting documented with more detail than just pointing a webcam at the final product! Thanks for sharing!

jamespray
Автор

It is incredibly interesting to see how 3D-printer hardware continues to be light-years ahead of the software.

jkr
Автор

You know what's beautiful about the 3d printing community? It's always evolving and the reason is the "community". Every now and then we see some individual/company (mostly individuals) give back to community by releasing their developments as open source.

HyperMakes
Автор

This is the real future of FDM printers.

habretho
Автор

This guy is a Serious engineer. It's common for an engineer to know one "art" really well, but to be adept at electrical, mechanical, and software is very impressive. I hope some technology company has been smart enough to hire you. Resume? Point them at this video! I tip my hat to you, sir!

kurtbilinski
Автор

He's back!

Glad to see people aren't sleeping on how great this is. We're seeing the future of 3D printing being forged in real time.

This isn't going to hit production any time soon due to adhesion issues on large models, but it ABSOLUTELY will one day because the ability to avoid supports is simply that valuable

MatthewBHoth
Автор

When I saw the rings for your bed conductivity, I just had to mention this. Take a look at how the power setup/generator cabling works in wind turbines. They do some fancy twisted cabling to enable them to turn the turbine head around as many times as it wants without tangling the wires. It'll be a much more stable connection than trying to use bearing conductivity. Robert Murray-Smith did a video on it a while ago.

Theminecraftian
Автор

Because you efforted through the mayhem, boosted innovation, and thus making you a world class local hero for open source, dude, man, brotherrrr!!

truetech
Автор

Possibly the second biggest benefit to your printer is the potential to utilize a *square opening nozzle* since you can overcome the x, y coordinate directionality limitation/compromise of traditional printers that require a circular opening to accommodate the non x, y coordinate movements. I'd love to see what this produces.

ExtantFrodo
Автор

A. Electroplate nickel "BB's" with copper for better voltage/current transfer w/o causing resistance (crosman sells copper plated 4.5mm "BB's")
B. See if you can get a firm spring (like a recoil spring from a pistol spring) to apply tension on the bed rotational bearing, you can tighten, then the spring will allow slight flex and maintain good contact
C. Ingenious design!

haydenc
Автор

that is awesome, you solved a problem that commercial 3d printer manufactures cannot solve

HarvickOne
Автор

Nice work. I appreciate all the hard work it takes to innovate and create. I know it can feel like an endless list of struggles and not always know where it is going. Your work is here is part of what will change the future of 3d printing. Way to go!

brandonjelinek
Автор

Nice work ! 5 years ago I did add 4-th rotational axis to a Delta printer and make it work with Machinekit - which is more suited for this kind of kinematics and have some build-in support of it. It was a big fun, but unfortunately hardware part - was an easy part, next big roadblock will be G-Code generation for additional axis, currently some slicers just scratching a surface of non-planar printing. If you need some help with Klipper or with hardware - feel free to ping me, will gladly help you to move forward.

GaOlSt
Автор

Wow this is so interesting! Regarding the layer shifting and microsteps - I might be misunderstanding something, but my imediate instinct is that it's like a cumulating "rounding error", for lack of a better term. Like, when the microsteps are set to a lower value, when the motor wants to move from say position "1.2" to position "1.5", but the low microsteps setting means it's only allow it to move in "0.2" increments, then it can only move to "1.4" or "1.6". Whereas larger microstep number means (if I understand correctly) a higher "resolution", so it can move in say "0.02" increments instead, so it can reach "1.48" or "1.52" which is much closer to where it wants to be. If the difference from where it wants to be to where it actually goes to is large enough, it will cause the shifting you see.

This makes me wonder if you could potentially solve the issue by adjusting gear ratios in certain places, because they might be amplifying those small discrepancies to a point where it becomes a problem. That's just my imediate instinct though, and I might be wildly misunderstanding what microsteps actually mean 😅

starblaiz
Автор

Man builds least rigid 5 axis system and makes surprisingly amazing prints out of it

AlexJoneses
Автор

Awesome. It really warms my cockles to see how far DIY CNC have come, and how far they can still go from where they are now.

abowden
Автор

El acento argentino es inconfundible jaja. Bien ahí hermano, muy buen proyecto

octimus
Автор

Outstanding Project Result. I need to print Model Train Parts and have wanted 5 axis for years. But now I see it working. For small parts it looks perfect. But I would have to build the whole machine, not just modify my CR10S Pro. I was thinking a table top 2 axis component to sit on top of the Y axis Table. Like on a Milling Machine. You approach is different but does achieve the objective. Great effort thank you for sharing. Dennis in Virginia USA

DennisMurphey
Автор

Z hop is one thing, but now you need “Swing hop” with the angles lol 😂

dhavok
visit shbcf.ru