filmov
tv
How to Upload an Arduino Sketch from Linux Terminal

Показать описание
In this tutorial I show you how to upload an Arduino sketch without the use of the Arduino IDE. If you're interested in using a different program to write your Arduino code, you need a way to upload it. The command line / terminal of a Linux or Mac computer allows you to do this easily. Or if your computer connected to the Arduino is remote (say a Raspberry Pi) you may not want to run a full fledged VNC server and instead want the ease of terminal access. Either way, this tutorial shows you how to upload a program to your Arduino from the terminal.
You can find this tutorial on my website at:
You can find this tutorial on my website at:
 0:01:33
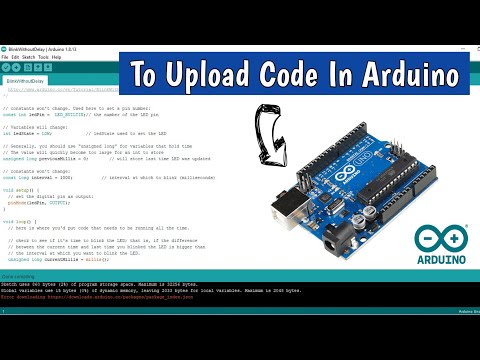
How to Upload Code(Sketch) in Arduino | Arduino IDE ⏩
 0:08:18
How to Upload and Run Code on an Arduino Board - Getting Started with Arduino
 0:05:18
Arduino Web Editor and how to Upload Your First Program
 0:05:21
Upload your first code to arduino uno
 0:04:41
Setup and Program Arduino Uno: Complete Guide
 0:02:43
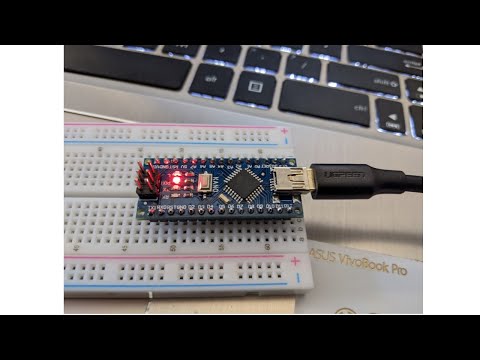
Upload Your First Code To Arduino Nano || Uploading The First Sketch
 0:02:22
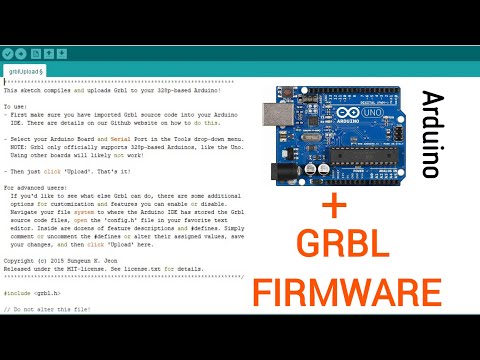
Install GRBL firmware in Arduino | CNC tutorial ⏩
 0:08:42
Arduino Nano how to load a Sketch
 0:05:16
ARDUIN0 IDE & ARDUINO UNO DEV-BOARD - LINKS & INFO
 0:03:49
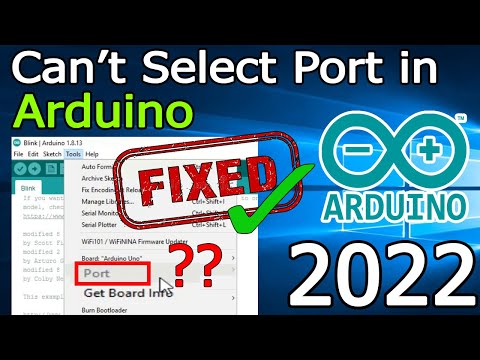
Arduino port problem | COM port not found [ 2022 Update ] Complete Step by Step Guide
 0:01:00
How to Upload Code in Arduino Uno & Diy Projects
 0:05:29
Arduino OTA Code Upload Complete Tutorial - How to upload code Wirelessly to Arduino Board?
 0:02:06
Arduino Uno R3 Clone IDE Install and driver fix
 0:04:21
How to Install Arduino Software IDE on Computer / Laptop
 0:03:41
How to upload Arduino IDE code to proteus simulation | How to Upload code in proteus
 0:06:12
HOW TO UPLOAD PROGRAM ON ARDUINO | ERROR SOLUTION:PROGRAM UPLOADING TO BOARD| SKETCH UPLOAD ISSUE
 0:08:10
How to Setup and Program NodeMCU ESP8266–Complete Guide
 0:00:19
Easy fix arduino nano stuck on uploading and programmer is not responding
 0:01:22
arduino nano code not uploading problem || arduino avrdude stk500_recv()
 0:00:56
Arduino Basics | How to Delete Code on Arduino
 0:01:58
How to upload HEX files to Arduino
 0:06:39
How to upload .HEX file on to Arduino Board
 0:05:59
How to Upload the latest version of GRBL to your Arduino UNO controller
 0:01:24
Install the ESP8266 Board in Arduino IDE in less than 1 minute (Windows, Mac OS X, and Linux)
Комментарии