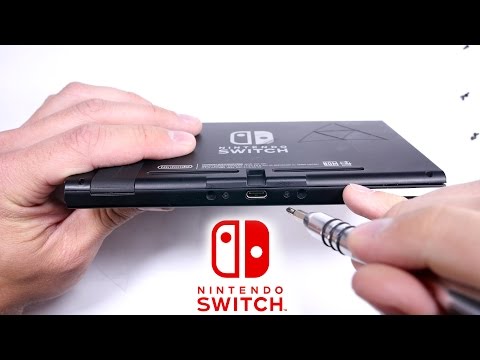
Nintendo Switch Battery Replacement-How To!

preview_player
Показать описание
Has the battery on your Nintendo Switch died due to too much Breath of the Wild? Ours did, so today we are going to show you how to replace the battery on your Nintendo switch!

You need some specific tools for this repair!

Use iFixit's opening picks for prying up batteries!

Subscribe to our channel for all our latest teardown and repair videos!
Рекомендации по теме
Комментарии
Автор

Now my Switch is much lighter, but it doesn't turn on.

lednerg
Автор

Just want to give a heads up this a great video step by step process. I just changed mine using this video. ONE THING I DO WANT TO POINT OUT IS. GETTING THE ACTUAL BATTERY OUT IS A LOT HARDER THAN YOU THINK. YOU CANT JUST “gently” take it out. it’s practically super glued on there. It took me about 30+ mins just trying to safely pry the battery off. Also LOTS OF SCREWS be very careful and don’t mix them! it’s a lot easier if you leave them separate in order you take them out so you can work backwards.

leomontanez
Автор

It's better to start gently prying up the old battery from wired side, as there's a sloped area underneath there to better fit an improvised non conducting pry tool to remove the battery. Don't bend or rupture the battery.

enakcma
Автор

One does not simply "gentle pry the battery up and out of it's well"

CallumSHume
Автор

Fixed Title: How to remove the battery from your switch.

olising
Автор

Thanks for the heads up about the cement under the battery.

TheDigitalMoose
Автор

Someone made a device without annoyingly gluing the battery in place? I can't believe it!

jayayebee
Автор

wow that was unexpectedly simple. nice one Nintendo

chestnutrice
Автор

WARNING: This is a good video, BUT there is adhesive under the existing battery and it makes it hard to take off, I looked around a few videos and found that most people are going in from the bottom with a spudger (Don't apply too much pressure) and also using a hair dryer to heat up the adhesive. Be careful I was using medium heat as to not overheat the battery because I think if you put it on high for too long it could rupture the battery. Also when they tell you take off the 5 screws for that silver plate there are 6 screws at least on mine there was so make sure they are all off before you lift the plate.

MrStrudleboy
Автор

Now can you please make a video on how to replace all the screws I lost when I tried this.

gregor
Автор

You forgot to tell how to PLUG the new battery in! I'm having problem getting the new battery plugged in.

mevb
Автор

It's refreshing to see a battery replacement video under 2 minutes.

B-rad
Автор

the batteries are glued in they dont come out with a plastic card. We used a flat head screw driver and pried it out. Thanks for the video. it was very helpful

videogametradingpost
Автор

Bought your kit and replaced ours. We had more screws in our metal shield, and you need to slide the card under where the wires go in to cut through the double back tape. We used a credit card. I also removed the OE heat paste and used some Arctic Silver. Hopefully that helps keep it cooler. The OE stuff was dried out. Good kit though!

TheRealSmithFamily
Автор

The tiny Phillips head screws are a pain to get out. I had to use a vice grip, strong screwdriver and large amount of pressure on the screw, and that slightly shredded the screwheads.
Also, my Switch had a 6th screw in the bottom right at 1:05, where the hole is on the Switch in the video.

Webberjo
Автор

I like how they neglected to mention that the battery is glued down. They also didnt show how to actually replace the battery. I also like how the girl is the one talking but some guy is the one doing the disassembly.

carlo
Автор

I understand that this was made to be short, but there are a lot of steps in the guide that aren't represented here. Specifically the thermal paste bit in particular and the adhesive guidance for the battery.

Claudethechiefsfan
Автор

Remember the days when you could just unscrew/remove a panel and just take the battery out. Nowadays, companies make things so complicated.

sebencopeak
Автор

Thank you ifixit for not telling me to remove a screw and bending my metal housing.

nameruse
Автор

I don't know if anyone else did this, but I accidentally stripped two of the SEVEN (not five) screws when attempting to remove the metal plate. It's ok, don't panic. As long as you get most of the screws out, you can bend the metal plate until it snaps and leave the stubborn screws inside. This isn't ideal, of course, so try to be careful, but you really don't need all of those screws. As long as you remove the plate, you can bend it back later. It is very malleable metal. Be careful to avoid damaging components underneath when prying it up though.

billieeyelash