filmov
tv
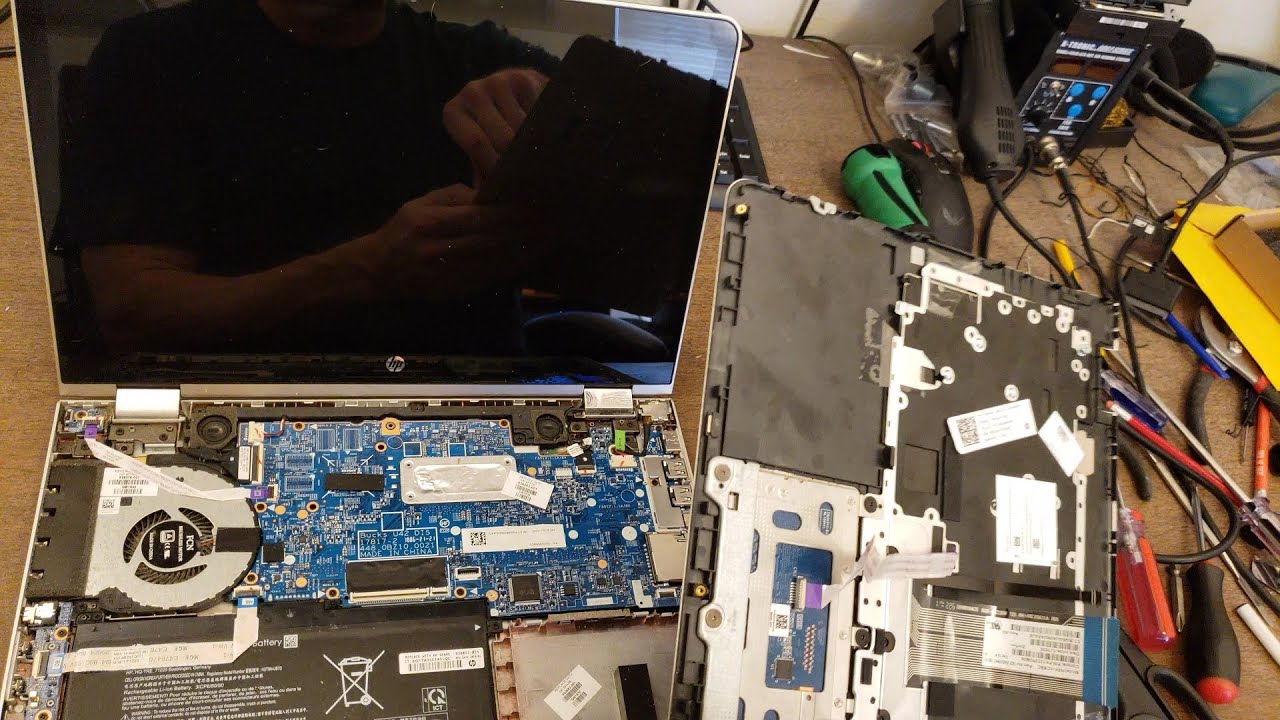
HP Pavilion X360 Laptop keyboard and back light replacement
Показать описание
In this video I replace the keyboard and back light on a HP Pavilion X360 laptop. If you're laptop is like this where the keyboard is held in place with plastic rivets I recommend replacing the palm rest as a complete piece. The trackpad can be easily moved over because it is held in by screws but putting the keyboard back in place in a laptop made like this is very difficult and you may not end up for a perfect fit.
Tools used in this video you can buy:
This is the powered screwdriver I use in the video. Hitachi DB3DL2
This is the one I have. It has the same 64bit set along with some other useful tools and a carrying case.
Tools used in this video you can buy:
This is the powered screwdriver I use in the video. Hitachi DB3DL2
This is the one I have. It has the same 64bit set along with some other useful tools and a carrying case.
 0:24:31
HP Pavilion X360 Laptop keyboard and back light replacement
 0:02:59
HP PAVILION x360 KEYBOARD CHANGING
 0:15:48
HP Pavilion x360 — 13-s150sa Keyboard Replacement | The Cheapest Way
 0:00:32
Hp pavilion x360 backlight keyboard
 1:01:13
HP Pavilion X360 m Convertible 14m-cd0003dx Complete Disassembly Keyboard Replacement Part 1 of 2
 0:03:18
HP Pavilion x360 Convertible replacement keyboard
 0:12:35
HP Pavilion X360 (2023) Review: It's An All-Rounder
 0:02:50
HP Pavilion x360 14 inch Saco Keyboard Protector Silicone Skin Cover for Laptop
 0:00:11
How to turn on Keyboard Backlight on HP Pavilion X360 - Change Brightness or Switch off
 0:03:12
HP Pavilion X360 2 in 1 Convertible Laptop - Overview and Key Features
 0:11:27
HP Pavilion X360 11-N030CA Keyboard Replacement Installation Guide 11-N 11-N000 11-N011LA 11-N020NA
 0:15:31
HP Pavilion x360 m Convertible 14m-ba114dx Disassembly Keyboard Trackpad Battery Fan Repair
 0:00:11
All new HP Pavilion X360 laptop! The price starts from Rs. 57,999. #shorts #hppavilion
 0:14:57
HP Pavilion x360 Keyboard Replacement 11m ap0013dx #HP #pavilion #x360 #keyboard #laptop
 0:00:12
The HP Pavilion X360 14 2-in-1 laptop
 0:00:18
Turn ON keyboard backlights, |HP PAVILION x360 convertible
 0:12:25
HP Pavilion x360 (2021) | Review and Unboxing
 0:00:31
Introducing the HP Pavilion x360
 0:10:38
HP Pavilion 15 x360 (2022) Review - Same But Different...
 0:00:19
How to turn on HP Spectre x360 laptop. Where is the power button? 😂
 0:00:57
HP Spectre x360 15 | HP
 0:16:16
HP Pavilion x360 14m Upgrade
 0:00:34
The all-new HP Pavilion x360 with Multi-touch #HPPavilion #PowerToDoItAll
 0:00:22
HP Pavilion x360, 13th Gen Intel Core i5-1335U, 16GB DDR4, 1TB SSD, FPR, 5 kg)ek1010TU #hppavillion
Комментарии