filmov
tv
How to Disable a Button in Angular Based on Conditional Logic

Показать описание
Learn how to effectively manage button states in Angular applications by using conditional logic for enabling or disabling buttons based on API responses.
---
Visit these links for original content and any more details, such as alternate solutions, latest updates/developments on topic, comments, revision history etc. For example, the original title of the Question was: Angular: Disable a Button dependent on a If condition
If anything seems off to you, please feel free to write me at vlogize [AT] gmail [DOT] com.
---
How to Disable a Button in Angular Based on Conditional Logic
In Angular applications, having a responsive user interface is key to ensuring a pleasant user experience. One common requirement is to disable buttons based on specific conditions, such as the results of an API call. If you have ever found yourself wondering how to disable a button based on an if condition, this guide will walk you through the steps necessary to implement this feature.
Understanding the Problem
Let's say you're developing a feature that requires a user to have access to certain services based on their subscription levels or categories defined by backend data. During an API call, if the returned data indicates that no services (or categories) are available, it is logical to disable the "Next" button.
Example Scenario
You might have the following structure in your Angular component:
A button that should lead the user to the next page when clicked.
An API call that fetches available categories.
Your goal here is to disable the button if the API response has zero categories available:
[[See Video to Reveal this Text or Code Snippet]]
However, the logic that controls this button is scattered and needs to be organized properly to work effectively. Let's dive into the solution.
Solution Overview
To achieve the desired behavior of conditionally disabling the button, follow these steps:
Step 1: Create a Control Variable
First, you need to establish a control variable in your TypeScript component to manage the disabled state of the button.
[[See Video to Reveal this Text or Code Snippet]]
Step 2: Modify the API Call Logic
In your ngOnInit method, modify the API call logic to set the disabled state based on the response from the API.
[[See Video to Reveal this Text or Code Snippet]]
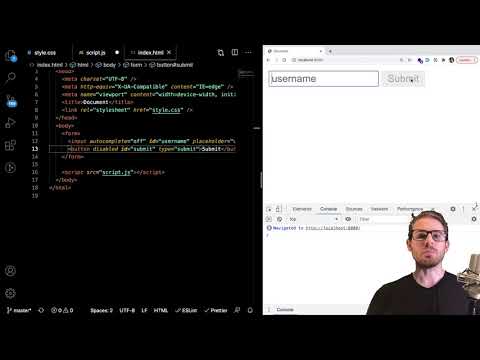
Step 3: Update the HTML Button Template
Next, you need to bind the button's disabled attribute to your control variable. This will automatically reflect the changes in your UI.
[[See Video to Reveal this Text or Code Snippet]]
Step 4: Implement the Button Click Logic
Finally, implement the button click logic in the next method to ensure that it can only proceed if the button is enabled.
[[See Video to Reveal this Text or Code Snippet]]
Conclusion
By following the above steps, you can effectively manage the enabled or disabled state of buttons in your Angular application. This helps ensure that users have a streamlined experience and only interact with elements when it's appropriate. The solution leverages Angular's reactive capabilities to monitor the state and update the UI in real-time based on the conditions you set.
If you have further questions or need clarification, feel free to reach out or leave a comment below! Happy coding!
---
Visit these links for original content and any more details, such as alternate solutions, latest updates/developments on topic, comments, revision history etc. For example, the original title of the Question was: Angular: Disable a Button dependent on a If condition
If anything seems off to you, please feel free to write me at vlogize [AT] gmail [DOT] com.
---
How to Disable a Button in Angular Based on Conditional Logic
In Angular applications, having a responsive user interface is key to ensuring a pleasant user experience. One common requirement is to disable buttons based on specific conditions, such as the results of an API call. If you have ever found yourself wondering how to disable a button based on an if condition, this guide will walk you through the steps necessary to implement this feature.
Understanding the Problem
Let's say you're developing a feature that requires a user to have access to certain services based on their subscription levels or categories defined by backend data. During an API call, if the returned data indicates that no services (or categories) are available, it is logical to disable the "Next" button.
Example Scenario
You might have the following structure in your Angular component:
A button that should lead the user to the next page when clicked.
An API call that fetches available categories.
Your goal here is to disable the button if the API response has zero categories available:
[[See Video to Reveal this Text or Code Snippet]]
However, the logic that controls this button is scattered and needs to be organized properly to work effectively. Let's dive into the solution.
Solution Overview
To achieve the desired behavior of conditionally disabling the button, follow these steps:
Step 1: Create a Control Variable
First, you need to establish a control variable in your TypeScript component to manage the disabled state of the button.
[[See Video to Reveal this Text or Code Snippet]]
Step 2: Modify the API Call Logic
In your ngOnInit method, modify the API call logic to set the disabled state based on the response from the API.
[[See Video to Reveal this Text or Code Snippet]]
Step 3: Update the HTML Button Template
Next, you need to bind the button's disabled attribute to your control variable. This will automatically reflect the changes in your UI.
[[See Video to Reveal this Text or Code Snippet]]
Step 4: Implement the Button Click Logic
Finally, implement the button click logic in the next method to ensure that it can only proceed if the button is enabled.
[[See Video to Reveal this Text or Code Snippet]]
Conclusion
By following the above steps, you can effectively manage the enabled or disabled state of buttons in your Angular application. This helps ensure that users have a streamlined experience and only interact with elements when it's appropriate. The solution leverages Angular's reactive capabilities to monitor the state and update the UI in real-time based on the conditions you set.
If you have further questions or need clarification, feel free to reach out or leave a comment below! Happy coding!
 0:00:16
 0:01:32
 0:01:27
 0:01:25
 0:00:42
 0:01:03
 0:05:17
 0:00:26
 0:01:01
 0:02:35
 0:00:25
 0:00:14
 0:03:11
 0:00:20
 0:03:00
 0:00:25
 0:00:13
 0:00:08
 0:00:41
 0:02:42
 0:00:12
 0:00:54
 0:00:17
 0:00:18