filmov
tv
How to tie a REALLY tight knot

Показать описание
After my welding failed I tied these weights together. It an overlapping locking hitch. Each hitch adds more tension to the system. It’s almost like putting rubber bands around a watermelon. It can be used to tied any two objects together, like a survival shelter while your camping.
 0:00:10
How to TIE A TIE under 10 seconds!
 0:02:08
How to Tie a Windsor Knot | Men's Fashion
 0:02:36
How to Tie a Tie - The Half Windsor Knot (Easy Method)
 0:00:53
This hack is the quickest and easiest way to tie a tie👔
 0:01:27
NOBODY knows this option to tie a TIE💥(The EASIEST WAY)🤯
 0:02:30
How to Tie a Windsor Knot (quickly!)
 0:02:46
How to tie a tie for School (Easy)
 0:04:48
How to Tie a Tie: Double Windsor Knot (MIRRORED & SLOW FOR BEGINNERS) The Only Knot You Need to ...
 0:03:22
Attractive Very easy hairstyle for long hair//Beautiful hairstyle for ladies/ Hair style girl simple
 0:02:47
How to tie a tie - Tulip necktie knot tutorial
 0:01:05
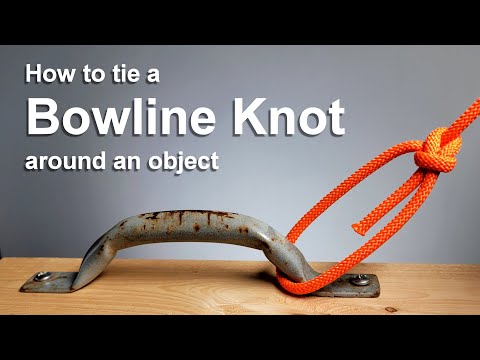
Knots - How to tie a Bowline Knot around an object.
 0:03:46
How to Tie a Trinity Knot for Beginners (How to Tie a Necktie to Impress)
 0:03:18
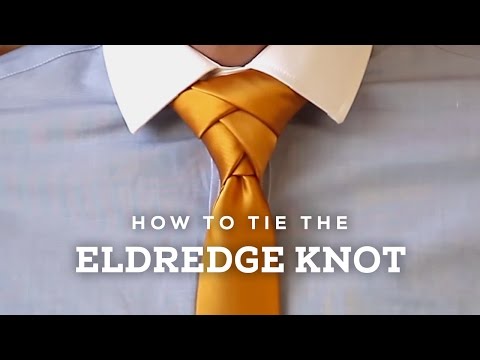
How to Tie A Perfect Eldredge Necktie Knot
 0:03:33
How to tie a tie EASY WAY (Slowly & Mirrored) Windsor knot
 0:02:51
How to tie a tie Quick and Easy
 0:01:42
How to Tie a Perfect Simple Knot
 0:03:38
How to tie a tie - VERY simple and easy tie knot for beginners
 0:01:18
How to Tie the Most Useful Knot in the World (Bowline)
 0:00:31
How to tie a tie/ Easy and Fast!
 0:00:09
The bowline knot is both easy to tie and untie
 0:02:22
How to Tie a Tie | Easy Windsor Knot Step-by-Step Guide
 0:02:14
Tie a Necktie (How to Tie a Tie for Beginners) - Pratt Knot / Shelby Knot
 0:00:16
How To Tie A Tie | Easy & Fast
 0:04:07
How to Tie an Eldredge Knot Step by Step
Комментарии