filmov
tv
How to Configure Cisco Router using Console Cable in Cisco Packet Tracer | SYSNETTECH Solutions

Показать описание
This video shows you the steps to configure a Cisco Router with consol cable using Cisco Packet Tracer.
To make a #console connection to the #router:
Step 1: First, add a Cisco Router, Switch, and three computers to the Packet Tracer working environment.
Step 2: Connect all computers to the Switch and connect the Switch to the Router.
Step 3: Now add a Laptop near the Router.
Step 4: Click on Console in Packet Tracer's cable types window and then connect one end of the #cable to the RS 232 port after clicking the
Laptop. Connect the other end to the Console port of the Router.
Step 5: Click on Laptop and click Terminal in the window that appears.
Step 6: Leave the Bits Per Second, Data Bits, Parity, Stop Bits, and Flow Control options at the default value in the Terminal Configuration window and click the OK button.
Step 7: Answer No to the first question asked to you when you connect to the Router on the laptop.
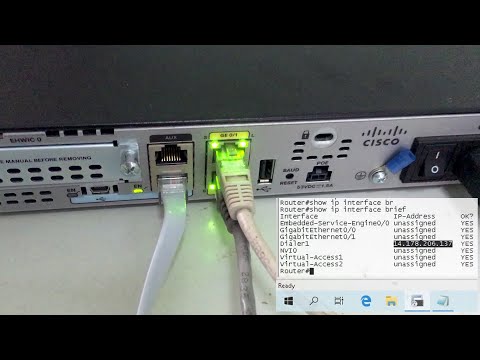
Step 8: After connecting, assign an IP address to the GigabitEthernet0 / 0 interface of the Router, which is connected to the Switch, and open the port.
Step 9: Now execute the password cisco123 and login command after the line console 0 command in config mode to set a password for the Console connection to prevent unauthorized access to the Router.
Step 10: Exit from the CLI with the exit command, and when you connect to the Router again, you can see a password prompt.
Step 11: You can use the show line command in privileged mode to control the sessions connected to the router.
Step 12: For example, you can create a DHCP pool on a router that you connect with a console cable. To do this, you can use the commands in the 4:05 timeframe.
Step 13: Do not forget to subscribe to our YouTube channel for more videos on Cisco Networking training with Packet Tracer!
───────────────BEST PRODUCT────────────────
───────────────RELATED VIDEOS───────────────
➊ How to Configure Static Routing
➋ How to Configure RIPv1
➌ How to Configure RIPv2
➍ How to Configure EIGRP
➎ How to Configure OSPF
───────────────FOLLOW US───────────────────
✔ Facebook
✔ Twitter
✔ Pinterest
✔ Instagram
✔ LinkedIn
███████████████████████████████████████████
To make a #console connection to the #router:
Step 1: First, add a Cisco Router, Switch, and three computers to the Packet Tracer working environment.
Step 2: Connect all computers to the Switch and connect the Switch to the Router.
Step 3: Now add a Laptop near the Router.
Step 4: Click on Console in Packet Tracer's cable types window and then connect one end of the #cable to the RS 232 port after clicking the
Laptop. Connect the other end to the Console port of the Router.
Step 5: Click on Laptop and click Terminal in the window that appears.
Step 6: Leave the Bits Per Second, Data Bits, Parity, Stop Bits, and Flow Control options at the default value in the Terminal Configuration window and click the OK button.
Step 7: Answer No to the first question asked to you when you connect to the Router on the laptop.
Step 8: After connecting, assign an IP address to the GigabitEthernet0 / 0 interface of the Router, which is connected to the Switch, and open the port.
Step 9: Now execute the password cisco123 and login command after the line console 0 command in config mode to set a password for the Console connection to prevent unauthorized access to the Router.
Step 10: Exit from the CLI with the exit command, and when you connect to the Router again, you can see a password prompt.
Step 11: You can use the show line command in privileged mode to control the sessions connected to the router.
Step 12: For example, you can create a DHCP pool on a router that you connect with a console cable. To do this, you can use the commands in the 4:05 timeframe.
Step 13: Do not forget to subscribe to our YouTube channel for more videos on Cisco Networking training with Packet Tracer!
───────────────BEST PRODUCT────────────────
───────────────RELATED VIDEOS───────────────
➊ How to Configure Static Routing
➋ How to Configure RIPv1
➌ How to Configure RIPv2
➍ How to Configure EIGRP
➎ How to Configure OSPF
───────────────FOLLOW US───────────────────
███████████████████████████████████████████
 0:05:37
How to internet configuration on CISCO router ( PPPoE , DHCP , NAT ) | NETVN
 0:18:15
How to configure cisco router for the first time (CCNA Level) | 2021
 0:19:30
Cisco Packet tracer Router configuration step by step
 0:10:51
Day-1 | Cisco Routers and Switches Complete Configuration on Real Devices |#ciscoccna #ccnp #cisco
 0:07:02
Basic network Configuration tutorial | Cisco packet tracer | Step by Step | Simple PDU
 0:04:40
Router configuration step by step - Cisco Packet Tracer basic
 0:15:44
Cisco Router Basic Configuration - Connecting Internet & LAN Network
 0:06:23
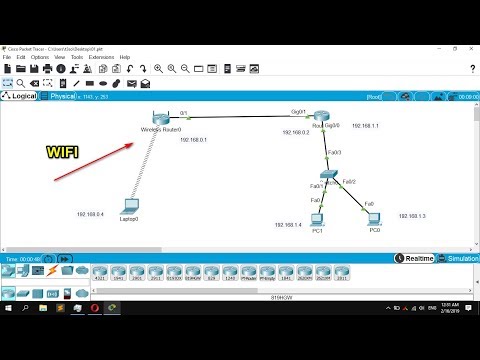
How to Configure Cisco WiFi Router in Cisco Packet Tracer
 0:18:01
How to configure VLAN in Mikrotik and Cisco | Msolved Tech
 0:20:54
Basic Router & Switch IOS configuration commands - CCNA beginner
 0:09:00
Cisco Packet Tracer Basic Networking - Static Routing using 2 routers
 0:32:33
Cisco CLI for Beginners | Network Fundamentals Part 10
 0:06:53
Cisco IOS Router Basic Configuration
 0:27:23
How to Connect to a Cisco Switch Using Putty (CCNA)
 0:10:26
Configuring CISCO Switch at work | CISCO commands, real world best practice
 0:14:19
Basics of Cisco Packet Tracer Tutorial | Router | How Router work | Connect 2 LAN network via Router
 0:01:03
How to configure username and password on CISCO switch/Router
 0:04:39
How to setting up LINKSYS E1200 | NETVN
 0:09:52
How to Configure IP Addresses on a Cisco Device
 0:18:12
Cisco Router | Configure to access the internet
 0:27:55
static routing with Connecting 4 routers with explanation | Cisco Packet Tracer Tutorial 3
 0:11:59
How to Connect to a Cisco Router Using Putty (CCNA)
 0:09:41
Configuring static routing with 3 routers using CLI command | Cisco Packet Tracer Tutorial 6
 0:14:46
Two Router Configuration- Cisco Packet Tracer
Комментарии