filmov
tv
2019 Best Photo Editor for Windows PC: Fotophire Photo Editing Toolkit
Показать описание
Introducing a powerful and easy photo editor, perfect for both business and personal use. It offers 200 photo effects; but also intelligently removes the background of your photo, or erases the watermark, unwanted objects or scratches from your photo without affecting the background.
Editing photo isn’t always sophisticated and time consuming, with Wondershare Fotophire, you can easily make professional looking images.
When you open it, you’ll see an interface like this, displaying you several editing tools to get started.
NO.1、Remove or change background
In start interface, select Photo Cutter and you’ll land on this media library. For first time user, we recommend you to start with a sample photo under Tutorial, so you’ll learn how to use this simple program with this interactive step-by-step guide.
Alright, let’s click Open and import a photo to be edited. Now you’ll see this self-explanatory editing interface. On the top, there’re options to undo, redo, export, print or directly share the outcome to Facebook. On the bottom, there’re options like preview aspect ratio, zoom in or out, etc. On the right panel are the key editing features.
To get a transparent background, click Paint Areas to Remove under Cut-out module, adjust the brush size, and simply mark on the background. You don’t even have to be precise, simply draw few lines and the background will be automatically removed. To refine a little bit, you can use Paint Areas to Keep tool or Erase Painting Tool until you’re satisfied with the result.
Other than saving a transparent background, you can also place the cutout object on a different background, using our preset templates in Photomontage module, or your own image.
In addition, there’s a crop tool which allows you to easily crop the photo in your way, using one of the popular dimention presets or type in your desire aspect ratio.
NO.2、Remove unwanted objects
To do that, select Photo Eraser first. Again you can learn how to use this tool in minutes with the built in tutorial. Let’s click Open and import an image.
In this similar interface, you’ll see that there’re several selection tools to erase objects. With brush in right size, you can simply mark an unwanted object on your photo. In 1 click, the sheep is removed while the background is reconstructed instantly. You can also select the object with a lasso tool. Even semi tranparent fonts like watermark or date stamps, can be easily removed, without affecting the background.
Under the Erase module, there’s a clone tool for you to clone and stamp any part of the photo in one click. You can do precision clone with same distance using Align mode, or turn it off to customize where you want to stamp. Another practical use of clone stamp is to erase objects, blemishes or damages by cloning a surrounding area and stamp on them.
NO.3、Retouch your photo
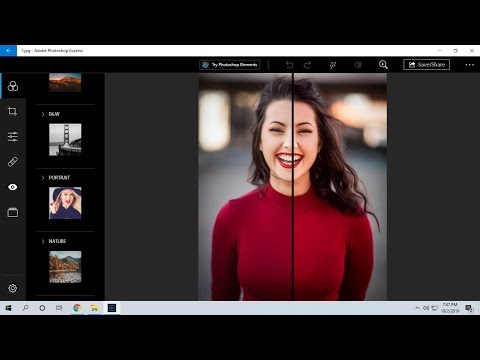
To fix poor lighting or add something extra, select Photo Editor, and import your photo. You’ll see the same style interface with more retouching features on the right panel.
In Effects library, there’re over 100 nice filters in various styles. You can easily turn your photo into a piece of art. Crop provides you numerous options as mentioned before. Adjustment is where you can correct color, adjust white balance, saturation and temperature, etc, or brighten or darken the tones along a curve line. Need a better depth of field? You can use creative blur to choose where you want to focus or blur. And how does a vignette effect sounds like?
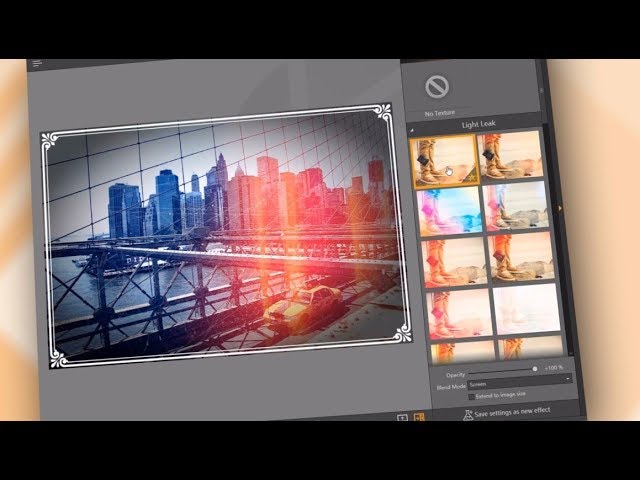
Under frames, there’re over 80 templates to frame your artwork. You can choose a nice one and customize the size.
Texture Module provides you 40 overlay effects to unleash your creativity on your masterpiece.
Last but not least, you can add text on your photo with a choice of many fonts too.
Editing photo isn’t always sophisticated and time consuming, with Wondershare Fotophire, you can easily make professional looking images.
When you open it, you’ll see an interface like this, displaying you several editing tools to get started.
NO.1、Remove or change background
In start interface, select Photo Cutter and you’ll land on this media library. For first time user, we recommend you to start with a sample photo under Tutorial, so you’ll learn how to use this simple program with this interactive step-by-step guide.
Alright, let’s click Open and import a photo to be edited. Now you’ll see this self-explanatory editing interface. On the top, there’re options to undo, redo, export, print or directly share the outcome to Facebook. On the bottom, there’re options like preview aspect ratio, zoom in or out, etc. On the right panel are the key editing features.
To get a transparent background, click Paint Areas to Remove under Cut-out module, adjust the brush size, and simply mark on the background. You don’t even have to be precise, simply draw few lines and the background will be automatically removed. To refine a little bit, you can use Paint Areas to Keep tool or Erase Painting Tool until you’re satisfied with the result.
Other than saving a transparent background, you can also place the cutout object on a different background, using our preset templates in Photomontage module, or your own image.
In addition, there’s a crop tool which allows you to easily crop the photo in your way, using one of the popular dimention presets or type in your desire aspect ratio.
NO.2、Remove unwanted objects
To do that, select Photo Eraser first. Again you can learn how to use this tool in minutes with the built in tutorial. Let’s click Open and import an image.
In this similar interface, you’ll see that there’re several selection tools to erase objects. With brush in right size, you can simply mark an unwanted object on your photo. In 1 click, the sheep is removed while the background is reconstructed instantly. You can also select the object with a lasso tool. Even semi tranparent fonts like watermark or date stamps, can be easily removed, without affecting the background.
Under the Erase module, there’s a clone tool for you to clone and stamp any part of the photo in one click. You can do precision clone with same distance using Align mode, or turn it off to customize where you want to stamp. Another practical use of clone stamp is to erase objects, blemishes or damages by cloning a surrounding area and stamp on them.
NO.3、Retouch your photo
To fix poor lighting or add something extra, select Photo Editor, and import your photo. You’ll see the same style interface with more retouching features on the right panel.
In Effects library, there’re over 100 nice filters in various styles. You can easily turn your photo into a piece of art. Crop provides you numerous options as mentioned before. Adjustment is where you can correct color, adjust white balance, saturation and temperature, etc, or brighten or darken the tones along a curve line. Need a better depth of field? You can use creative blur to choose where you want to focus or blur. And how does a vignette effect sounds like?
Under frames, there’re over 80 templates to frame your artwork. You can choose a nice one and customize the size.
Texture Module provides you 40 overlay effects to unleash your creativity on your masterpiece.
Last but not least, you can add text on your photo with a choice of many fonts too.
 0:04:38
 0:06:43
 0:08:23
 0:05:36
 0:16:59
 0:02:41
 0:06:55
 0:10:46
 0:04:45
 0:04:51
 0:30:37
 0:01:42
 0:09:25
 0:04:40
 0:06:28
 0:05:09
 0:06:15
 0:00:40
 0:06:02
 0:03:57
 0:00:27
 0:07:41
 0:00:15
 0:00:29