filmov
tv
HOW TO ADD A BITBUCKET GIT REPO IN CPANEL HOSTING ACCOUNT USING SSH TERMINAL | STEP BY STEP TUTORIAL

Показать описание
If you are looking to add a Bitbucket Git repo in cPanel hosting account using SSH terminal, then you've come to the right place. In this step-by-step tutorial, we will guide you on how to add a Bitbucket Git repo in cPanel hosting account using SSH terminal without default Git tool of cPanel and SSH key using app password of Bitbucket.
Here are the steps to follow:
Step 1: Create a new project and repo in Bitbucket
The first step is to create a new project and repo in Bitbucket. This is where you will be storing your code.
Step 2: Generate app-specific password in Bitbucket and allow access and roles
Next, you need to generate an app-specific password in Bitbucket and allow access and roles. This will allow you to authenticate and authorize access to your Bitbucket repo.
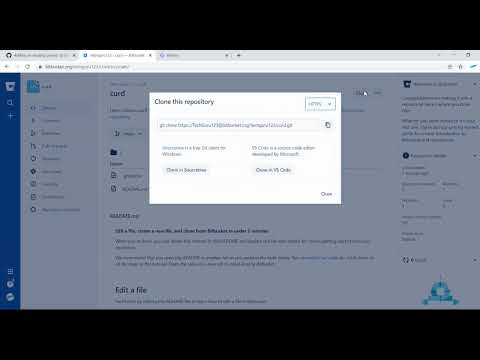
Step 3: Copy HTTPS clone URL from Bitbucket repo
After generating the app-specific password, you need to copy the HTTPS clone URL from your Bitbucket repo. This will allow you to clone the repo using SSH terminal.
Step 4: Open integrated cPanel terminal in cPanel hosting account
Once you have the HTTPS clone URL, you need to open the integrated cPanel terminal in cPanel hosting account. This is where you will be pasting the clone URL and cloning the repo.
Step 5: Go to your public HTML directory
In the terminal, you need to navigate to your public HTML directory. This is where you will be cloning your Bitbucket repo.
Step 6: Paste copied URL, and it will ask for a password
Next, you need to paste the copied URL in the terminal, and it will ask for a password. Enter the app-specific password you generated in Step 2.
Step 7: Enter password and start clone
Once you enter the password, you can start the clone process. This will clone the Bitbucket repo in your cPanel hosting account.
Step 8: Check Git status
Finally, you can check the Git status to ensure that the clone was successful.
That's it! You have successfully added a Bitbucket Git repo in cPanel hosting account using SSH terminal without default Git tool of cPanel and SSH key using app password of Bitbucket.
In this tutorial, we have covered the following topics:
Creating a new project and repo in Bitbucket
Generating app-specific password in Bitbucket and allowing access and roles
Copying HTTPS clone URL from Bitbucket repo
Opening integrated cPanel terminal in cPanel hosting account
Going to public HTML directory
Pasting copied URL and entering password to start clone
Checking Git status
If you found this tutorial helpful, please like, comment, and subscribe to our channel. Don't forget to hit the bell icon for notifications on future videos.
Thank you for watching!
Here are the steps to follow:
Step 1: Create a new project and repo in Bitbucket
The first step is to create a new project and repo in Bitbucket. This is where you will be storing your code.
Step 2: Generate app-specific password in Bitbucket and allow access and roles
Next, you need to generate an app-specific password in Bitbucket and allow access and roles. This will allow you to authenticate and authorize access to your Bitbucket repo.
Step 3: Copy HTTPS clone URL from Bitbucket repo
After generating the app-specific password, you need to copy the HTTPS clone URL from your Bitbucket repo. This will allow you to clone the repo using SSH terminal.
Step 4: Open integrated cPanel terminal in cPanel hosting account
Once you have the HTTPS clone URL, you need to open the integrated cPanel terminal in cPanel hosting account. This is where you will be pasting the clone URL and cloning the repo.
Step 5: Go to your public HTML directory
In the terminal, you need to navigate to your public HTML directory. This is where you will be cloning your Bitbucket repo.
Step 6: Paste copied URL, and it will ask for a password
Next, you need to paste the copied URL in the terminal, and it will ask for a password. Enter the app-specific password you generated in Step 2.
Step 7: Enter password and start clone
Once you enter the password, you can start the clone process. This will clone the Bitbucket repo in your cPanel hosting account.
Step 8: Check Git status
Finally, you can check the Git status to ensure that the clone was successful.
That's it! You have successfully added a Bitbucket Git repo in cPanel hosting account using SSH terminal without default Git tool of cPanel and SSH key using app password of Bitbucket.
In this tutorial, we have covered the following topics:
Creating a new project and repo in Bitbucket
Generating app-specific password in Bitbucket and allowing access and roles
Copying HTTPS clone URL from Bitbucket repo
Opening integrated cPanel terminal in cPanel hosting account
Going to public HTML directory
Pasting copied URL and entering password to start clone
Checking Git status
If you found this tutorial helpful, please like, comment, and subscribe to our channel. Don't forget to hit the bell icon for notifications on future videos.
Thank you for watching!
 0:08:58
Bitbucket repositories | Create repositories & add files
 0:09:41
Git with Bitbucket create repository on Bitbucket and push files to remote repository
 0:02:10
How to create and clone a Bitbucket repository to VSCode
 0:05:46
How to add a new project to an existing Bitbucket repository
 0:05:06
how to upload project to Bit bucket | clone repository |add repository to Bitbucket | upload private
 0:03:32
Atlassian BitBucket pull request demo
 0:02:41
How to upload the project to Bitbucket? | Add repository to Bitbucket
 0:00:28
bitbucket user access
 0:01:12
How To Add Bitbucket Credentials In Jenkins? (2024)
 0:05:05
#github How to add Existing project to a BitBucket Repository..
 0:05:10
How To Add, Commit and Push a Folder using GitBash and BitBucket
 0:09:12
Bitbucket tutorial | How to use Bitbucket Cloud
 0:05:19
How to Upload files and folders into BitBucket Repository
 0:21:10
Intro to CI/CD with Bitbucket Pipelines
 0:25:40
Setup bitbucket and integrate with VS Code
 0:00:51
How to integrate github or bitbucket repository with jira project
 0:36:03
Git Tutorial - Git Crash Course using BitBucket
 0:02:26
BitBucket Tutotials | Add new file and modify the file in Bitbucket Repository | Udemy Course
 0:00:56
How to upload files to the remote repository on Bitbucket for the first time by using SourceTree
 0:04:58
How to Generate and Add SSH Keys to Github / Bitbucket (MacOS)
 0:06:08
Create and Configure BitBucket SSH keys for Git
 0:02:14
How to Create & Assign Bitbucket Repo with User name
 0:34:07
#Bitbucket What is BitBucket? | How to use Bitbucket cloud?
 0:01:21
How to Quickly add, edit, and clone a file in Bitbucket Cloud
Комментарии