filmov
tv
Hand Carved Utensils | Build It | Ask This Old House

Показать описание
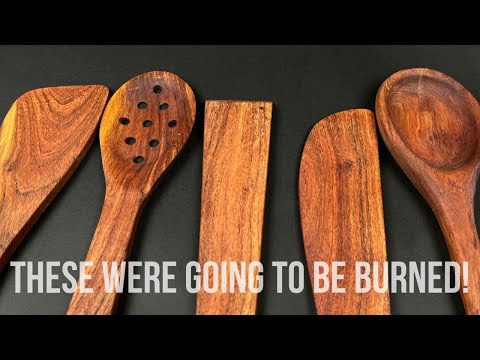
Ask This Old House general contractor Tom Silva and host Kevin O’Connor hand carve wooden serving utensils using leftover pine from a previous Build It project.
Time: 2-3 hours
Cost: $50
Skill Level: Beginner
Tools List for Building Wooden Utensils:
Shopping List:
Steps:
1. Trace out an outline of the utensils on a piece of paper and cut it out to use as a template on the wood.
2. Place the paper template on the scrap wood being used for the utensils. Trace the outline over a decent section of the wood with straight grain and no knots.
3. Cut the scrap wood into a workable piece using the cross-cutting side of a Japanese pull saw.
4. While still using the Japanese pull saw, make relief cuts along the outline of the utensils. This will make the wood easier to cut later on.
5. Make a rough thickness cut using the Japanese pull saw so that the utensils are roughly the desired depth. This can be fine-tuned later.
6. Use the coping saw to cut out the outline of the utensil. The relief cuts should make this step easier.
7. Start fine-tuning the shape of each utensil using a variety of hand tools. The spoke shave is good for the handle, and the rasp is a little better for the head of the utensil.
8. Scoop out the heads of each utensil using a curved gouge. Using the gouge, work your way to the lowest point of the utensil in the center and then come back up. Work all the way around the head of each utensil to give the curve a unified look.
9. Sand the utensils smooth using 80, 120, and 240 grit sandpaper.
10. Wipe down the utensils with a tack cloth.
11. Apply a food grade wood finish using a rag.
Resources:
To cut and carve the spoon and fork, Tom picked out a variety of hand carving tools, including a carving gouge, spoke shave, a couple different rasps, a coping saw, a Japanese pull saw, and a hand plane. Some of these tools can be found at home centers, but it will be easier to locate them all at specialty woodworking shops.
The sandpaper Tom and Kevin used to smooth down the utensils can be found at home centers.
Build It:
This Old House general contractor Tom Silva, This Old House host Kevin O’Connor, and special guests including Jimmy DiResta, take you through step-by-step DIY projects in this popular video series. From end-tables to cutting boards to wine racks to chicken coops and more, learn how to build from the best pros in the game. Segments include mention of all tools and materials needed to get the job done.
Looking for more step by step guidance on how to complete projects around the house? Join This Old House Insider to stream over 1,000 episodes commercial-free.
Plus, download our app for streaming full episodes to your connected TV, phone or tablet:
Follow This Old House and Ask This Old House:
Full episode:
Historic Plantings, Wood Utensils | Ask TOH
Build It | Hand Carved Utensils
 0:08:24
Hand Carved Utensils | Build It | Ask This Old House
 0:08:05
Hand Carving Spoon and Bowl - Our Cabin Needs Utensils
 0:10:25
Making Cooking Utensils from Firewood
 0:05:14
Making wooden cooking utensils from hard maple
 0:05:05
Hand Carved Egg Holder - 2015 Kitchen utensil build challenge - Ep 025
 0:00:08
Learn to carve wooden utensils with me! #greenwoodworking
 0:09:08
Make a Wood Spoon
 0:00:26
AmazingChina: Freehand Wood Carving (Chip Carving)
 0:12:11
How Japanese Wooden Ladles Are Made. This 87-Year-Old Craftsman Has Hand Carved Ladles For 70 Years.
 0:14:48
Why You Should NEVER Sand Your Spoons + 14 Other Pro Tips
 0:01:00
carving a spoon out of almond wood!
 0:17:02
MAKING TEAK WOOD KITCHEN UTENSILS
 0:05:50
Bamboo Box Joint Spaghetti Box - 2015 Kitchen utensil build challenge - 192
 0:19:32
How I Carve a Spoon from Start to Finish – Narrated Version
 0:07:26
DIY Wooden Kitchen Utensils
 0:06:43
How To Make Wooden Kitchen Utensils || Wooden Kitchen Gadgets
 0:06:22
How to Make Kitchen Utensils (free templates)
 0:01:00
How to carve a spoon using FIRE #bushcraft #survival #howto #primitive #outdoors #camping
 0:00:52
A Wooden Utensils for Grandma 🤩🎁~ mini wood toy- woodworking art skill/wood hand #shorts
 0:00:14
Is wooden utensils worth? 🤔
 0:05:49
How to Carve Wooden Plate for Eating
 0:00:10
Carve More Spoons! #spooncarving #greenwoodcarving #kitchentools #wooden #maker #learncraft
 0:08:09
How To Sell Hand Carved Wooden Utensils on Etsy: A Step-by-Step Guide
 0:00:05
Creating Wooden Utensils Through Hand Carving
Комментарии