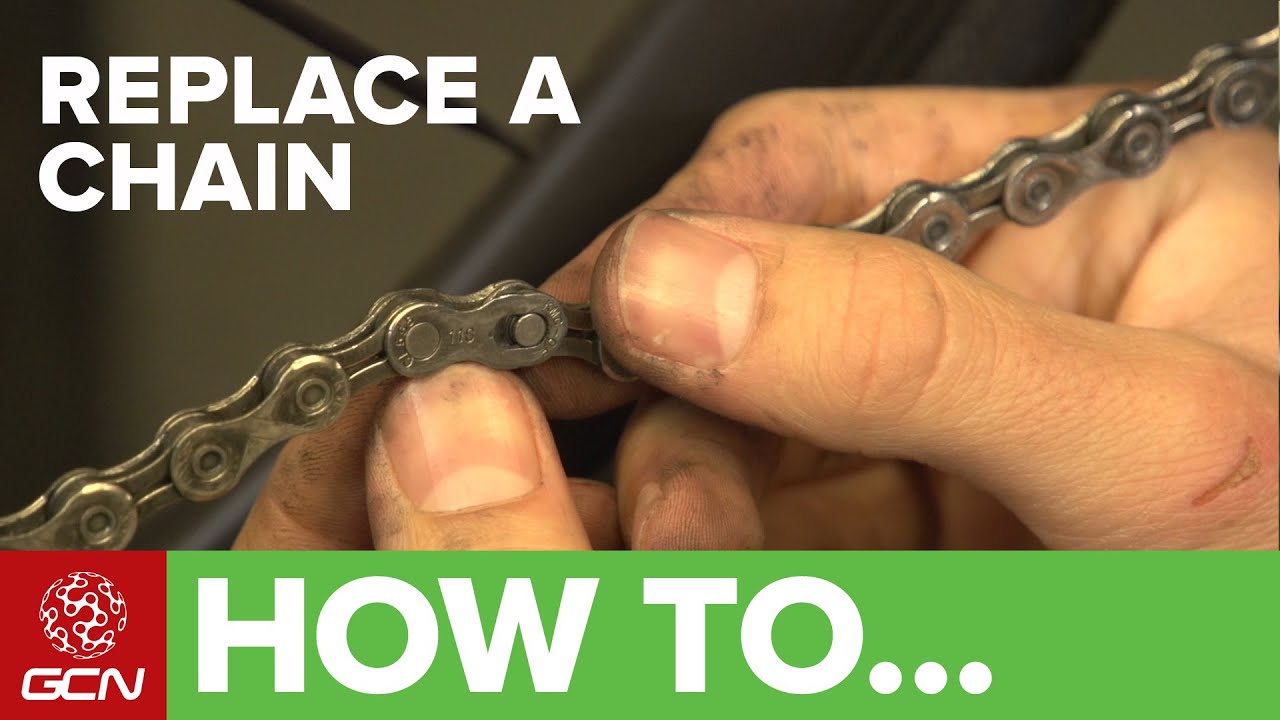
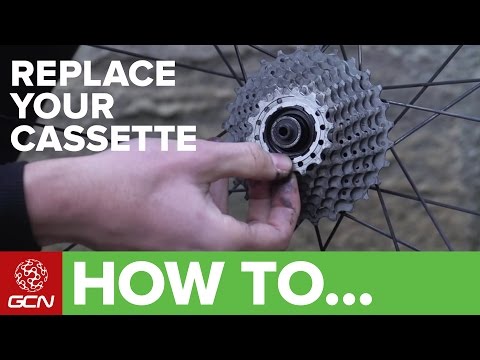
How To Replace A Bicycle Chain

preview_player
Показать описание
The chain on your bike wears out over time and eventually you'll have to replace it. Fortunately, the process is pretty simple - Simon shows you how.

First thing to do is find out whether your chain is joined together with a pin or with a quick link. If you have a quick link then technically you can remove the chain with your bare hands. Bear in mind though that when it comes to re-sizing your chain, you can only cut it down to the right size with the use of a chain tool.

If you don't have your old chain to hand, or if you've changed your gear ratios and need a new size of chain, we've also got a failsafe way of finding the correct chain length for your bike!

It's best to check for chain wear on a regular basis - leave it to long and it will damage your whole drivetrain.

Music - licensed by Cue Songs
IO - Chocolate

About GCN:

The Global Cycling Network puts you in the centre of the action: from the iconic climbs of Alpe D’Huez and Mont Ventoux to the cobbles of Flanders, everywhere there is road or pavé, world-class racing and pro riders, we will be there bringing you action, analysis and unparalleled access every week, every month, and every year. We show you how to be a better cyclist with our bike maintenance videos, tips for improving your cycling, cycling top tens, and not forgetting the weekly GCN Show. Join us on YouTube’s biggest and best cycling channel to get closer to the action and improve your riding!

Welcome to the Global Cycling Network | Inside cycling

Thanks to our sponsors:

Leave us a comment below!

Music - licensed by Cue Songs
Рекомендации по теме
Комментарии
Автор

I did it! I replaced my own chain! You just saved me $130 now I’m not dependent on my local overpriced bike shop

rosiebailey
Автор

I'm a native French speaker. I went through 3 youtube tutorials in French without being able to understand how I should put the chain on the derailler. Before trying to look a tutorial in English, stumbled upon yours and finally got it!

Thanks! You're a real life-saver!

Iennaish
Автор

One useful tip if you’re using a joining pin is to drive it into the chain from the inside. Although it’s not as easy to do, it shouldn’t be too difficult to position the chain and bike in a way that you can access it from the other side. The reason for this is, once you snap off the guide, it will leave a burr in the remaining rivet. If the burr is on the inside of the chain, it can scratch against a cassette gear when the chain is turning through the next lower gear. Driving the rivet from the inside will put the burr on the outside, and will prevent this from happening.

JoeyIndolos
Автор

it would be really nice if GCN would do a video about building up a complete bike step by step... I mean they have videos for each part but it would be really cool to see it in one video. could be 2 hours long - i'd never mind, i'd love to watch this! thinking about building up my next bike myself

koDiacc
Автор

Another top video guys. I built a bike with zero experience using only your how to videos.. It's still going strong.

nmcrobie
Автор

Couple of tips;

Some chains have a specific outside and inside, so keep an eye out for that, and make sure you have them the right way around.

If you don't have a quicklink or starter/guide pin,
-when you shorten the chain, don't pop the pin all the way out; just push it far enough to let the inner link come away, but so that it stays in the outer link. This will make it about a million percent easier to re-link the chain.
-and then when reinstalling the chain, set it up so that you can work the pin in from the outside of your bike, rather than the inside. For this last reason, combined with the one about side-specific chains, it might be worth your while when breaking the chain in the first place, to work the pin from the inside, out.

This is very, very important especially if you're fixing your chain on the side of the road 20 miles from home.

obriaind
Автор

This was the first time changing my bike chain so this tutorial was incredibly useful!

angusdavidson
Автор

Sometimes a naturally gifted educator comes along and this guy is it. One of the best.

Hogladdy
Автор

I’m so grateful for these videos, I was about to use a chain tool on a chain that had a quick link in it before I saw this.
I was able to replace my rear mech and adjust and index it using other other vids from this channel to guide me without any problems at all.
Top work guys thanks.

DrStoat
Автор

Thanks Si. Here are some more tips that might be helpful to your viewers:

1 - Always wear gloves when working with the chain. Most of the bicycle chain lubricants are designed for weather-resistance. This means they stick really well and are difficult to clean off your hands. Using gloves keeps your hands clean but you have to keep the gloves pulled snug on your fingers so they aren't pinched and ripped by the chain.

2 - In my experience, you do not need to shift to the small chainring---you can shift the chain to the large chainring before removing it. This positions the chain where it is much easier to reach and the small amount of additional spring tension from the rear derailleur is minor compared to the easier access. Also, if you're like me and seldom use your small chainring and hate cleaning it (because it's difficult to reach), keeping the chain on the big chainring keeps oil away from the small one.

3 - Be very careful to avoid dropping or sliding the chain on the chain stay of your frame. It is very easy to scratch and chip the paint on your frame this way. This is my only criticism in an otherwise great video---when Si installed the new chain, he allowed the chain to slide along the chain stay as he threaded the chain on the rear cassette and derailleur---this is never a good idea.

4 - If you're removing a badly worn chain, it is probably a good idea to replace the rear cassette also (Si mentioned this in an earlier GCN video). The teeth on the sprockets will probably be worn from the old chain stretching and may not fit a new chain properly. Many experts say we should treat the cassette as a "consumable" the same as the chain.

5 - Always clean your cassette, rear derailleur guide wheels and chainrings before installing a new chain.

6 - It's usually best to lubricate the new chain after installation. Some new chains come pre-lubed and may not require this (as long as the factory lube is acceptable for your riding environment). If your new chain comes from the factory with a sticky anti-rust coating, you may need to clean off this coating before installing and lubing the new chain. There are a variety of ways to lube the chain. Which method you choose is a matter of personal preference, your riding environment and how often you clean your bike. The environmental conditions can be very important. One lube may work well in wet conditions and another may be much better for dry and sandy conditions. If you clean your bike frequently like Si does (after every ride), even a water displacement product with an integral short-lasting lube (like WD-40) may work well as long as it is applied frequently. My personal favorite is Park Tool CL-1 (a dedicated synthetic chain lube with reasonably-good weather resistance).

7 - What kind of chain to use? You could stay with the factory-recommended chain for your drivetrain. But there may be a good reason to switch to a different type. For example: If you ride in wet conditions, a nickel-plated chain will rust less. If you're trying to keep your weight down, a chain with hollow pins and links can save you 60 g or more. For example, a SRAM PC-850 with solid pins and links weighs 318 g while a SRAM PC-1091R with hollow pins and links weighs just 255 g (and the PC-1091R includes nickel plating).

8 - Si mentioned "quick links", the chain links that are designed to be installed and removed without a conventional chain pin tool. Depending on the make, these links have a variety of names such as "master links", KMC "missing links" and SRAM "powerlinks". Some are designed to be reusable and some are not. But I've found that most of them can be reused many times (regardless what the manufacturer says) and it helps to have a pair of master link pliers as Si showed (Park Tool MLP-1.2). I have single-use SRAM powerlinks that I've reused dozens of times with zero problems. I strongly recommend using master links because they allow your chain to be quickly removed, making its cleaning so much better. I ride about 150 miles per week along the eastern side of Lake Michigan in the U.S. and there is lots and lots of sand. Even though I ride my road bike on clean paved highways with wide shoulders, I get lots of sand in my drivetrain and this requires frequent cleaning to keep the drivetrain in top condition. An easy-to-remove master link makes this a quick task. Chain cleaning tools that clean your chain while it's on the bike, in my opinion, never do an adequate job.

D.Eldon_
Автор

The most common reason for replacing a chain is because it has stretched.  To allow for this I always double check by counting the number of links in the old and new chains and matching them rather than just relying on length.  Really doesn't take very long (especially if you have the number of links in the old chain recorded somewhere)

davidbate
Автор

So refreshing to see a mechanical video done by someone professional - thanks!

jankubat
Автор

Cheers! 5 years later this just helped me change my first chain after snapping one for the first time also.

rabg
Автор

No matter how may times I change chains, I always come back to this video. My only suggestion is to buy an inexpensive chain pliers....makes locking in quick links that much easier. I agree...Si is so tranquil it's like the Bob Ross of chain replacement.

jimpeyton
Автор

mywife bought a secondhand bike yesterday that needed work. your videos made it a lot easier for a non cyclist to fix a bike

keithsummers
Автор

This video, plus your other chain fixing vids has educated me and saved my riding life! Many thank yous!

norcaluv
Автор

I never thought that I would need to see this video again, but low and behold, I was teaching myself to break down my bike and after I replaced the chain, I didn't route it correctly around one of the jockey wheels and I had contact. After seeing this video, I have everything back together as it goes. Thanks Simon!

Snicker
Автор

Simon should run Chain Replacement As Stress Therapy Classes. This is so... tranquil.

Maxmaxz
Автор

Nice, really helpful, thanks. Not sure if you mentioned but - if you are using a quick link, you need to take one extra link out of the new chain (when sizing it next to the old one) as when you install the quick link it adds 1 link to the length of the chain : )

marcuskt
Автор

Thanks, this video helped me not throwing my bike through the garage out of frustration.

Tip for the folks unable to attach the quicklinks to each other: apply pressure on the breaks and spin with one foot your pedals. Make sure that the quicklinks are perfectly in line with each other before you do this. Cheers.

Kefmans