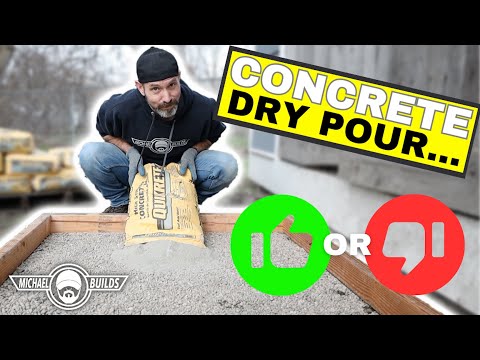
Dry Pour... What I Discovered 2 years later...

preview_player
Показать описание
In this video I'll show you what we discovered 2 years later with this DRY POUR. You may or my not believe what we found...

******* MichaelBuilds.Net *******

******* MICHAEL BUILDS PATREON *******

FILMING EQUIPMENT I USE:
-Canon EOS R Mirrorless Camera
-Soft Box Lighting
-Rode mic
-Camera iPhone 8
-Editing software: DaVinci Resolve
-Gimbal DJI Mobile 2

Follow me;
Instagram: @michaelBuilds313
Threads: @MichaelBuilds313

Michael Builds
47526 Clipper St.
Unit 700391
Plymouth Mi. 48170
Рекомендации по теме
Комментарии
Автор

this is a fantastic follow up. thank you for sharing

erikhartwig
Автор

You're a lifesaver for quickly pointing out flaws you discovered with these experiments. I know I speak for everyone when we I say we're looking forward to future concrete test vids. Thanks Michael.

totallycv
Автор

You never know until you try. You've done plenty of test before hand. Thanks for the honest update.

joeldickherber
Автор

Hey Michael, I’m 64 years old and just limited of how many of these bigger jobs I can tackle anymore. I saw your first pour a few years back and decided to do it on a 6‘ x 8 ‘ pour inside a garage that was away from any open weather. We didn’t really care how the finish looks so we probably gave it a little more water at the beginning than what you suggested and it holds a 250 gallon fuel tank on top of it and we had absolutely no issues with it. You saved me a lot of work. I strongly recommend in the right places that dry pour is the way to go so God bless you for all your efforts and all your honesty but I would definitely do it again. Saved me a ton of back work.

BruceStetson-jcli
Автор

MUCH respect to you for showing the results. Far too often viewers are left without knowing the true results of things like this. Bravo for have the integrity to give an honest report.

krisallison
Автор

I did a 6’6” x 6’ 4-inch dry pour for a garden shed and then I poured two gallons of water seal paint on top to ensure no condensation on the shed floor. The concrete is strong and no issues (on the visual edges. And the anchors holding down the shed are still strong. Dry pour worked for me.

markrothenberg
Автор

Thanks for the honest update on the slabs.

daveh
Автор

I did a dry pour a year and 3 mths ago and until now it still looks good will check in another 3 mths

izzyrosa
Автор

Credit for continuing to do it again. There is probably something out there that will make dry pour not delaminate. Think bonding strength. Some bonding polymer additive or fiberglass fibers. I think you're on the right track.

zetamale
Автор

Thanks for the honest update on that method of dry pour and how it holds up. I'm always looking for a better way of getting the jobs done. Concrete can be tricky and shortcuts usually don't work out. One universal thing I have found is I've never been happy with the amount of Portland cement in any premixed & ready mix concrete bags. In high traffic areas that you want to last I found an extra shovel of Portland cement into the mixer of every ready mix bag makes a big difference in surface wear resistance.
Given your results - solid core with flaky crust - What if ? Trial to eliminate the crust: Dry pour the bulk of the pour, level off then soak well, and top with traditional mixed concrete. Trowel, float, surface, and edge; water&cure

Mark_Nadams
Автор

Thank you for an honest video about the results. There's too many videos out there on "dry pour", usually some young homesteaders who think they have invented some new thing. Concrete needs to be MIXED with water to work effectively and last. Big surprise. It's really not much more work to mix it up right. You can do a bag at a time if you can't mix up a whole batch.

ohgeo
Автор

Glad you made an update video, after watching the originals I was going to dry pour the side walk in our backyard (50 feet) as it needs it bad and gets full sun 12hrs a day. Now I will do it the right way and rent a mixer because I’m not trying to mix 50+ bags by hand. 👍

scottgordin
Автор

You're in a cold climate aren't you? It's the ice. I have a 2yo dry pour test pad under a set of deck stairs. I watched water from it over the winter sit on it and freeze. In the spring it's got delam where the freeze/thaw hit it. Not everywhere, but it's concentrated where stuff sat on it. Very interesting to see and solidifies my belief that dry pour is sufficient for small pads that you don't care how they look on the surface, like a shed base. Mine still has no cracks while my professionally poured patio has 2 ugly ones.

mleachx
Автор

Appreciate the honest feedback. It’s super helpful to hear real results over time. Dry pour can seem quick and easy, but it’s good to know the long term trade offs. These results has confirmed my concerns with dry pours over the years.

inspiringbuilds
Автор

I live in the South and have great results as of today. I learned from your first dry pour and repeated the method on five slabs. My biggest slab measures 8’ x 40’. You may experience a lot more freezing, which is causing the failure. I agree the dry pours should be done in areas where aesthetics or high strength isn't as critical. The surface of the dry pour erodes from water dripping or high wear. However, It is an excellent method for making small slabs economically and quickly.

saighusa
Автор

I did a 7' x 4' x 4" pad for the entrance to my wife's She Shed three years ago and it is still solid. I live in Florida and no sooner did I have it all tamped down and leveled did we have an unexpected downpour. Yes, that rain did disturb that nice finish I was trying to make, but it seems to still be strong and no evidence of flaking or breaking up like you show in your video. It's just solid and it always exposed to the elements. I did put some rebar in the center of it for strength, though it hasn't really had much more weight on it than a couple of people stepping up onto the porch.

aytviewer
Автор

don't give up on the dry pour thanks to your videos and some others I was able to use this method and have slabs i think over 2 years now that are doing great in some kennel areas. On my first one or two i used a very light mist and let cure too long and saw delamination almost immediately. The rest i have misted forever on the first layer and misted again about 10 min later before soaking it down about 20 min after that. i think this helps bond the top layer through as you get more water on initially and coming back with a quick heavier mist after helps to get that bonding down through. just my theory and experience. KEEP IT UP

kalebosborn
Автор

If - Just Suppose - you dump dry concrete mix in a form and gradually wet the dry concrete during the dumping of bags, before you finish it. Finish it wet to hopefully eliminate flaking on top. Hopefully this makes sense as I have never tried dry pour, not against it. Normally even wet concrete is dumped, then spread, then troweled or bull floated. So, mix in the form as you go and finish at the end. You can still add water after finish. Like your video's, keep them up.

kevinwilson
Автор

oh, you can fix that by placing a rug on top LOL

louieavi
Автор

Thanks for doing these follow ups. Seems to make a solid case for pouring wet.

ksnax
visit shbcf.ru