filmov
tv
Mini PET - Build a Commodore PET from all new parts!

Показать описание
Support The 8-Bit Guy on Patreon:
Visit my website:
Buy the PET-compatible "Petskey" keyboard PCB here:
And a big thanks to PCBWay for rushing me those boards!
Visit my website:
Buy the PET-compatible "Petskey" keyboard PCB here:
And a big thanks to PCBWay for rushing me those boards!
 0:26:52
Mini PET - Build a Commodore PET from all new parts!
 0:14:13
Building a case for the Mini-PET
 0:14:00
MiniPET Kit Build and Test
 0:20:27
How To Build a 3D Printed Mini Commodore PET With Working LCD Display
 0:14:41
The New MiniPET 4080D, reviewed!
 0:31:59
MiniPET build and test
 0:01:19
A Mini-Me for My Mini House for our Pets - walking inside my 2-year DIY Pet Home Design Project
 0:00:12
🦔Mini Diy Eating Pet!? #cutecrafts #papercraft #minicraft #crafts #craft #cute #diy #diycrafts
 0:00:54
You Won’t Believe What This Cat Did 😲#viralshort#shorts#viralstory#funnyvideo#aianimation #catlove...
 0:10:21
I GOT A PET! - MiniPet Mini Review
 0:00:14
Ultimate Mini Pet House (Wooden Hideaway For Cats, Dogs, Rabbits, Guinea Pigs)
 0:00:52
Building a Mini-Gaming Room in the Mini-House #pets #kawaii
 0:00:48
Let’s build a jumping spider enclosure #shorts #ad #jumpingspider
 0:06:18
How To Mini Hamster Cage & Toys Tutorial // DIY Miniature Pet
 0:00:20
I Built A Cat Wall Playground
 0:00:13
Discover a nest of little rabbits, cute pet debut plan, rabbit pastoral cute pet
 0:12:53
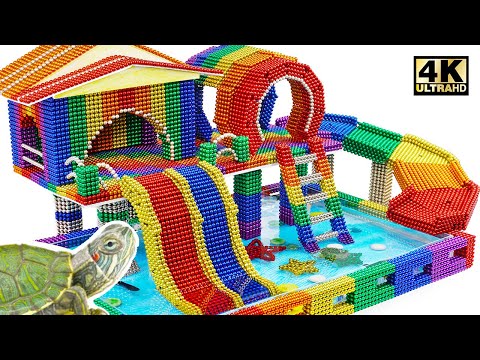
DIY - How To Build Mini Swimming Pool For Pet From Magnetic Balls (Satisfying) | Magnet World Series
 0:01:00
Pets Mini House Tour - Into the Mouse Hole - 2-year DIY Mini Home for Pets
 0:00:55
Building a Puppy Ball Pit! #shorts
 0:00:24
I Built a Fish Tank for my 🌈 Betta Paul
 0:00:35
How Mini Cows Are Changing Pet Trends 😲
 0:00:15
Mini cow In my car #dream #pets #yt #cow #cute #car #ride #travel #youtube #mini
 0:00:19
Let’s make a PORTAL 🌀 #shorts
 0:00:16
Best beginners pet #snakes 🐍
Комментарии