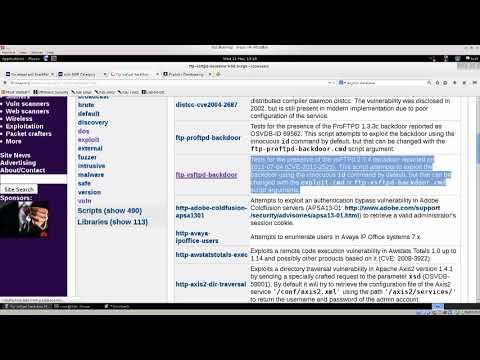
Learn Kali Linux Episode #21: Virtual Private Network (VPN) Setup (Part 2)

preview_player
Показать описание


In this lecture we will finish configuring our VPN connection.

Рекомендации по теме
Комментарии
Автор

Thank you for such great quality and clear spoken lessons. I AM LEARNING!!!

KCFindsDesign
Автор

Great job! Spoken clearly and slowly its easy to follow along and makes the tutorial more enjoyable👍👍

DavidCastillo-xtme
Автор

This guy has content, I wish you had a website most teachers today went teaching Kali Linus efficiently, they will teach a little and stop please upload more videos I would also love to get intouch I really want to learn Kali Linux fronna professional like you

chorkaniitv
Автор

Related to vpnbook password comment by you in the tutorial :) Public password is generated with standards to conform with their software validation code so as to compel users to generate strong password. In case if they keep simple password they have to write additional code to validate for easy PW input, which will also be an vulnerable point to attack from experts like you :) However I am really liking the course content and your explanation depth very much till now. I promise to pay at the end of the course and request your kind alms till then! Thanking you very much.

prabhakaryes
Автор

I am learning a lot,
love this playlist.

Just_Damian
Автор

Congrats on 100k Joseph! Thanks for the content :)

henzeus
Автор

you are good teacher.. and you also make useful video in simple method...thank you

shrikashirajeducation
Автор

to
It took longer than I would have liked to get all this configured properly but I got it now and figured idd share what helped me so you don't have to dig for hours while doing trial and error. Im running kali on my raspberry pi 4 FYI.
1st) was disabling ipv6 by going to advanced network configuration GUI going to the ipv6 tab and selecting disabled instead of automatic. Since vpnbook only covers ipv4 your ipv6 address will still be your real one if not done.
2nd) open up /etc/resolv.conf text file and remove all that's there and replace it with name server 208.67.222.222 and name server 208.67.220.220, this part you know from the tutorial but when you reboot that gets reset to your real one.
3rd) go to under [main] which mine looks like
[main]
plugins=ifupdown, keyfile
dns=none <---- added

if you dont have a [main] section for what ever reason then add

[main]
dns=none

and if you reboot then cat /etc/resolv.conf you will see it was not over written!

4th) run vpn as in the video and you should be good to go with no leaks from what I can tell so far, if you find some let me know :D

ryanmartino
Автор

Guys.. after connecting this vpn, I was also unable to connect to internet but when i did by GUI so it worked so just import the file from GUI and apply it...It will work.. Thanks

wajidali
Автор

Great series. Thanks for taking the time to share the videos.

mathisonturing
Автор

Mr @joseph Delgadillo i know you are busy and having a loots of questions but what i figure it out most of the people whatching this video have the same problem. Basicly the main problem is when we follow you step by step everything goes well but when we restart the computer resolv.conf file returns to the default. Why the resolv.conf file returns to the default by the generated network manger? i hope you clear this up for all of us, thanks btw for all this effort.

zubeyrucar
Автор

Some feedback: please use some software that shows your mouse pointer and click events more obviously in the recorded screenshot videos. As of this one, I can't see where your mouse is or where you're clicking even when the vido is maximize to take up my entire hi-res display monitor.

HiOctaneVideoShare
Автор

Somewhere in previous tutorial you said that we should not access web in root. get this cleared please. coz u use firefox now in root user

tanishq
Автор

Sat Mar 14 14:31:36 2020 NOTE: --fast-io is disabled since we are not using UDP
Sat Mar 14 14:31:36 2020 TCP/UDP: Preserving recently used remote address: [AF_INET]94.23.57.8:443
Sat Mar 14 14:31:36 2020 Socket Buffers: R=[131072->131072] S=[16384->16384]
Sat Mar 14 14:31:36 2020 Attempting to establish TCP connection with [AF_INET]94.23.57.8:443 [nonblock]
Sat Mar 14 14:31:37 2020 TCP connection established with [AF_INET]94.23.57.8:443
Sat Mar 14 14:31:37 2020 TCP_CLIENT link local: (not bound)
Sat Mar 14 14:31:37 2020 TCP_CLIENT link remote: [AF_INET]94.23.57.8:443
Sat Mar 14 14:31:37 2020 Connection reset, restarting [0]
Sat Mar 14 14:31:37 2020 SIGUSR1[soft, connection-reset] received, process restarting
Sat Mar 14 14:31:37 2020 Restart pause, 5 second(s)

ruslanshamsiev
Автор

Once I connect to the VPN, I am no longer able to connect to the internet. I've been stuck on this part for literally weeks now, searching all over the web and finding nothing. Please Joseph, help us. 😕

KingRetro
Автор

+Josef Delgadillo
openDNS is now owned by cisco does that mean it's not free anymore + is google dns a safe choice ?

mahdou
Автор

Hi. so after the configuration I saw a padlock on my screen with a private IP address. Now I have rebooted my system and I want to know, do I have to configure the whole VPN again or there is a command I can use to start it?

nanaarhin
Автор

Thanks. I managed to install openvpnbook, it show my ip in a different country but the dns is my address and my country!! Have done something wrong?

mingosutu
Автор

Im in China currently, the proxychains cant connect here(dont know why, im new to this, but my guess is the GFW of china maybe) But the vpn setup you showed here managed to bypass it and i can access the internet outside of china on my VM. Great work!
Btw do you think the GFW has an influence on proxychains? Because the terminal keeps saying timeout/denied.

cobarde
Автор

almost every time that i boot the machine ( by virtual box host = win vm = kali linux debian 64bit ) i get to a terminal that says that my data could be compromised and other messages, like attack! and other things, i searched on some forums and says that could be guest additions, non well installed, but i reinstalled them multiple times and still get this

root-jv