filmov
tv
Designing and 3D Printing Drawer Organisers for a Custom Workshop Workbench | DIY Engineering

Показать описание
Socials: @Fat Lip Collective
Music by Swilled: @swilled_music
________________________________________________________________________
It's finally time to upgrade my garage workshop.
Something I've been avoiding for some time now, just because I know once I start I won't be able to stop.
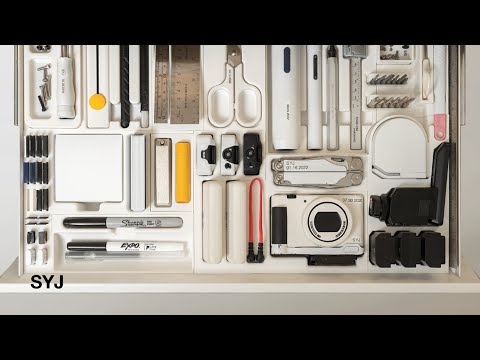
The main thing that I've been wanting to tackle is designing and 3D printing some drawer organisers so that I can finally get a handle on allllll of the fixings that I have laying around.
But first, to do that, I needed some new drawers - and why not couple them with a nice new workbench?
The containers worked exactly as I wanted to, and I'm already working on a bunch of extra, custom designs to suit a whole range of other items I plan to store in the drawers.
Let me know what you think!
Cabinets: Mechpro Blue (in Black finish) - MPTT9D-46IN
Benchtop: 2440mm x 960mm x 70 mm
Varnish: Feast Watson Clear Satin (approx 750ml used for ~4 complete coats of entire board).
0:00 - Introduction
0:46 - Choosing the Cabinets
2:00 - Cabinet Setup
5:05 - Prep Work
8:43 - CAD Design
9:19 - 3D Printing
10:04 - Organising
11:58 - Conclusion
Music by Swilled: @swilled_music
________________________________________________________________________
It's finally time to upgrade my garage workshop.
Something I've been avoiding for some time now, just because I know once I start I won't be able to stop.
The main thing that I've been wanting to tackle is designing and 3D printing some drawer organisers so that I can finally get a handle on allllll of the fixings that I have laying around.
But first, to do that, I needed some new drawers - and why not couple them with a nice new workbench?
The containers worked exactly as I wanted to, and I'm already working on a bunch of extra, custom designs to suit a whole range of other items I plan to store in the drawers.
Let me know what you think!
Cabinets: Mechpro Blue (in Black finish) - MPTT9D-46IN
Benchtop: 2440mm x 960mm x 70 mm
Varnish: Feast Watson Clear Satin (approx 750ml used for ~4 complete coats of entire board).
0:00 - Introduction
0:46 - Choosing the Cabinets
2:00 - Cabinet Setup
5:05 - Prep Work
8:43 - CAD Design
9:19 - 3D Printing
10:04 - Organising
11:58 - Conclusion
 0:18:05
The Best 3D Printed Organizers for your Workshop
 0:09:02
Organizing my Drawer with 3D Printing
 0:22:13
How to 3D Print Custom Tool Organizers for ANYTHING!
 0:05:28
Things to 3D print when you're bored!
 0:21:26
I Hand-Picked the BEST 3D Prints
 0:00:45
Spice Rack Pullout | SpongyBob | 3D Printing Ideas
 0:00:54
Achieve Next-Level Organization with 3D Printing on the Bambu Lab P1S
 0:14:26
My TOP 3D Printed Organization Systems
 0:00:49
3D printed TapPress Modular Storage Drawers #diy #organizer #3dmodeling #makersgonnamake #3d
 0:13:30
3D Printing Awesome Desk Accessories | Customizing My Workspace
 0:03:43
3D Printed Table Drawer
 0:12:54
Designing and 3D Printing Drawer Organisers for a Custom Workshop Workbench | DIY Engineering
 0:17:30
Upgrading My Desk With 3D Printing
 0:00:46
3d print with me with the Bambu Lab A1 Mini! #3dprinting #bambulab #a1mini
 0:00:33
Would you use this drawer? #3dprintable#organizer
 0:00:16
3D Printed Business Card Embosser Roller PCB Style
 0:00:14
Gridfinity bin to store SanDisk drives in IKEA ALEX drawer #gridfinity #3dprinting #ikea
 0:00:10
Are your drawers chaotic?🫨 Drawer Organisers by @gazzaladra #3dprinting
 0:00:10
My 3d printed mushroom drawer handle design! #3dprinting #functional
 0:00:28
Creality CR-30: The INFINITE 3D printer!
 0:00:23
DIY Spice Drawer Organizer, Cricut Labels + 3D Printed Tray!
 0:10:08
STACKABLE STORAGE BOX FOR YOUR TABLE - 3D Printed
 0:40:17
Gridfinity in the Machine Shop: 3D Printed Metrology Toolbox Organization
 0:03:34
The Best Item Organiser! (Useful 3D prints) | #3D1
Комментарии