filmov
tv
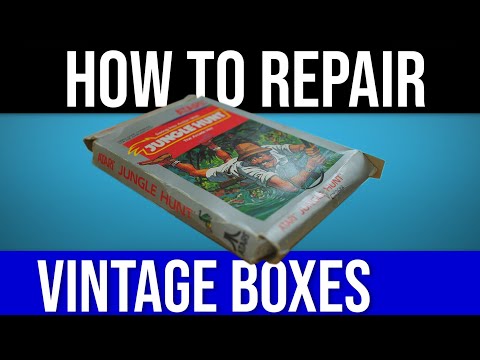
Repairing Crushed Big Box Games with the 'Retro Hot Plate'

Показать описание
Squashed, flattened, broken or torn cardboard game boxes can be heart breaking and I appear to own more than most. Often they are included with a donated system, languishing at the bottom of a box. So I thought I'd try to make good some of the examples I have by coming up with a technique to straighten them out. I'm sure we can refine this further in time but I'm pretty happy with the results so far, it just needs a name!
🏆 Support RMC
Time is the most valuable thing we have. Official Cave Dwellers create a reliable monthly income that allows me to give my all to this channel. If you'd like to support this, and help me make it the very best I can then please consider using:
● Chapters
00:00 Intro
01:24 Testing out some techniques to repair boxes
05:04 A device to repair squashed big box games
10:15 Repairing Lotus 2 squashed game box
13:34 Fixing lots of squashed big box games
16:26 Conclusion on fixing squashed cardboard boxes
19:07 A 60 second game restoration
● Support the Sponsors of The Cave
● Subscribe
Please take a moment to subscribe to the channel
● Episode Links
Items used:
The magnets I bought are no longer listed on Amazon, they were described as "Neodymium Magnet Pins 36mm, N52". If you find a suitable alternative please let me know and I'll add the link here.
● Join me on social media
● Come and chat on the RMC chat server
●Visit The Cave museum shop and treat yourself
● RMC Podcasts
Enjoy my Podcasts with your favourite app using the links here:
 0:20:46
Repairing Crushed Big Box Games with the 'Retro Hot Plate'
 0:06:13
Fixing Crushed Video Game Boxes: How I do it
 0:05:23
The Ultimate Way to RESTORE Retro Video Game Boxes | DJVG
 0:24:42
Fixing damaged game boxes
 0:06:52
NINTENDO ZELDA BOX RESTORATION...CAN WE SAVE IT ? #nintendo #zelda #restoration #extreme #retro #wow
 0:04:32
Restoring Old Retro Game Boxes -GB/GBA Repair
![How to [DIY]](https://i.ytimg.com/vi/hBacMjCckkY/hqdefault.jpg) 0:09:43
0:09:43
How to [DIY] & Restore Old Game Boxes | Retro Gaming Collecting
 0:18:20
Repairing MORE game boxes using your tips and tricks (some quite badly)
 0:09:20
HOW TO RESTORE CARDBOARD BOX: refurbishing a vintage Atari Jungle Hunt box from the 80's
 0:00:12
Simulation steering wheel 2021 Cool Toys & Gift For Kids 604
 0:12:01
LGR - Cleaning Up & Restoring PC Game Boxes
 0:00:12
WILD Broken Chair Prank! 🤯 #shorts
 0:00:34
smashing the iPhone SE with a hammer will do this: ... #shorts
 0:00:16
destroy a car in strongman style. #destroy #car #strongman #style
 0:01:00
Filling Cute mermaid pencil case ❤️#shorts #filling #pencilcase #youtubepartner #90s #youtubeshorts...
 0:00:51
2003 VS 2023 with Benefit Cosmetics 🥰 #makeup #shorts
 0:00:15
Carrom king #viral #foryou #viralvideo #carromking
 0:00:45
Surprising jumping boxes #shorts
 0:00:59
We made a cool car out of plastic waste! 🚘 #woodmood #shorts #recycling
 0:00:51
This cube LIGHTS up! 💡
 0:00:26
My FAVORITE CAR Got DESTROYED... #shorts
 0:00:24
The NASTIEST Phone EVER! 🤮 #Shorts
 0:00:54
Is This the Biggest Order I've Ever Shipped?!
 0:00:16
Lani Love Got a Nose Bleed #shorts #lanilove #nosebleed
Комментарии