filmov
tv
pip install opencv contrib python windows

Показать описание
Title: Installing OpenCV-Contrib-Python on Windows using pip
OpenCV is a powerful open-source computer vision library that enables developers to work with images and videos. The opencv-contrib-python package extends the functionality of OpenCV by including additional modules and features. In this tutorial, we will guide you through the process of installing OpenCV-Contrib-Python on a Windows system using the pip package manager.
Step 1: Install Python
Before we proceed, make sure you have Python installed on your Windows machine. If not, you can download the latest version of Python from the official Python website. During the installation process, ensure that you check the box that says "Add Python to PATH."
Step 2: Open a Command Prompt
After installing Python, open a command prompt by pressing Win + R, typing cmd, and hitting Enter.
Step 3: Update pip
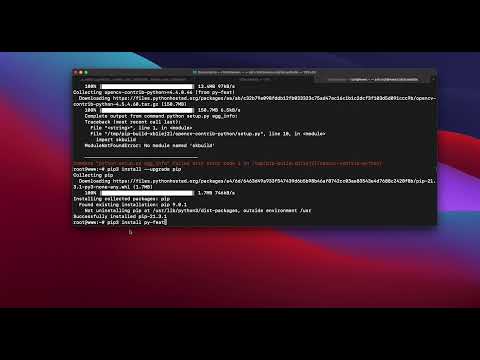
Before installing OpenCV, it's a good practice to ensure that your pip is up-to-date. Execute the following command:
Step 4: Install OpenCV-Contrib-Python
Now, let's install OpenCV-Contrib-Python using the following command:
This command will download and install the latest version of OpenCV-Contrib-Python and its dependencies.
Step 5: Verify the Installation
To verify that OpenCV-Contrib-Python has been successfully installed, run a simple Python script that imports OpenCV:
If the installation was successful, you should see the OpenCV version printed in the console.
Congratulations! You have successfully installed OpenCV-Contrib-Python on your Windows system. You can now start exploring the various computer vision functionalities provided by OpenCV and its additional contributions.
Feel free to use this as a starting point for your computer vision projects on Windows. If you encounter any issues during the installation process, refer to the official OpenCV documentation for troubleshooting and additional information.
ChatGPT
OpenCV is a powerful open-source computer vision library that enables developers to work with images and videos. The opencv-contrib-python package extends the functionality of OpenCV by including additional modules and features. In this tutorial, we will guide you through the process of installing OpenCV-Contrib-Python on a Windows system using the pip package manager.
Step 1: Install Python
Before we proceed, make sure you have Python installed on your Windows machine. If not, you can download the latest version of Python from the official Python website. During the installation process, ensure that you check the box that says "Add Python to PATH."
Step 2: Open a Command Prompt
After installing Python, open a command prompt by pressing Win + R, typing cmd, and hitting Enter.
Step 3: Update pip
Before installing OpenCV, it's a good practice to ensure that your pip is up-to-date. Execute the following command:
Step 4: Install OpenCV-Contrib-Python
Now, let's install OpenCV-Contrib-Python using the following command:
This command will download and install the latest version of OpenCV-Contrib-Python and its dependencies.
Step 5: Verify the Installation
To verify that OpenCV-Contrib-Python has been successfully installed, run a simple Python script that imports OpenCV:
If the installation was successful, you should see the OpenCV version printed in the console.
Congratulations! You have successfully installed OpenCV-Contrib-Python on your Windows system. You can now start exploring the various computer vision functionalities provided by OpenCV and its additional contributions.
Feel free to use this as a starting point for your computer vision projects on Windows. If you encounter any issues during the installation process, refer to the official OpenCV documentation for troubleshooting and additional information.
ChatGPT
 0:03:03
 0:03:16
 0:03:24
 0:01:33
 0:05:28
 0:03:19
 0:04:38
 0:07:24
 0:04:52
 0:02:38
 0:03:15
 0:00:48
 0:02:39
 0:02:37
 0:02:58
 0:01:44
 0:02:06
 0:03:22
 0:02:51
 0:02:45
 0:04:13
 0:02:42
 0:02:09
 0:02:48