filmov
tv
Troubleshooting the FFMpeg Executable Not Found Error in Laravel

Показать описание
Discover how to resolve the `Unable to load FFMpeg` error in your Laravel project by properly configuring FFMpeg binaries in your .env file.
---
Visit these links for original content and any more details, such as alternate solutions, latest updates/developments on topic, comments, revision history etc. For example, the original title of the Question was: Laravel FFMpeg - Unable to load FFMpeg in file error
If anything seems off to you, please feel free to write me at vlogize [AT] gmail [DOT] com.
---
Troubleshooting the FFMpeg Executable Not Found Error in Laravel
Developing video or audio manipulation features in a Laravel application can be incredibly rewarding but, as with any integration, technical hiccups can arise. One of the more common issues developers encounter when working with FFMpeg in Laravel is the dreaded ExecutableNotFoundException. If you're receiving an error that states Unable to load FFMpeg, don't worry — you're not alone! In this post, we'll break down the problem and guide you through the solution.
Understanding the Problem
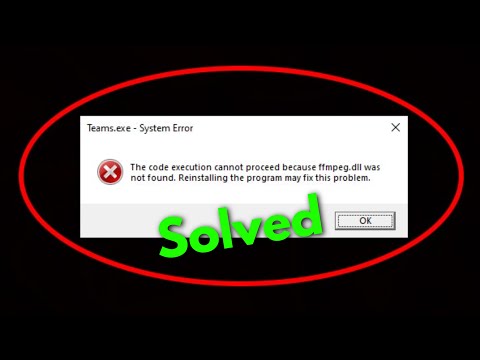
The error message you might be seeing typically looks something like this:
[[See Video to Reveal this Text or Code Snippet]]
Such errors usually stem from the system not being able to locate the FFMpeg executable files, which are essential for the library to function correctly. You've likely already installed FFMpeg locally using Homebrew. However, unless your Laravel application knows where to find the FFMpeg binaries, it will continue to throw this error.
Solution: Setting Up FFMpeg Binaries
To resolve the ExecutableNotFoundException, you need to specify the locations of the FFMpeg binaries in your .env file. Here’s how you can do it:
Step 1: Find the Path to Your FFMpeg Binaries
First, you need to know where the FFMpeg and FFProbe executable files are located on your system. Typically, if you installed FFMpeg via Homebrew, the paths are as follows:
FFMpeg: /usr/bin/ffmpeg
FFProbe: /usr/bin/ffprobe
You can confirm these paths by running the following commands in your terminal:
[[See Video to Reveal this Text or Code Snippet]]
Step 2: Update Your .env File
Open your Laravel project's .env file.
Add the following lines to specify the paths to the FFMpeg binaries:
[[See Video to Reveal this Text or Code Snippet]]
Save the changes to your .env file.
Step 3: Clear Config Cache
After updating the .env file, you may need to clear your configuration cache for the changes to take effect. In your terminal, run:
[[See Video to Reveal this Text or Code Snippet]]
Step 4: Test Your Integration
Now that you have pointed your application to the correct binary paths, it's time to test your FFMpeg integration. You can call the endpoint that utilizes the FFMpeg functionality. If everything was set up correctly, you should no longer encounter the ExecutableNotFoundException error.
Conclusion
Integrating FFMpeg into your Laravel application can significantly enhance your web application's multimedia capabilities. The Unable to load FFMpeg error usually indicates a configuration oversight regarding the executable paths. By setting the FFMPEG_BINARIES and FFPROBE_BINARIES in your .env file, you can quickly resolve this error and get back on track with your project.
If you still run into issues, double-check the paths you've used or consult the FFMpeg and Laravel-Ffmpeg documentation for more advanced troubleshooting tips. Happy coding!
---
Visit these links for original content and any more details, such as alternate solutions, latest updates/developments on topic, comments, revision history etc. For example, the original title of the Question was: Laravel FFMpeg - Unable to load FFMpeg in file error
If anything seems off to you, please feel free to write me at vlogize [AT] gmail [DOT] com.
---
Troubleshooting the FFMpeg Executable Not Found Error in Laravel
Developing video or audio manipulation features in a Laravel application can be incredibly rewarding but, as with any integration, technical hiccups can arise. One of the more common issues developers encounter when working with FFMpeg in Laravel is the dreaded ExecutableNotFoundException. If you're receiving an error that states Unable to load FFMpeg, don't worry — you're not alone! In this post, we'll break down the problem and guide you through the solution.
Understanding the Problem
The error message you might be seeing typically looks something like this:
[[See Video to Reveal this Text or Code Snippet]]
Such errors usually stem from the system not being able to locate the FFMpeg executable files, which are essential for the library to function correctly. You've likely already installed FFMpeg locally using Homebrew. However, unless your Laravel application knows where to find the FFMpeg binaries, it will continue to throw this error.
Solution: Setting Up FFMpeg Binaries
To resolve the ExecutableNotFoundException, you need to specify the locations of the FFMpeg binaries in your .env file. Here’s how you can do it:
Step 1: Find the Path to Your FFMpeg Binaries
First, you need to know where the FFMpeg and FFProbe executable files are located on your system. Typically, if you installed FFMpeg via Homebrew, the paths are as follows:
FFMpeg: /usr/bin/ffmpeg
FFProbe: /usr/bin/ffprobe
You can confirm these paths by running the following commands in your terminal:
[[See Video to Reveal this Text or Code Snippet]]
Step 2: Update Your .env File
Open your Laravel project's .env file.
Add the following lines to specify the paths to the FFMpeg binaries:
[[See Video to Reveal this Text or Code Snippet]]
Save the changes to your .env file.
Step 3: Clear Config Cache
After updating the .env file, you may need to clear your configuration cache for the changes to take effect. In your terminal, run:
[[See Video to Reveal this Text or Code Snippet]]
Step 4: Test Your Integration
Now that you have pointed your application to the correct binary paths, it's time to test your FFMpeg integration. You can call the endpoint that utilizes the FFMpeg functionality. If everything was set up correctly, you should no longer encounter the ExecutableNotFoundException error.
Conclusion
Integrating FFMpeg into your Laravel application can significantly enhance your web application's multimedia capabilities. The Unable to load FFMpeg error usually indicates a configuration oversight regarding the executable paths. By setting the FFMPEG_BINARIES and FFPROBE_BINARIES in your .env file, you can quickly resolve this error and get back on track with your project.
If you still run into issues, double-check the paths you've used or consult the FFMpeg and Laravel-Ffmpeg documentation for more advanced troubleshooting tips. Happy coding!
 0:01:33
 0:03:42
 0:00:50
 0:05:44
 0:02:13
![[SOLVED] FFMPEG is](https://i.ytimg.com/vi/E_2kpWwmCrQ/hqdefault.jpg) 0:03:46
0:03:46
 0:03:25
 0:01:33
 0:03:05
 0:02:30
 0:01:45
 0:03:24
 0:01:38
 0:00:17
 0:01:17
 0:00:21
 0:01:50
 0:03:19
 0:01:55
 0:02:08
 0:01:37
 0:03:24
 0:00:57
 0:00:44