filmov
tv
Arduino Real Time Clock - Using the Tiny RTC

Показать описание
Today we will add a Real-Time Clock to an Arduino. I’ll show you how the Tiny RTC is hooked up and how to use two ways, including with interrupts. We will also construct a temperature and humidity clock.
The Arduino is a very versatile platform with many features, however, one thing it cannot do is tell the time. In order to do that you will need a real-time clock module.
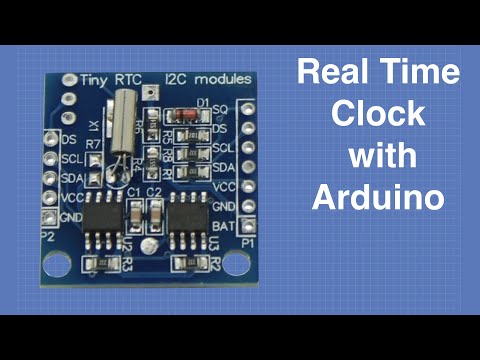
A real-time clock is essentially a digital clock that you can interface with a computer or microcontroller. The module we are going to use is the popular Tiny RTC, which interfaces with the Arduino using the I2C bus.
The Tiny RTC is based upon the DS1307 real-time clock chip. This chip provides readings of the second, minute, hour, day, day of the week, month, and year. It adjusts for leap years and has a battery backup. And its available from several sources and it is very inexpensive.
I’ll show you how to hook up the Tiny RTC and how to set and read the time. We will then look at a more advanced method of using the Tiny RTC, using interrupts.
Here is the Table of Contents for today's video:
00:00 - Introduction
02:19 - Tiny RTC Module
05:15 - Hooking it up
06:03 - Setting the Time
09:43 - Reading the Time
12:30 - Creating Interrupts
19:58 - RTC with Temperature and Humidity
While you are on the website please subscribe to the DroneBot Workshop newsletter. It’s my way of keeping in touch with you to let you know what projects I’m working on.
And please subscribe to the YouTube channel if you haven’t already. That way you won’t miss out on any of the videos.
Thanks and I hope you enjoy the video!
The Arduino is a very versatile platform with many features, however, one thing it cannot do is tell the time. In order to do that you will need a real-time clock module.
A real-time clock is essentially a digital clock that you can interface with a computer or microcontroller. The module we are going to use is the popular Tiny RTC, which interfaces with the Arduino using the I2C bus.
The Tiny RTC is based upon the DS1307 real-time clock chip. This chip provides readings of the second, minute, hour, day, day of the week, month, and year. It adjusts for leap years and has a battery backup. And its available from several sources and it is very inexpensive.
I’ll show you how to hook up the Tiny RTC and how to set and read the time. We will then look at a more advanced method of using the Tiny RTC, using interrupts.
Here is the Table of Contents for today's video:
00:00 - Introduction
02:19 - Tiny RTC Module
05:15 - Hooking it up
06:03 - Setting the Time
09:43 - Reading the Time
12:30 - Creating Interrupts
19:58 - RTC with Temperature and Humidity
While you are on the website please subscribe to the DroneBot Workshop newsletter. It’s my way of keeping in touch with you to let you know what projects I’m working on.
And please subscribe to the YouTube channel if you haven’t already. That way you won’t miss out on any of the videos.
Thanks and I hope you enjoy the video!
 0:08:26
How To Use An RTC (Real Time Clock) With Arduino Uno R3 | Make an Accurate Clock!
 0:10:07
Arduino Tutorial 35- Real Time Clock using DS1302 RTC Module
 0:31:29
Arduino Real Time Clock - Using the Tiny RTC
 0:03:59
Arduino and DS3231 Real Time Clock Tutorial
 0:02:34
DS 3231 RTC module with Arduino
 0:02:45
How to set DS3231 Real time clock module for Arduino
 0:05:32
DS1302 RTC with arduino tutorial
 0:10:29
How do I use a Real Time Clock with Arduino? RTC 1307
 0:12:01
How to use Arduino Real Time Clock module with DS1302 chip
 0:11:01
Das RTC DS3231 Modul einfach erklärt, Teil 1 | #EdisTechlab #rtc #ds3231
 0:07:27
Arduino Project: Arduino Real Time Clock (RTC) with Temperature Monitor
 0:10:47
Real Time Clock Tutorial | Arduino | DS3231
 0:11:34
Arduino Projekt: Echtzeituhr DS1307 am Arduino
 0:31:34
Learn everything about the DS3231-SN Real Time Clock | Use without Arduino Library
 0:10:39
Arduino Project: Real time clock (RTC) and temperature monitor using the DS3231 module.
 0:08:05
DS1307 RTC module With Arduino (Tiny RTC ).
 0:27:46
RTC DS3231 Project / Real Time Clock With Arduino / RTC Alarm Setting / Real Time Clock Tutorial
 0:06:40
how to use RTC DS1302 module with Arduino Uno
 0:13:38
Building a Real Time Clock (RTC) kit for Arduino Tutorial
 0:10:12
How to Use External Real-Time Clock (RTC) with Arduino (Lesson #36)
 0:02:48
How to use Arduino RTC Module | DS3231 Arduino RTC Module [Code and Circuit Diagram]
 0:08:41
Real Time Clock: Setting the Date/Time with Arduino
 0:35:25
RTC (Real Time Clock) with Arduino - Low Cost MCP7940N
 0:03:08
Getting Started With DS3231 RTC Module
Комментарии