filmov
tv
How 433 MHz RF Module Works & Interfacing with Arduino | RF ASK #arduino #diy #electronics

Показать описание
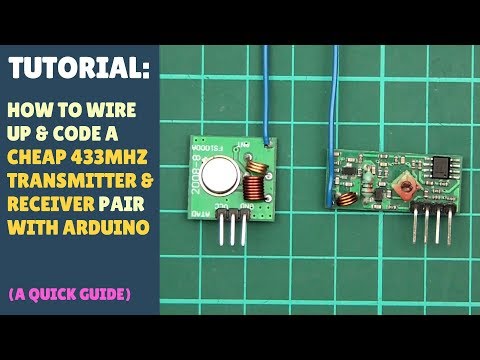
In this video, I want to show you how to use the RF ASK Receiver and Transmitter
How 433 MHz RF Module Works & Interfacing with Arduino | RF ASK #arduino #diy #electronics
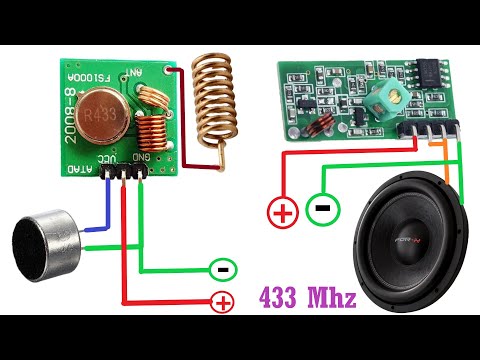
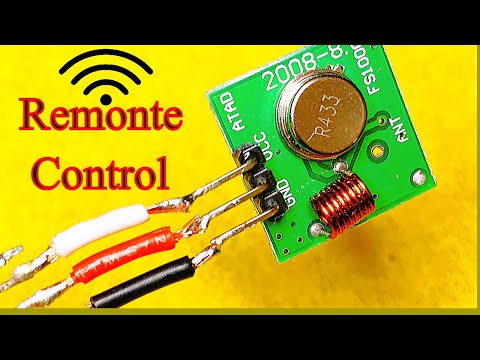
Components required:
1. Arduino UNO
2. Arduino NANO
3. breadboard
4. RF ASK Transmitter Module 433MHz
5. RF ASK Receiver Module 433 MHz
6. LED
7. push button
8. resistor 220Ω
Please do not forget to subscribe and like
Follow us on other social media
Note: Some People copy my content as well as the thumbnail. I have no issues with content as long they make it themselves. But for the thumbnail, It belongs to respective owners (Some also created by myself). If you get a copyright strike without any notice by copying my thumbnail, it is not my fault. Happy Creating :)
WARNING:
This video is for demonstration and education purpose only
Each demonstration presents risk and hazards that must be fully understood before attempting and should be performed only by professionals
how,how to,how to make,technical new ideas,arduino,zintechideas,diy,life hack,How 433 MHz,RF Module,RF ASK,RF ASK Receiver and Transmitter,ASK Receiver and Transmitter,Transmitter,Receiver,433 MHz RF Module,How 433 MHz RF Module Works & Interfacing with Arduino,Arduino UNO,Arduino NANO,RF ASK Transmitter Module 433MHz,RF ASK Receiver Module 433 MHz,RF ASK Receiver,RF ASK Transmitter,push button,programming RF ASK Receiver and Transmitter,running RF ASK
How 433 MHz RF Module Works & Interfacing with Arduino | RF ASK #arduino #diy #electronics
Components required:
1. Arduino UNO
2. Arduino NANO
3. breadboard
4. RF ASK Transmitter Module 433MHz
5. RF ASK Receiver Module 433 MHz
6. LED
7. push button
8. resistor 220Ω
Please do not forget to subscribe and like
Follow us on other social media
Note: Some People copy my content as well as the thumbnail. I have no issues with content as long they make it themselves. But for the thumbnail, It belongs to respective owners (Some also created by myself). If you get a copyright strike without any notice by copying my thumbnail, it is not my fault. Happy Creating :)
WARNING:
This video is for demonstration and education purpose only
Each demonstration presents risk and hazards that must be fully understood before attempting and should be performed only by professionals
how,how to,how to make,technical new ideas,arduino,zintechideas,diy,life hack,How 433 MHz,RF Module,RF ASK,RF ASK Receiver and Transmitter,ASK Receiver and Transmitter,Transmitter,Receiver,433 MHz RF Module,How 433 MHz RF Module Works & Interfacing with Arduino,Arduino UNO,Arduino NANO,RF ASK Transmitter Module 433MHz,RF ASK Receiver Module 433 MHz,RF ASK Receiver,RF ASK Transmitter,push button,programming RF ASK Receiver and Transmitter,running RF ASK
 0:29:50
 0:11:42
 0:03:20
 0:00:22
 0:00:56
 0:08:14
 0:00:22
 0:00:10
 0:05:59
 0:00:50
 0:17:00
 0:06:13
 0:02:57
 0:06:15
 0:01:00
 0:00:16
 0:06:14
 0:18:50
 0:00:26
 0:03:19
 0:01:11
 0:02:03
 0:00:11
 0:18:07