filmov
tv
Configure the DHCP Relay Agent in Windows Server 2022
Показать описание
Configure the DHCP Relay Agent in Windows Server 2022
1. Prepare
- DC25 : Routing Server , IP 10.0.0.254(Card Bridge), IP 10.0.2.254(VMnet2), IP 10.0.3.254(VMnet3)
- WIN111 : Client, Set receive IP from DHCP Server (VMnet2) | WIN112 : Client, Set receive IP from DHCP Server (VMnet3)
2. Step by step : Configure DHCP server multiple scopes on DC22, configure routing DHCP relay agent on DC25
- DC22 : Configure DHCP server multiple scopes
+ Start IP address : 10.0.0.100 , End IP address : 10.0.0.200
+ Length : 24 , Subnet mask : 255.255.255.0 - Next ... . Router (Default Gateway) - IP address : 10.0.0.254 - Add - Next to Finish
+ Do the same for VMnet2_Scope2 (10.0.2.0/24), VMnet3_Scope3 (10.0.3.0/24)
- DC25 : Configure routing DHCP relay agent
+ Turn off Firewall local
+ Set IP for cards network : IP 10.0.0.254 (Card Bridge) , IP 10.0.2.254 (VMnet2) , IP 10.0.3.254 (VMnet3)
+ Server Manager - Manage - Add Roles and Features - Next to Server Roles : Select "Remote Access"
- Next to Role Serives : Select "DirectAccess and VPN (RAS)","Routing" - Add Features - Install
+ Tools - Routing and Remote Access - Right-Click DC25 - Congfigure and Enable Routing and Remote Access
- Choose "Custom configuration" - Select "LAN routing" - Finish - Start service :
+ IPv4 - Right-Click General - New Routing Protocol... - DHCP Relay Agent - OK
+ Right-Click 'DHCP Relay Agent' - New Interface... - Choose VMnet2 and VMnet3
+ Right-Click 'DHCP Relay Agent' - properties - Server address : 10.0.0.22 (IP of DHCP server) - Add - OK
- WIN111 : Set receive IP from DHCP Server - Check IP belong 10.0.2.0/24 (VMnet2) - OK
- WIN112 : Set receive IP from DHCP Server - Check IP belong 10.0.3.0/24 (VMnet3) - OK
 0:12:18
CCNA DAY 32: Configure DHCP Relay Agent on Cisco Routers | IP Helper Address Configuration
 0:10:10
How to Configure DHCP Relay Agent in Windows Server 2016
 0:14:37
DHCP Relay-Agent Configuration in Packet Tracer Step by Step | CCNA Training | DHCP Server |
 0:04:20
DHCP Relay Agent
 0:13:21
Configure the DHCP Relay Agent in Windows Server 2019
 0:16:01
Configure the DHCP Relay Agent in Windows Server 2022
 0:15:56
Configure the DHCP Relay Agent in Windows Server 2016
 0:06:30
Configure the Router as a DHCP Relay Agent - CCNA
 0:11:33
Configuring DHCP IP Helper Address, Packet Tracer v. 7.2
 0:09:28
How to Configure DHCP Relay Agent on CISCO Router
 0:12:41
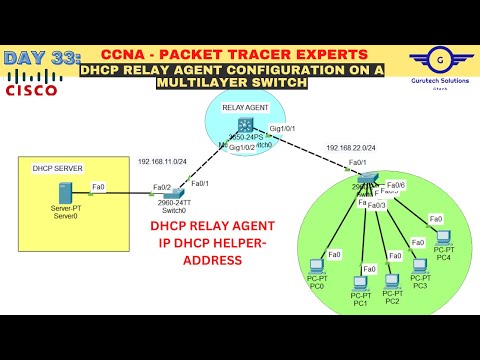
CCNA DAY 33: Configure DHCP Relay Agent on Cisco Multilayer Switch | IP Helper Address Configuration
 0:13:54
DHCP Relay Agent in Cisco Router
 0:04:38
DHCP Relay Agent in Windows Server
 0:14:02
DHCP Server Configuration | DHCP Relay Agent | dhcp explained | ccna 200-301
 0:07:34
Configuring DHCP Relay | IP Helper Address
 0:03:55
DHCP Relay Agent || IP Helper Address || DHCP 7
 0:02:36
How to configure Cisco Router as DHCP Relay Agent
 0:09:39
How to configure DHCP-Relay in Cisco Packet Tracer tool
 0:08:43
What is DHCP? & How to Configure DHCP Relay-Agent On Cisco Router Step By Step | CCNA Free Cours...
 0:00:17
NanoBytes by Route Genix | Configuring DHCP Relay Agent on Cisco Router
 0:15:37
DHCP server with DHCP Relay Agent in windows server 2008R2
 0:10:09
CCNA LAB 4 : Configuring DHCP Relay Agent on Cisco Packet Tracer | IP Helper-address Configuration.
 0:03:34
Cisco Tech Talk – DHCP Relay Agent Configuration Two Switches and Windows DHCP Server
 0:18:47
DHCP Relay Agent Lab
Комментарии