filmov
tv
Building Your Own Lawn Striping Kit using Boat Rollers

Показать описание
DIY Lawn Striping Kit using boat rollers.
Items used: 2 10x10 “L” brackets $22
4 6x6 “L” brackets $16
11 trailer boat rollers $110
1/4” steel flat bar 2” x 36”, $30
Steel conduit pipe 36”, $15
Boat rollers are from Fleet Farm, Seasense Wobble Roller, 4inch by 3/4
#lawn #lawncare #lawngoals
Items used: 2 10x10 “L” brackets $22
4 6x6 “L” brackets $16
11 trailer boat rollers $110
1/4” steel flat bar 2” x 36”, $30
Steel conduit pipe 36”, $15
Boat rollers are from Fleet Farm, Seasense Wobble Roller, 4inch by 3/4
#lawn #lawncare #lawngoals
 0:05:59
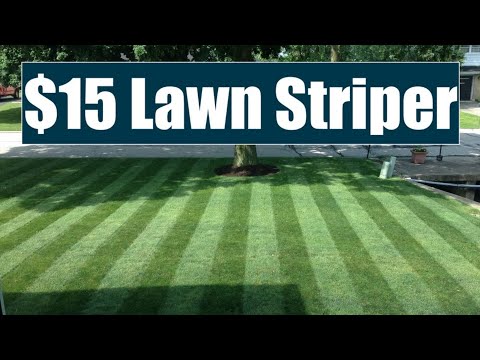
DIY LAWN STRIPING KIT under $15
 0:03:57
How To Build Your Own Lawn Striper | How To Strip Your Lawn |DIY Lawn Striper
 0:07:48
Building the Best (and the Cheapest) DIY Lawn Striper ⚙️ In-depth Guide & Demonstrations
 0:00:31
Easiest DIY Striper That Works!
 0:00:22
Here’s how you stripe your lawn #diy #lawn #tipsandtricks
 0:00:39
How To Make A Lawn Striper
 0:00:16
Easiest Stripe Kit on YouTube
 0:05:21
Building Your Own Lawn Striping Kit using Boat Rollers
 0:02:01
DIY Lawn Striper - How to Stripe Your Lawn for Cheap!
 0:05:09
Homemade vs. Pro Lawn Stripe Kit
 0:00:17
CheckMate™ Lawn Striping Kit Tractor Installation
 0:00:17
Neighbors First Lawn Striping #diylawn
 0:00:16
Making diamonds!!
 0:00:37
Meet My Stripe Kit!
 0:19:54
Best DIY Lawn Striper. How to build it!!
 0:00:14
Cheap striping kit! EGO 1903E-SP doing its thing ! #lawnstripes #stripekit #batterymower
 0:07:13
Stripes like this for $29.95 make your own stripe kit
 0:00:55
Make your OWN STRIPING KIT Cheap for your mower! Find out the total cost at the end. #lawncare #diy
 0:03:15
Best Homemade Striping Kit For Zero Turn Mowers: Cub Cadet Ultima
 0:00:47
DIY Lawn Striping Kit! ($15) Ryobi mower
 0:03:46
Lawn Striping - DIY Striping Kit Build and Demonstration
 0:00:19
Lawn Striping Like A PRO With A Push Mower #lawncare #lawnstripes #grass
 0:01:08
How to make your own lawn striper
 0:08:24
Lawn Striping With YOUR PUSH MOWER
Комментарии