filmov
tv
Arduino oscilloscope build on breadboard

Показать описание
It is an improved version of the oscilloscope using Arduino that I made before, and has the following enhancements.
1. Frequency and duty ratio measurement function.
2. Mounting the circuit on a small breadboard.
(Program code for SH1106 (1.3inch OLED) developed. see add 2)
The circuit scheme and program code are available from follows.
add 1
-- contents deleted --
add 2
Program code for SH1106 available from,
1. Frequency and duty ratio measurement function.
2. Mounting the circuit on a small breadboard.
(Program code for SH1106 (1.3inch OLED) developed. see add 2)
The circuit scheme and program code are available from follows.
add 1
-- contents deleted --
add 2
Program code for SH1106 available from,
 0:03:01
Arduino oscilloscope build on breadboard
 0:03:01
Arduino Build : DigiTAL Oscilloscope DIY Kit 9484 from SparkFun
 0:50:45
DSO 138 Oscilloscope and Arduino
 0:08:14
Workbench Essentials When Starting Arduino! (Beginner Guide)
 0:18:16
【For Beginner】How to start electronics and what item is needed
 0:08:37
how to make mini oscilloscope, using Arduino nano ,dfrobot
 0:02:04
Cheapest DIY oscilloscope $$$
 0:08:02
How to make an Oscilloscope using Arduino | Arduino as Oscilloscope
 0:20:38
Build kits & learn along the way, MitchElectronics Analog Explorer & JYETech DSO138mini osci...
 0:07:04
Membuat OLED Oscilloscope Arduino by RADIOPENCH
 0:00:24
Arduino Make Your Uno Kit
 0:00:08
Zoorlack oscilloscope from Eim Technology #oscilloscope #tool #electronics #diy #arduino #battery
 0:00:18
Harmonic Percolator on the Breadboard & the Oscilloscope (ECE3400: Analog Electronics)
 0:00:16
Amazing arduino project | Check description to get free money.
 0:00:33
DIY Oscilloscope
 0:07:02
Membuat OLED Oscilloscope Arduino Radiopench V3.0
 0:00:13
NEVER buy this JOYSTICK! #electronics #engineering #arduino
 0:05:45
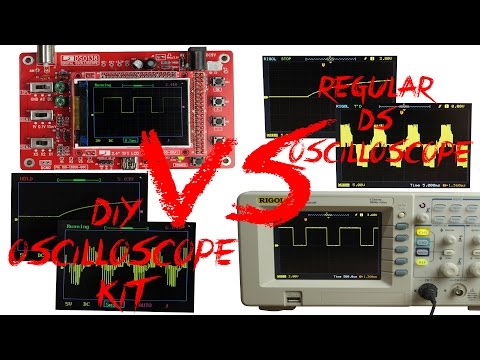
DIY Oscilloscope Kit (20$) VS Regular DS Oscilloscope (400$)
 0:23:15
DSO068 Oscilloscope Kit Build & Review - Electronic Project
 0:10:48
Membuat Oscilloscope Arduino (GOscilloscope) by siliconvalley4066
 0:00:23
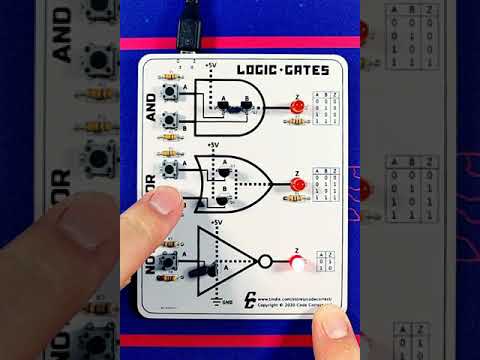
Logic Gates Learning Kit #2 - Transistor Demo
 0:13:31
I tried the Cheapest Arduino Alternative (that Nobody heard of)
 0:11:49
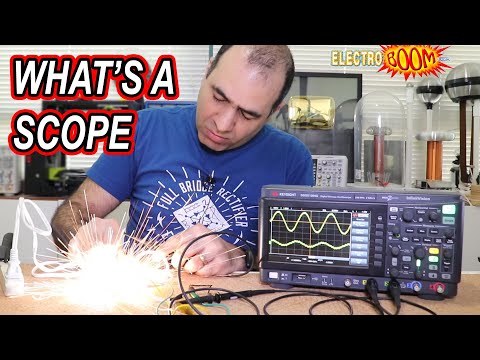
What’s an OSCILLOSCOPE?
 0:05:44
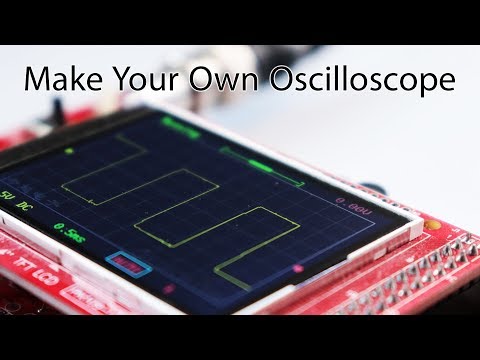
Make Your Own Oscilloscope & Basic Tutorial
Комментарии