filmov
tv
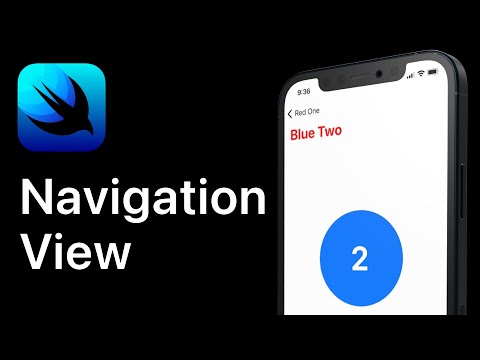
Create a SwiftUI NavigationView with a Timer Delay for Smooth Navigation

Показать описание
Learn how to implement a timer delay in SwiftUI NavigationView, enabling seamless transition to a new view after an animation.
---
Visit these links for original content and any more details, such as alternate solutions, latest updates/developments on topic, comments, revision history etc. For example, the original title of the Question was: Swiftui NavigationView timer delay
If anything seems off to you, please feel free to write me at vlogize [AT] gmail [DOT] com.
---
Create a SwiftUI NavigationView with a Timer Delay for Smooth Navigation
Navigating between views in SwiftUI is generally straightforward; however, sometimes you want to enhance the user experience with animations and delays. Have you ever wanted to show an animation for a set amount of time before automatically navigating to a new view? This is a common requirement, and in this guide, we'll explore how to accomplish this through a SwiftUI implementation.
The Problem: Navigating After a Delay
Imagine you're building an app where you want users to first see an animation (like a loading spinner or a splash screen) before showing the main content of the next view. Instead of relying on the user to click a button to proceed, you want the app to handle it automatically after a short delay (for example, 3 seconds). This allows for smoother transitions and an uninterrupted user experience.
The Solution: Using NavigationLink and a Timer
To implement this feature in SwiftUI, you can utilize a combination of NavigationView, NavigationLink, and a timer. Below, we will walk through the steps and provide code snippets to make this work effectively.
Step-by-Step Guide
Create a State Variable: You'll need a state variable to track when to navigate to the new view.
Set Up the NavigationView: Use NavigationView and NavigationLink to create the necessary view structure.
Implement the Timer: Use a timer to change the state variable after a defined delay.
Here's how you can put it all together in your SwiftUI view:
Code Example
[[See Video to Reveal this Text or Code Snippet]]
Breakdown of the Code
State Variable (pushNewView): This boolean variable is used to control if the NavigationLink should activate or not.
NavigationView: Acts as a container for presenting multiple views in a navigation context.
NavigationLink: This link checks the state of pushNewView. When it becomes true, it will navigate the user to the "Second View."
Timer Setup: The timer is initiated in the onAppear modifier, which triggers the change to pushNewView after 3 seconds.
Key Considerations
Animations: Feel free to replace the Text("First View") with any animation or visual element you want to display during the delay.
Testing: Make sure to test the timer on various devices to ensure smooth navigation and animation without any glitches.
Conclusion
Implementing a timer delay for navigation in SwiftUI not only adds a professional touch to your app but also contributes to a better user experience. By using the simple code structure shared above, you can easily showcase animations or introductory content before transitioning to new views, enhancing your application's usability.
Now you can create seamless navigation experiences in your SwiftUI applications easily!
---
Visit these links for original content and any more details, such as alternate solutions, latest updates/developments on topic, comments, revision history etc. For example, the original title of the Question was: Swiftui NavigationView timer delay
If anything seems off to you, please feel free to write me at vlogize [AT] gmail [DOT] com.
---
Create a SwiftUI NavigationView with a Timer Delay for Smooth Navigation
Navigating between views in SwiftUI is generally straightforward; however, sometimes you want to enhance the user experience with animations and delays. Have you ever wanted to show an animation for a set amount of time before automatically navigating to a new view? This is a common requirement, and in this guide, we'll explore how to accomplish this through a SwiftUI implementation.
The Problem: Navigating After a Delay
Imagine you're building an app where you want users to first see an animation (like a loading spinner or a splash screen) before showing the main content of the next view. Instead of relying on the user to click a button to proceed, you want the app to handle it automatically after a short delay (for example, 3 seconds). This allows for smoother transitions and an uninterrupted user experience.
The Solution: Using NavigationLink and a Timer
To implement this feature in SwiftUI, you can utilize a combination of NavigationView, NavigationLink, and a timer. Below, we will walk through the steps and provide code snippets to make this work effectively.
Step-by-Step Guide
Create a State Variable: You'll need a state variable to track when to navigate to the new view.
Set Up the NavigationView: Use NavigationView and NavigationLink to create the necessary view structure.
Implement the Timer: Use a timer to change the state variable after a defined delay.
Here's how you can put it all together in your SwiftUI view:
Code Example
[[See Video to Reveal this Text or Code Snippet]]
Breakdown of the Code
State Variable (pushNewView): This boolean variable is used to control if the NavigationLink should activate or not.
NavigationView: Acts as a container for presenting multiple views in a navigation context.
NavigationLink: This link checks the state of pushNewView. When it becomes true, it will navigate the user to the "Second View."
Timer Setup: The timer is initiated in the onAppear modifier, which triggers the change to pushNewView after 3 seconds.
Key Considerations
Animations: Feel free to replace the Text("First View") with any animation or visual element you want to display during the delay.
Testing: Make sure to test the timer on various devices to ensure smooth navigation and animation without any glitches.
Conclusion
Implementing a timer delay for navigation in SwiftUI not only adds a professional touch to your app but also contributes to a better user experience. By using the simple code structure shared above, you can easily showcase animations or introductory content before transitioning to new views, enhancing your application's usability.
Now you can create seamless navigation experiences in your SwiftUI applications easily!
 0:05:02
 0:07:05
 0:17:34
 0:16:46
 0:15:06
 0:39:18
 0:08:25
 0:04:33
 0:01:30
 0:42:14
 0:04:09
 0:15:13
 0:05:53
 0:06:10
 0:04:25
 0:11:21
 0:38:47
 0:01:52
 0:04:30
 0:00:18
 0:00:33
 0:39:04
 0:22:16
 0:07:32