filmov
tv
Tutorial - Drawstring bag

Показать описание
Sometimes you just need to have all laid out in front of you and when you are done just pull the strings and the mess is gone! :)
Great for makeup, toys, coloring pencils and crayons.
Great for makeup, toys, coloring pencils and crayons.
 0:07:26
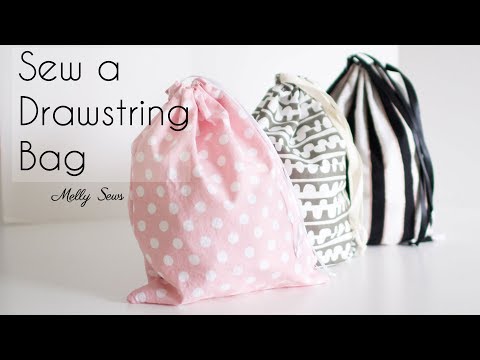
Making a simple DIY Drawstring Bag | Sewing Tutorial
 0:08:54
Erica's SUPER EASY DRAWSTRING BAG // Sewing Tutorial!
 0:06:16
DIY Drawstring Bag // How to Make a Drawstring Bag in 10 minutes
 0:05:21
DIY drawstring pouches, easy sew.
 0:03:27
Easy drawstring bag in 10 minutes! Great for scraps ✂️
 0:07:44
How to make a fully lined draw string bag - Please try this technique. It is very simple method!
 0:05:43
HOW TO sew an EASY drawstring bag? 10 minute SCRAP BUSTER
 0:04:03
Quick and Easy Drawstring Bags with French Seams @MYTKOandMYTKO
 0:30:39
No Pattern needed to make this drawstring backpack! Sewing Tutorial.
 0:15:42
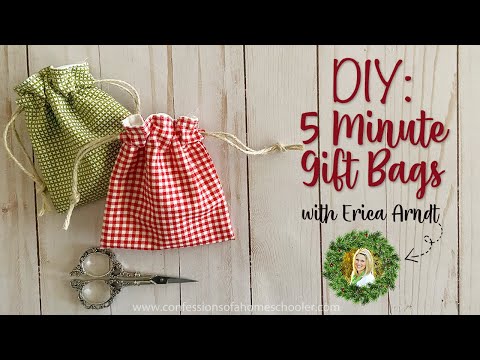
5 Minute Gift Bag // Easy Sewing Tutorial
 0:14:21
DRAWSTRING BAG ~ Learn how to sew this beginner friendly, contrasting bottom drawstring bag.
 0:07:08
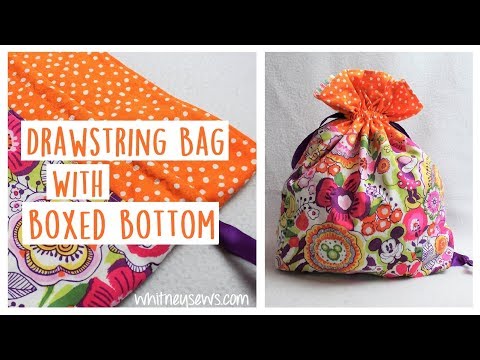
How to make a drawstring bag with lining + easy drawstring bag with boxed bottom(sew very easy)
 0:06:21
🛍️ How to Sew a Cute and Simple Drawstring Bag from Fabric Scraps
 0:18:31
HOW TO MAKE A FULLY LINED DRAWSTRING BAG WITH BOXED BOTTOM - Easy to Follow Tutorial
 0:14:42
DIY Drawstring Lunch Bag | Easy Drawstring Tote Bag Tutorial [sewingtimes]
 0:17:31
How to Sew a Lined Drawstring Bag with Boxed Bottom: Step-by-Step Tutorial
 0:08:47
Lined Drawstring Pouch | Cute Drawstring Pouch Tutorial
 0:15:12
Easy DRAWSTRING Squishy Bag with Handles // TUTORIAL
 0:23:36
How To Make A Drawstring Bag
 0:11:09
Sew a Drawstring Bag in 10 minutes | Beginner Tutorial
 0:05:19
How To Make A Lined Drawstring Bag
 0:16:51
DIY KNITTING BAG | PROJECT BAG | DRAWSTRING BAG | TOTE BAG | BAG SEWING TUTORIAL
 0:14:04
Learn to Sew a Drawstring Bag - Beginner Sewing Project
 0:05:35
EASY Drawstring Bag with Boxed Bottom - Organize your Life | Whitney Sews
Комментарии