filmov
tv
How to make EASY Faux Stained Glass | Step by Step Tutorial

Показать описание
Here's a step by step tutorial on how to turn Dollar Tree picture frames into faux stained glass 😍
This is a great project for spring/Easter that kids and adults will both love! 🎨
#easycrafts #eastercrafts #tutorial
What you will need:
~Picture Frame- I used two different sizes from Dollar Tree
~Simple pattern (can be hand drawn or printed- see below)
~Craft paints (I used glass paint but you can use any water based paint you have!)
~An old paint brush (Don't use your nice brushes when painting with glue!)
*As an Amazon Associate I earn from qualifying purchases
==========================================================================
Project Steps:
1. Clean off glass with rubbing alcohol to make sure glue and marker will stick.
2. Put your pattern inside the frame. Taping it in place so it doesn’t move around can be helpful.
Use permanent marker to trace your pattern onto the FRONT of the glass (the side facing out of the frame).
3. Take pattern out of the frame and remove glass
4. Turn glass around so that the BACK side of the glass is facing up. The lines you traced should be on the side facing down.
5. Take a small amount of clear school glue and mix a drop (very small) of water based paint (or food coloring) into the glue.
6. Take your old flat brush and brush on a thin layer of the glue/paint mixture onto the glass where you want your pattern to be colored. You should be painting it on to the opposite side that your pattern is traced on.
7. Continue to fill in your pattern until all the color is where you want it to be.
8. Let glue/paint dry
9. Flip glass around so that the lines of your pattern are facing UP.
10 Decide which method you want to use for your lines. 1. Permanent marker or 2. Glue
11. The quickest method is to take your permanent marker and just retrace your lines to make them thicker and clean it up. *tip you can use a cotton swab with rubbing alcohol to erase lines or “oops” as needed”
12. The glue method is taking some white school glue (I would use a bottle only half full) and mixing black acrylic paint into the bottle.
13. Then take the bottle and carefully squeeze out the glue along your lines. This needs to dry over night but will turn into a thinker raised pattern…some people have used puffy paint if they want the lines to really stick out!
14. Once the lines are dry put the glass back into the frame with the lines facing out.
15. As a final step I took some crinkled tin foil and covered the back of the frame to give the final effect of stained glass. I suggest watching the video to the end to see how cool this really looks because it changes the entire look!
===========================================================================
My goal is to simplify painting and crafting techniques for beginner artists!
For more tutorials and tips follow us on:
 0:06:48
Faux Rice Paper/ Simple and Easy DIY @yesterdaystomorrows
 0:00:32
Easiest fake french braid ✨
 0:00:56
How to Make Lightweight Faux Rocks for Your Yard
 0:00:54
this faux loc DIY is a GAME CHANGER! 🤯 would you try this? 💕
 0:00:37
How to: VIRAL Faux Braided Ponytail 🎀
 0:00:30
EASY FAUX FRENCH BRAID HACK
 0:01:33
How To Do Faux French Braids
 0:00:30
How to Make Easy and Affordable DIY Faux Wood Beams
 0:00:55
Minecraft fake paper nails💅 #art #craft #minecraft #minecraftshorts #nails #papernails #game #easy...
 0:00:14
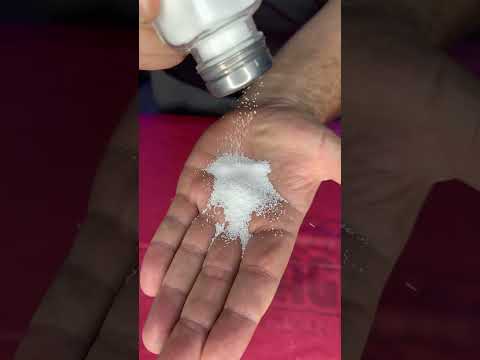
Make fake snow for your holiday crafts! #shorts #hacks #diy #recipe #fakesnow #crafts #holiday
 0:02:41
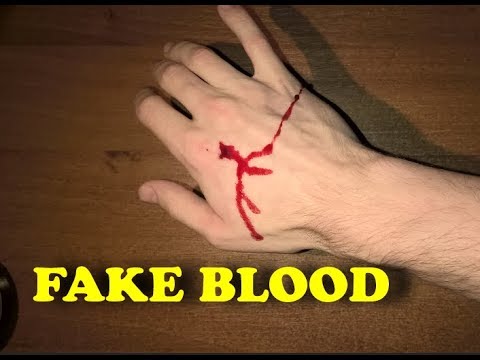
How to make FAKE BLOOD at home. VERY SIMPLE WAY
 0:01:00
How to make a SUMMER WREATH with faux florals and a grapevine. DIY wreath tutorial #wreathdiy
 0:00:59
How to install faux locs | Beginner Friendly
 0:00:16
Easy fake dessert tutorial for props or decoration!
 0:00:15
Fake Bangs Tutorial 💇🏻♀️ #shorts #hair #hairstyle #hack
 0:00:32
DIY Faux Flowers for the Front Porch 🌺 #amazonfinds #founditonamazon #amazonhome #flowers
 0:00:56
EASY INDIVIDUAL CROCHET FAUX LOCS
 0:00:13
DIY Fake Snow 😮❄️
 0:00:12
Backyard Makeover (wip) - easy faux vine wall / plant wall / patio privacy fence #backyardmakeover
 0:00:16
how to make fake nails at home l diy fake nails
 0:00:27
how to make fake nails
 0:01:30
DIY Faux Roman Shades
 0:00:25
How To Do Faux Calligraphy...!😎 #shorts #calligraphy
 0:34:24
DIY Faux Rice Paper Tutorial - Easy!!!
Комментарии