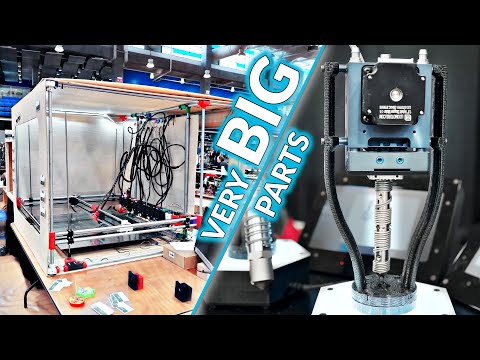
Arduino MSLA Printer - FINALLY! DIY Project

preview_player
Показать описание
Project and PCBs: Not yet ready!

🔥Finally, this project is geting close. I have the PCBs and the parts form y Arduino MSLA printer and this time it will be a lot bigger than the prototype.

🔀LINKS
-------------------------------------
Tutorial here: Not Yet Ready!

🤝SUPPORT
-------------------------------------

00:00 Intro
08:51 Thank You

Like share and subscribe to motivate me. Thank you

#MSLA
#tutorial
#Arduino
Рекомендации по теме
Комментарии
Автор

I love this project! It's amazing that you're thinking of disassembling a TFT display. I got a lot of inspiration from this video.

방구석전자
Автор

You also might want to put a passive heatsink or some kind of active cooling on the LED board. I have a feeling the LEDs may have a somewhat short lifespan depending on how hard you are driving them. Of course, I could be wrong. I don't know for certain. Very neat project though.

gvii
Автор

Very good project, be careful stepper current won't make it hot enough to deform the PLA.

You might also want a fan blowing across or under the LED's I see an opening in the case already, heat will degrade the LCD along with the UV, but even faster. UV might also quickly degrade the interior PLA, makes it brittle and crumbles.

For keeping you project going, just solder mod wires from the incorrect input-only pins, to the output pins needed.


Consider trying to switch to a mono-display or also supporting one as an option, I understand finding a common module is more practical here, but could make it a fairly competitive project as mono-displays have exposure-time advantages.

Roobotics
Автор

Please continue this project....Awesome work by the way.

voc
Автор

@04:10 Can't say I'm super sold on _that_ way of mounting the LCD... Here's to hoping this is only meant to be a prototype mounting solution in case something breaks... For a permanent / final solution I'd be expecting something more akin to a frame supporting the LCD all around instead of just the corners thus better distributing the load coming from the liquid trapped between the Build Platform and the FEP creating a bulge during the early stages 🤔

Duraltia
Автор

Looks great. Those LEDs might need some kind of diffusion though for more consistent lighting of the layers via the screen.

kesor
Автор

I can't believe another episode's out! I remember checking back every few weeks after I saw the first arduino msla video, hoping for a new part. Great video as always!

TommyHoughton
Автор

wow what a beutifull project. i love seeing those smal sla printers. keep the work up man! love your videos. greetings from the netherlands

hawwin
Автор

I've been thinking of doing the same thing!
even bought some tft displays where I took one apart but never got around to test it, love to see someone else is going at it

Joshplv
Автор

What a fantastic project. Can't wait for part 2

andypodmore
Автор

Wow that’s a very complex project that you’ve put a lot of work into. Looking forward to seeing the final prototype. Great work👌

leehewitt
Автор

Been waiting a long time for this video. Looking forward to the end result.

robbjosh
Автор

Wouldn't it be better to use a Monochrome Display? Now you loose the Red and Green channel and I assume the light from the LED can only pass the Blue color channel? With the RGB-Display you would not illuminate the whole surface, only the spots where the blue light is transmitted? I am I missing something, or were you able to remove the RGB-filer (bayer filter) or is the UV light anyway blocked and transmitted (depending on the state of each pixel) by all RGB-pixels?
Still a very cool Project!

xjohnny
Автор

Nice! I would maybe add a layer of some light dispersing material between the LEDs and the screen, so that the light that gets to the screen is more uniform and less dotted.

adriabruicortes
Автор

I went back and watched the first vid again, I really like that you have a method of doing this using Arduino. I recently started trying to ressurect my broken Gen 1 AC Photon and the only common option is using NanoDLP. It is powerful software but the documentation is not great, and it is certaintly aimed more at running a machine over a network. I would prefer something that used electronics and software you would find for FDM printers and I am fine with plugging a usb or SD card into it to use it (although network/tether control is good too) Sending the images to a display adapter that can output hdmi or dvi would open up the possibility to use old monitors for MLSA machines and modded DLP projectors. Great work anyway, keep it going!

Furyer
Автор

I'm enjoying seeing an approach to how to make one of these printers. I'm probably going to stick with my prusa mini printer. But I still enjoy watching your approach to making a 3D printer. I enjoy the opportunity to learn more electronics. It is definitely a complex project. I like the fact you used an ESP32 (my preferred board these days versus an Arduino unless I'm rebuilding someone else's project where they used Arduino). Thank you for taking the time to create this content Andrei.

JonathanDeWitt
Автор

You will need lens to focus the UV. I've used 60deg lens with reflective cones on my build couple years ago. Aligning led matrix in hexagonal pattern can get on more even setting of the resin. btw, driving all staff on a raspberry pi with octoprint is more reasonable imo. in my project, i switched off some led selectively in shadow area, can be done on python script in few lines of code.

JeffLeung
Автор

Ty for sharing the bumps you experience along the way.

chriseaton
Автор

I'm excited for the final project and the test. Keep it going 💯

malik_chaabane
Автор

Awesome project and build. Looking forward to its first test print

peterm