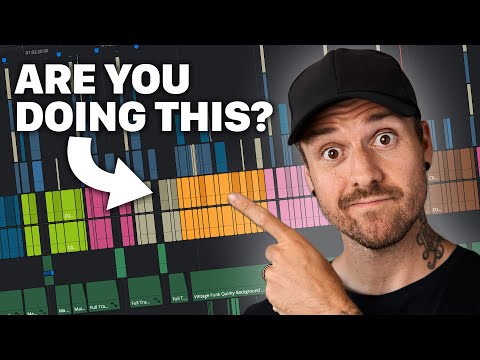
These Editing Tips Will Save You HOURS in Resolve

preview_player
Показать описание
In this video we're talking about 2 editing tricks that can and will save you hours when working in DaVinci Resolve. Editing is a huge part of filmmaking so finding a way to speed up your workflow easily can make the process a lot more enjoyable and that's what these tips are for.

Follow me on:

🎵 Music licensing platforms I use:
($70 off your first year with code SAVE70)

Another way to support the channel:

Disclaimer:
Some of the links above are affiliate links, meaning I get a small compensation (at no extra cost to you) when purchases are made. It's a good way to support the channel and help keep the lights on :)
Рекомендации по теме
Комментарии
Автор

Holy smokes. I have edited about 120 videos in Resolve now, using Blade, select, delete/backspace, ripple, slide blahblahblah and after seeing this and simply using 1, 2, 3, 4 -- I now demand 300 hours of my life back from The Universe. I didn't even realize there was a built-in Pro Tools template. I'm such a noob. Thank you George, I do not say this lightly, you just changed my life ❣

VisionsMusicGroup
Автор

I will now be adopting this method. I've been using Davinci for about a year now, and understand the importance of an organized workflow... but have still neglected it, and now I'm at the part where everything is messy lol.

The stacked timelines thing is huge for me, so I appreciate it! :)

Thanks George

iPlayiOS
Автор

I enjoy editing more than I imagined. How you all grasp all the details on all the raw footage is beyond me. Organizing all your thoughts and keeping notes in your head is mind blowing in itself.
What I do...is simply record fewer attempts, giving me fewer choices when I bring the SD cards home to edit. tHanks for the videos!

Dancing_Alone_wRentals
Автор

Genuine, straight to the point and no annoying acting. Appreciate this.

project_nomad
Автор

3:11 if you would set „Start To Playhead“ to „Q“, „Split Clip“ to „W“ and „End to Playhead“ to „E“ yo can get the same result just even faster without the unnecessary selecting the clip with the mouse and then deleting the selected parts. Just hit „W“ where you want to split the clip, move forward to the point where you want everything to be deleted until the last cut and hit „E“ - way faster! :)

SebastianFriedrichVisuals
Автор

Was just looking for the equivalent to the premiere Q/W shortcuts, and you cleared that up and gave me the stacked timeline tip in addition. Much appreciated.

PhilKnall
Автор

Definitely sticking around. Keep them coming George. Thank you for making the effort to show these tips.

SonnyLMugambi
Автор

This is so good! I've been trying to think of ways to speed up my workflow, and you delivered multiple tips in a concise and professional video. I appreciate that!

turningupdb
Автор

The tutorials that teach the basics of video production are great, but tips like these are the real game changers! :D Thanks for sharing your "secrets" George!

saxumnatur
Автор

Stacked timelines! 🤯Had no idea about that. The second tip is the one I always try to teach people once they are comfortable with the idea of cutting and trimming because it saves so much time! Great video George!

bendesignsmedia
Автор

Thanks for this, George! I watched this a while back and learned about the 1 2 3 and 4 shortcuts as well as stacked timelines, but I just revisited this and added the stuff about organizing timelines and going through footage to my "arsenal." Much appreciated!

SidelineFilmz
Автор

Thank you George! Such a great workflow! I really appreciate you taking the time to share this. Stacked timelines--- mind blown!

mattalber
Автор

I was actually already doing the second half, but the first tip there could really make my life easier. Since starting YouTube in 2020 I have been all self taught and this year my resolution to myself was to learn better editing habits. Currently I dump all of my clips into the media pool, mark in/out in the clip monitor and pull down to a single time line. I find that I also often miss key moments of content or a flow because I am not watching everything at once. Watching how you take advantage of multiple timelines is going to change my entire process. I cannot even begin to think about how much time you have saved me going forward.

PenguinOutdoors
Автор

Great tips - I haven't seen anyone else explain the multi-timeline workflow before so that was pretty interesting. Those edit bindings are a nice super-set of what I have so much appreciated! You have a new subscriber 😀

KenRossPhotography
Автор

These are great tips! I always dread cutting clips short & want to get to the fun part with transitions so those shortcuts will definitely be up there on my to-do list of modifications I need to do moving forward. The multiple timeline clips are excellent as well, I usually just play all the individual clips & drag them onto my working timeline, I wasnt even aware that you could have multiple going at the same time haha. Thanks for making this video, you potentially have saved me about a gallon of coffee & part of my sanity. Cheers!

Merrlin
Автор

amazing video. something people really seem to overlook when staying motivated is workflow and this helps a ton. thank you

lrdhsy
Автор

Hey, awesome tips, especcialy for the fast cutting.
For a large No of clips, I would even recommend a tip 0 before your tip No 1 which emulates what is done on large film production sets every night with the 'diaries' (the many clips being shot during the day). There is even a SW for this type of work, Assimilate Scratch - but we can emulate it a bit with Davinvi Resolve:

Create a new timeline and then go to the cut page, select the bin with your clips (you may have more than one bin with clips for larger projects), and take advantage of the viewing mode called 'Source Tape'. This will make all clips of a bin being showed in the view window as if it was one large clip - and you can navigate ('scratch') through them as if it was one clip.

Then take advantage of the playback keys on your keyboard for 'scratching' through all the clips:
- 'j' = backwards
- 'k' = stop
- 'l' = forward
Pressing 'j' or 'l' multiple times will speed up playback for backward or forward.

To select the part you feel good to go into the timeline just mark the beginning by pressing 'i' (= in) and 'o' (= out), then select via the mouse either smart insert or append insert to bring the selected part into the timeline - this works even over clip boundaries.


After this initial 'Scratch', your tips are awesome to speed up things from there - will give it a try asap.

joyoffilming
Автор

I was almost going to stop using resolve due to the torture that is having to swap between razor and pointer (A & B) slowing everything down and being less than 100% accurate thank you so much for making this video showing the one thing I desperately needed to keep going with this program. The cut to start and end was just a bonus. I’m legit keen on getting back to work. 🎉

DrRamnac
Автор

Thank you George, I have never seen the timeline stacking method before. This is a really fast way to get through an edit. I appreciate you taking the time to share them, I will re adding this technique to my work flow.

hamradiowithkevin
Автор

Excellent help! Thank you for your generous kindness. I will look at other videos of yours.

deborahherman
join shbcf.ru