filmov
tv
Flashing an In Betweenie, Part 2: Jambs and Head

Показать описание
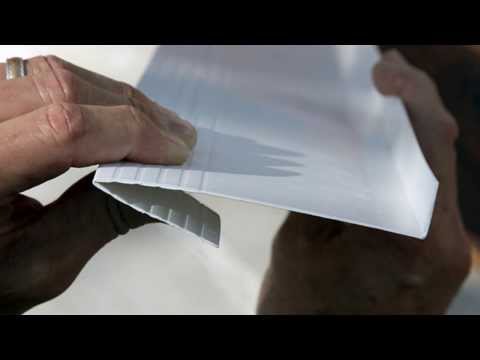
With the sill pan flashed, Ben turns to flashing the jambs of a window opening in this passive house retrofit
First he tapes the slits in the WRB that accommodate the sill pan, and tool it in place.
Now he can fill in the jambs with leftover WRB, because it is a lot less expensive than the wide flashing tape that he used on the sill.
Tap those staples home and tape the seams.
This kind of a spoiler alert: there is a lot of taping in this video.
Most membranes and tapes are pressure sensitive, so they must be tooled when they are applied. If you don’t use a roller, they may not stick.
You can use a J-roller, or the Volkswagen Roller that Ben bought on eBay.
It is not really made by Volkswagen, and he did not get it on eBay, it is made by FastCap.
Tape the top flap, roll it, and cut some more tape.
With the outside corner taped, he finishes off with a couple of bow ties in the top corners. Here’s how to make them:
Ben: "Use about a four-inch wide piece of the membrane, which is 12 inches long. Split it into two pieces that are about 4x6.
The next step is to make some—approximately— 30 degree cuts from near the middle of the piece to to each corner.
Now you've got a section right here that you have to connect to cut out the excess.
The membrane is sticky, making the bow ties tricky to install without sticking them to themselves or—
Ben: without sticking to your beard in the process.
Another spoiler alert: There is a lot of J-rolling in this video, too. But we cut out a lot more than we included, so … yeah.
Cut the WRB in a plumb line where the inside of the window will be so you can make a clean transition between wood and the WRB that will be sealed with tape.
Ben: So we don't have any infiltration that can come from behind out WRB and this is also functioning as a secondary air barrier ...
The primary air barrier is the Zip System wall sheathing, with seams taped. Sealing this inner edge with tape completes the air barrier system.
The tape stops at the outside of the window, not the outside of the wall. This allows a drainage path for water to escape. Air leaks are stopped at the inner edge of the WRB with tape.
That is then rolled tight.
With the window flashed and taped tight, it’s time to set some windows. Which we’ll cover in the next video.
—Ben Bogie owns Built to Last Design & Build, LLC, in New Milford, CT
Subscribe to Pro Trade Craft's YouTube channel for regular updates
 0:04:08
Flashing an In Betweenie, Part 2: Jambs and Head
 0:04:02
Flashing an 'In-Betweenie' Window, Part 1: Sill
 0:03:25
In-Betweenie Window Installation (part 3): Put the Window In the Hole
 0:01:35
Pan Flashing an Innie Hybrid Approach
 0:08:08
Изоляция окон лентами pro clima, монтажный шов на окнах
 0:01:10
Window flashing - Vycor over liquid applied
 0:01:50
Window flashing detail.
 0:10:49
Heavy-Duty Window Flashing by Chris Corson Using Extoseal Encors
 0:02:42
Superinsulated Sunroom (2): Backing Out an Outie Window
 0:00:29
SIGA Haga terrein, The Hague, Netherlands
 0:12:47
Recess Window Installation_Fortifiber products_How to-BEST Practices
 0:01:18
Blueskin peel and stick
 0:03:30
Universal Sill Pan
 0:02:21
Christine Williamson: Is it Time to Retire the Metal Sill Pan | BSFC | AIA
 0:44:34
Integrated Truss House - How to install inset windows
 0:04:53
Window Installation Positioning
 0:01:42
CSS : how do you workaround this inconsistency between IE, Firefox and Chrome
 0:13:33
How We Install Walls In Our Camper Van | Window Frames | Episode 9 | DIY VAN BUILD
 0:07:41
How To: Instaling a Recessed Flanged Window
 0:09:15
Sheeting, Felt Paper, French Doors and Window Install
 0:01:26
Window opening
 0:00:27
Banananan tapes to door window car
 0:05:04
Detailing Windows on a High-Performance House
 0:05:12
What is Flashing Tape? 😎💦
Комментарии