filmov
tv
Geometry Nodes and UV Mapping in Blender
Показать описание
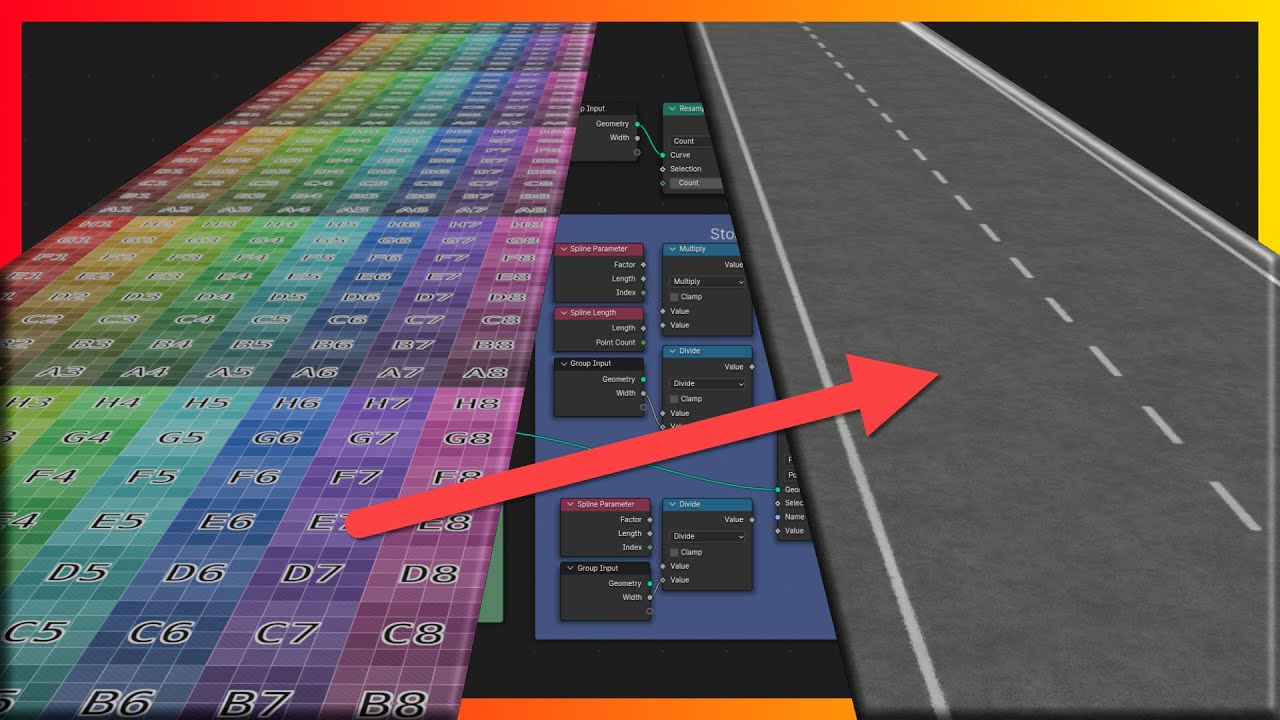
In this video, I demonstrate creating a procedural road generator using Blender's geometry nodes, covering the setup of the curve, UV mapping, and texture alignment. Highlights include creating an external control for road width, a diagnostic tool for curve length, and offering a free tool download on Gumroad for enhancing your Blender toolkit.
🔗 LINKS MENTIONED:
🍿 WATCH NEXT:
MY CURATED COURSES
MY DESK TOOLS & GEAR
💻 THE PC:
MY *ON THE GO* TOOLS & GEAR
MY OTHER SOCIALS:
WHO AM I?
Hi there! 👋 I'm Mike, and I'm relatively new to YouTube. I've been teaching Blender professionally for over 10 years, and I'm excited to share my knowledge with the community here. On this channel, you'll find full guides, courses, and tools to help guide, reassure, and educate you on your Blender journey. Let's create something amazing together!
⌚️Timestamps:
PS: Some of the links in this description are affiliate links that I get a kickback from 😜
In this video, I dive deep into the process of creating a procedural road generator using Blender's geometry nodes. It's been quite a journey, and I’ve even added a new tool to my asset pack, which you can download for free from Gumroad. I start by setting up a basic curve, then jump into geometry nodes to create a road mesh from that curve. This involves setting up the workspace for optimal use and ensuring the geometry aligns correctly.
I demonstrate how to generate and manipulate UV coordinates for our road texture. By capturing and storing attributes along the curve, I create a UV map that properly aligns with the generated geometry. This includes setting up parameters, resampling the curve, and applying a material to see the UV map in action.
As we progress, I tackle challenges such as stretching and scaling the texture uniformly. This requires some mathematical adjustments and careful alignment of the curve. I also show how to use the Shader Editor to fine-tune textures and ensure they map correctly across the road mesh.
One highlight is creating an external control for the road width, making the tool more versatile and user-friendly. This allows for easy adjustments without diving back into the geometry nodes each time.
Towards the end, I introduce a diagnostic tool I developed, which displays curve length information on-screen, aiding in precise adjustments and troubleshooting. This tool is also available for download and can be added to your Blender asset library.
If you're interested in procedural generation, UV mapping, or enhancing your Blender toolkit, this video is packed with insights and practical steps. Have you tried creating procedural textures in Blender? What challenges did you face?
 0:10:36
UV Maps in Geometry Nodes | Blender 3.5
 0:20:45
Geometry Nodes and UV Mapping in Blender
 0:04:50
PROCEDURAL UVs
 0:07:20
Geometry nodes: UV map in curve objects
 0:06:42
How to create proper UV Maps with Geometry Nodes in Blender
 0:11:49
Blender Tutorial: Procedural UV Unwrapping with Geometry Nodes
 0:17:09
Unwrap Your UVs in a Flash with Blender's Geometry Nodes
 0:02:39
Geometry Nodes Fields Quick Tip: Working with UVs on Instances | Blender 3.0 Geometry Nodes Tutorial
 0:11:16
Wireframe - Blender Geometry Nodes Tutorial - Procedural UV Maps
 0:00:18
realize instances, maintain uv data blender geometry nodes (broken in 3.5)
 0:08:45
How to make Procedural UVs for Platonic Solids in Geometry Nodes | Blender Tutorial
 0:00:24
Blender 3.3 Alpha : Geometry Nodes Gets UV Generation Feature
 0:08:20
Blender Tutorial: Use Image Texture on Simulations
 0:18:25
Simple UV Retopology using Geometry Nodes in Blender 4.0
 0:00:11
Using Blender Geometry Nodes to Manipulate UV Mapping
 0:00:56
Blender Geometry Nodes Toolset Pack
 0:08:45
Houdini Unwrapping Techniques: The Basics
 0:18:47
Blender 3.4: Procedural creation of a wall with automated UV unwrapping and texturing
 0:06:51
Texture Mapping Nodes in Blender 4
 0:03:37
Geometry Nodes Curve Mapping
 0:12:12
LIVENODING First Look Geometry Nodes UV Unwrap and Packing
 0:24:55
Textures Don’t Work on Curves—How to Fix It (Blender Tutorial)
 0:04:22
UV transfer to different topology
 0:02:01
Blender Geometry Nodes : Box UV Mapping
Комментарии