filmov
tv
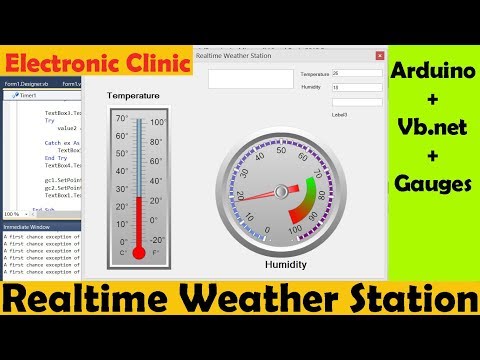
Arduino Weather Station dht11 | Display Sensors Data on Gauges using Blynk Nodemcu esp8266 wifi

Показать описание
Download Circuit Diagram and Programming:
Subscribe to my New YouTube Channel, if you want to watch my videos in Hindi/Urdu
nodemcu board and library setup:
Nodemcu power supply making:
learn how to make a schematic and PCB:
Relay driver circuit design calculation:
Project Description:
*****************************
1. Nodemcu ESP8266 wifi module.
2. 5x7 cm Vero board
3. 470uf capacitors, we will need two of these.
4. Female dc socket
5. 7805 voltage regulator, the first leg is the input, the middle one is the ground and the third one is the output.
6. Led, the longer leg is the anode, and the shorter one is the cathode.
7. 330-ohm resistor
8. Female headers
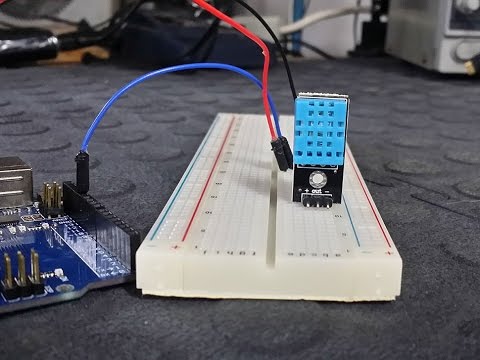
9. Dht11 temperature and humidity module and
10. Some jumper wires.
These components can be purchased from Amazon, the components purchase links are given below.
*****************************
Purchase links for Components with the best prices.
Arduino Nano USB-C Type ( recommended):
ESP32 WiFi + Bluetooth Module for iOT Projects (recommended), more IO pins, improved speed, and supports a Lipo Battery:
DHT11 Temperature and Humidity Module:
Nodemcu ESP8266 WiFi Module:
LM7805 Voltage Regulator:
470uf capacitor:
330-ohm resistor:
DC Female Power Jack:
Female Headers:
Male Headers:
LEDs:
Other Must-Have Tools and Components:
Top Arduino Sensors:
Super Starter kit for Beginners
Top Oscilloscopes
Variable Supply:
Digital Multimeter:
Top Soldering iron kits: "best"
Top Portable drill machines:
Jumper Wires:
3D printers:
CNC Machines:
Electronics Accessories:
Hardware Tools:
DISCLAIMER: This video and description contain affiliate links, which means that if you click on one of the product links, I will receive a small commission. This helps support the channel and allows me to continue to make videos like this. Thank you for your support!
****************
Follow me on Facebook:
Subscribe to my New YouTube Channel, if you want to watch my videos in Hindi/Urdu
nodemcu board and library setup:
Nodemcu power supply making:
learn how to make a schematic and PCB:
Relay driver circuit design calculation:
Project Description:
*****************************
1. Nodemcu ESP8266 wifi module.
2. 5x7 cm Vero board
3. 470uf capacitors, we will need two of these.
4. Female dc socket
5. 7805 voltage regulator, the first leg is the input, the middle one is the ground and the third one is the output.
6. Led, the longer leg is the anode, and the shorter one is the cathode.
7. 330-ohm resistor
8. Female headers
9. Dht11 temperature and humidity module and
10. Some jumper wires.
These components can be purchased from Amazon, the components purchase links are given below.
*****************************
Purchase links for Components with the best prices.
Arduino Nano USB-C Type ( recommended):
ESP32 WiFi + Bluetooth Module for iOT Projects (recommended), more IO pins, improved speed, and supports a Lipo Battery:
DHT11 Temperature and Humidity Module:
Nodemcu ESP8266 WiFi Module:
LM7805 Voltage Regulator:
470uf capacitor:
330-ohm resistor:
DC Female Power Jack:
Female Headers:
Male Headers:
LEDs:
Other Must-Have Tools and Components:
Top Arduino Sensors:
Super Starter kit for Beginners
Top Oscilloscopes
Variable Supply:
Digital Multimeter:
Top Soldering iron kits: "best"
Top Portable drill machines:
Jumper Wires:
3D printers:
CNC Machines:
Electronics Accessories:
Hardware Tools:
DISCLAIMER: This video and description contain affiliate links, which means that if you click on one of the product links, I will receive a small commission. This helps support the channel and allows me to continue to make videos like this. Thank you for your support!
****************
Follow me on Facebook:
 0:05:40
Arduino Weather Station || dht11 Temperature & Humidity sensor
 0:04:40
Weather Station using Arduino Uno & DHT 11 Sensor // DHT 11 Humidity & Temperature Sensor P...
 0:00:13
Arduino weather station with OLED display and DHT22 sensor
 0:14:57
DHT11 Temperature and humidity sensor using arduino with LCD disply tutorial
 0:05:39
Simple Arduino Weather Station | Arduino Weather Station dht11 | diy weather station
 0:05:17
DHT11 Temperature & Humidity sensor with Arduino - Tutorial
 0:17:15
Arduino Weather Station dht11 | Display Sensors Data on Gauges using Blynk Nodemcu esp8266 wifi
 0:04:49
Arduino Weather Station Based on DHT11 - for Beginners
 0:03:07
how to make an arduino weather station with DHT11 temperature and humidity sensor
 0:04:45
Arduino Weather Station using DHT11 & LCD Shield
 0:05:34
DHT11 Temperature and Humidity Sensor Displaying on MAX7219 using Arduino
 0:17:58
Arduino | Smart weather station DHT11 Temperature & Humidity sensor Arduino
 0:11:15
How to Use a DHT11 Humidity Sensor on the Arduino - Ultimate Guide to the Arduino #38
 0:05:44
Temperature and humidity sensor Dht 11 with i2c LCD display
 0:05:17
How To Make Weather Station Using Arduino UNO & DHT11 Sensor
 0:00:20
DIYmall DHT11 Temperature Sensor 1602 IIC LCD with Arduino Tutorial
 0:04:36
DHT11 | Arduino weather Station | Temperature And Humidity
 0:08:12
DHT11 Temperature & Humidity sensor with Arduino - Simple Weather Station
 0:05:46
Arduino Weather Station || Temperature & Humidity Sensor || DHT-11 || Wireless Weather Station
 0:09:26
Arduino Weather Station Using BMP280-DHT11 - Temperature, Humidity and Pressure
 0:57:17
Arduino Tutorial 51: DHT11 Temperature and Humidity Sensor with LCD Display
 0:02:00
Arduino Weather Station (using DHT11/ DHT22) || VIKRAM TECH
 0:32:28
Arduino Weather Station dht11 | Display Sensors Data on Gauges vb.net | temperature and humidity
 0:05:06
🌡️🌤️Arduino Weather Station ll DHT 11 Temperature Humidity Sensor in tamil
Комментарии