filmov
tv
Raspberry Pi 4 Cooling

Показать описание
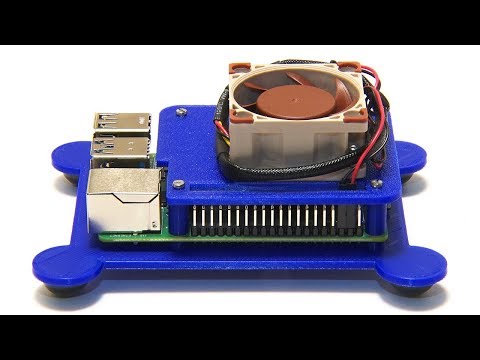
Raspberry Pi 4B cooling solutions and sysbench stress tests, including running the Pi 4 in its official case, in a Pimoroni Coupe case with a heat sink, and with a 40mm Noctua fan in a custom, 3D printed mount.
The Pi 4 Pibow Coupe 4 case is here:
And the Pimoronic 40x30x5mm heat sink is here:
(affiliate links). But do shop around for the best alternatives. You will need a hacksaw to cut these to size.
The STL files for my 3D printable mount can be found on Thingiverse here:
To put everything together, you will need 4 x M2 25mm bolts an 4x M2 nuts to fix the Pi in the mount (or 20mm bolts if you just use the top portion), as well as 4 x M3 15mm (or longer) bolts and 4 x M3 nuts to position the fan (well, you could get away with just two nuts and bolts).
#RaspberryPi #Cooling #ExplainingComputers
 0:15:37
Raspberry Pi 4 Cooling
 0:16:39
Raspberry Pi 4 Passive Cooling
 0:06:37
#288 Raspberry Pi 4 Coolers: Which one is best? (Quickie)
 0:11:41
Great Raspberry Pi 4 Cooling solution
 0:14:38
Raspberry Pi 4: More Active Cooling!
 0:06:32
Raspberry Pi 4 Dual Cooling Fan Aluminum Alloy Case
 0:05:57
iUniker $10 Pi4 Case With Fan & Heatsinks
 0:06:27
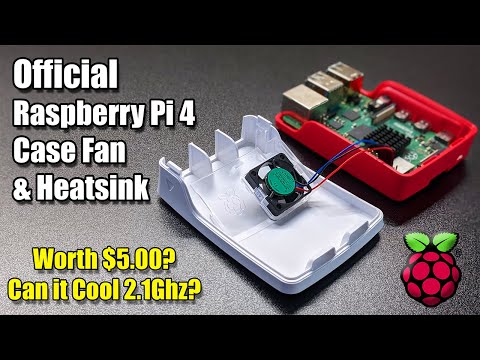
Official Raspberry Pi 4 Case Fan and Heatsink Review Is It Worth $5.00
 0:08:27
Thermoelectric Cooler On The Raspberry Pi 4! Super Low CPU Temps With Science!
 0:07:30
Cooling Raspberry Pi 4
 0:03:34
Review: ICE Tower Cooling fan for Raspberry Pi 4
 0:08:08
Another insane cooler for Raspberry Pi 4!
 0:13:22
How to Cool Down a Raspberry Pi 4
 0:06:45
Passive cooling for the Raspberry Pi 4
 0:08:52
Raspberry Pi 4 B: Heat Sink Testing
 0:02:57
How to Install the Raspberry Pi 4 Case-P173/P330/P373 with Copper Heatsink Version?
 0:00:34
LABISTS Raspberry Pi 4 Case with Dual Cooling Fan
 0:15:17
Raspberry Pi 5 Cooling: Official Case vs Geeek Pi Heatsink Case
 0:14:32
Raspberry Pi 4 Stress testing - Is this the best way to cool a raspberry pi?
 0:08:03
Low Profile Ice Tower Cooler - The Ultimate Raspberry Pi 4 Cooler?
 0:06:20
Raspberry Pi Case Fan - How Loud is it?!
 0:01:32
ICE Tower Cooling Fan Low Profile Unboxing - Cut Raspberry Pi 4 Heat in HALF!
 0:02:13
How to Use Geekworm Design Embedded Heatsink with Cooling Fan for Raspberry Pi 4 Model B?
 0:05:21
Raspberry Pi 4 NEEDS A FAN - How to Install CanaKit Heatsink and Fan
Комментарии