filmov
tv
JavaFX Scene Builder Tutorial 39 - TableView and TableColumn

Показать описание
JavaFX Scene Builder Tutorial 39 TableView and TableColumn
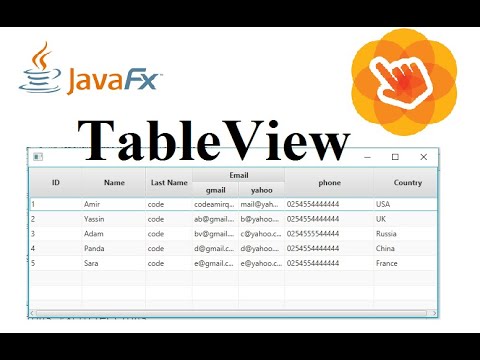
The Table View control will be used to display the list of issues.
1 - In the Controls section of the Library panel, select Table View. Drag and drop it above the Split Pane (Vertical Flow) element's divider line
2- From the Menu bar, choose Modify and then Fit to Parent.
3 - Click the Code section of the Inspector panel and select table from the fx:id field's drop-down list of available instance variables.
4 - Set the properties of the two columns in the table view.
In the Hierarchy panel, select the row for the first TableColumn component under the row for the TableView component. In the Code section of the Inspector panel, select colName from the fx:id field's drop-down list.
Click the tab for the Properties section and set the Text property to Name:.
Back in the Hierarchy panel, select the row for the second Table Column component. In the Code section of the Inspector panel, select colStatus from the fx:id field's drop-down list.
Click the tab for the Properties section again and set the Text property to Status.
5 - Add another column to the table.
Select the Table Column control from the Library panel. Drag and drop it inside the table view in the Content panel. The new column is added to the right of the Status tab.
In the Code section of the Inspector panel, select colSynopsis from the fx:id field's drop-down list of available instance variables.
Click the tab for the Properties section again and set the Text property to Synopsis
6 - From the Menu bar, choose View and then Show Sample Data. Notice that the list view and the table view elements in the Content panel are populated with sample data. Choose View and then Hide Sample Data from the Menu bar to turn off the display of the sample data.
 0:19:34
JavaFX Scene Builder Tutorial 39 - TableView and TableColumn
 0:08:57
JavaFX Tutorial 39 - Hyperlink
 0:06:32
JavaFX 15 Tutorial 39 - CheckMenuItem
 0:04:31
TableView | Part 3 – Start JavaFx Fxml App | JavaFx GUI Tutorial #39
 0:11:46
JavaFx Switch the Scences
 0:03:58
JAVAFx Tutorial 39- Material UI Design Part 4
 0:30:07
Programming Example: JavaFX, Scene Builder Hello Name Example
 0:04:47
JavaFX and Scene Builder Beginner Course - IntelliJ #10: FXML
 0:09:49
Tutorial on Pagination Control in JavaFX? | Tutorial for beginners
 0:42:48
JavaFX Lecture-09 TableView Using JavaFX and Scene Builder
 0:03:09
Basic JavaFX Programming using SceneBuilder
 0:01:48
JavaFX Scene Builder Tutorial 31 - How to Install Scene Builder
 0:03:22
Java GUI Tutorial - How to use the Scene Builder for JavaFX - ENGLISH
 0:02:09
JAVAFx Tutorial 14- Creating UI with SceneBuilder
 0:00:24
Link Java FX Scene Builder to Java code
 0:11:49
💻 JavaFX 04 | Projekt Temperature-Data-GUI [3/11] - FXML mit SceneBuilder & Controller-Methoden...
 0:19:24
JavaFX Login Form Tutorial using Scene Builder | JavaFX and Scene Builder Tutorial | 2020 Version
 0:04:00
Boarding Pass GUI w/ JavaFx, SceneBuilder
 0:04:18
JavaFX and Scene Builder - Edit TableView
 0:03:19
JavaFX : Comment télécharger et importer Jfoenix sur SceneBuilder
 0:21:02
JavaFx Scene Builder Login example
 0:03:29
Simple javafx program using SceneBuilder(UI)
 0:02:57
JavaFX and Scene Builder - IntelliJ: BubbleChart
 0:09:34
JavaFX Tutorial 10 - CheckBox
Комментарии