filmov
tv
How to install a 3D wooden world map on the wall | World map lagane ka sahi tarika.

Показать описание
How to install a 3D wooden world map on the wall | World map lagane ka sahi tarika.
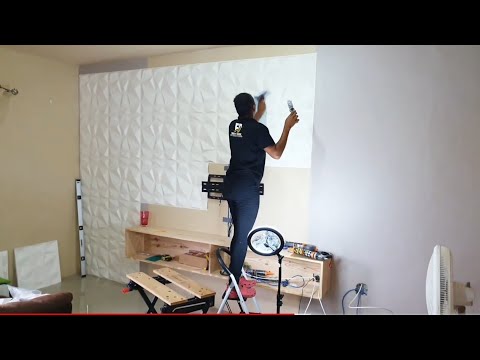
Assembling a 3D wooden world map is a fun family activity.
Designed to be more than just art, you can use this big jigsaw geographical puzzle for educational purposes.
Get your kids on board if you wish to familiarize them with the world map. It will hardly take 1-2 hours to assemble it.
Follow the simple instructions mentioned in the manual to place the map correctly on the wall.
Step 1: Start by laying out the pieces on the floor and keep the map image in hand before fitting them together like a puzzle.
Step 2: Clean your wall to make sure it’s not dusty.
Step 3: Take the two stencils in the box and mark out the upper left and right corners of the map on the wall.
Step 4: Don’t forget to measure between the wooden map and the wall with measuring tape. Ensure you have the map perfectly in the middle of your wall space.
Step 5: Start by placing the left and right destinations. Place the remaining pieces between them once you place the left and right in the position.
Step 6: The map pieces have special double-sided tape attached on their back, strong enough to hold the pieces in place, and it is implausible that a piece would ever come off.
Note
We don’t recommend removing something that looks perfect on your wall.
However, if you ever want to remove it, we recommend using heat on the map to make the tape softer.
Once softened, the tape won’t rip out the plaster, and you will have your wall as it was before the map was there.
#howtoinstall3Dwoodenworldmap, #woodenworldmapinstallation, #3Dwoodenworldmap #woodenworldmap
thanks for watching us!
 0:08:09
 0:10:11
 0:00:21
 0:03:51
 0:16:49
 0:02:42
 0:04:04
 0:06:55
 0:07:00
 0:00:36
 0:13:05
 0:00:18
 0:10:09
 0:36:50
 0:01:32
 0:02:11
 0:07:17
 0:09:06
 0:08:27
 0:05:00
 0:04:57
 0:07:00
 0:08:00
 0:06:08