filmov
tv
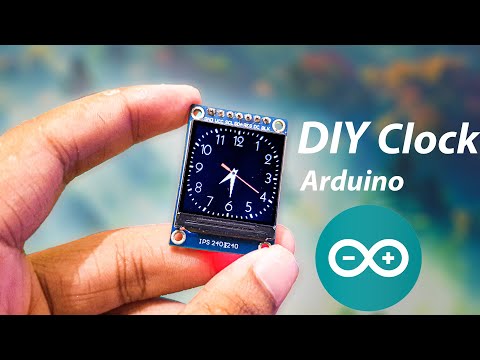
Lets Make Analog Clock Arduino - OLED Clock - Arduino Programming Tutorial

Показать описание
Learn how to make an analog clock from scratch, using Arduino and OLED display. It is a step by step programming tutorial in which I will show you how to program an analog clock using Arduino IDE. In this tutorial, I will discuss all the programming steps from drawing a circle to display the time in analog format on different sizes of LCD displays. You can also use LED matrix of any size to draw analog clock. In this tutorial I have used C++ but you can use any other programming language with the same logic that I have implemented in this tutorial.
Before watching this video, you must have knowledge about hardware. Because it is a pure Arduino programming tutorial with no any discussion about the hardware components.
--------------------------------------------------------------------------------------------------------------------
Parts Buy Links (Affiliate Links)
--------------------------------------------------------------------------------------------------------------------
--------------------------------------------------------------------------------------------------------------------
Useful Video Links
--------------------------------------------------------------------------------------------------------------------
Arduino GPS Speedometer with Analog Gauge
Let's Add Timezone In your GPS Projects - Arduino Speedometer
Micropython GPS Speedometer
--------------------------------------------------------------------------------------------------------------------
Social Media Links
--------------------------------------------------------------------------------------------------------------------
GitHub:
YouTube:
--------------------------------------------------------------------------------------------------------------------
Download Code
--------------------------------------------------------------------------------------------------------------------
--------------------------------------------------------------------------------------------------------------------
Disclaimer
--------------------------------------------------------------------------------------------------------------------
Disclaimer: All videos are for educational purposes and use them wisely. Any video may have a slight mistake, please take decisions based on your research. This video is not forcing anything on you.
#ArduinoProgramming #ArduinoProjects #Arduino
 0:14:12
Lets Make Analog Clock Arduino - OLED Clock - Arduino Programming Tutorial
 0:11:19
Induction Clock. Let's make it for your home
 0:00:10
The Ultimate ESP8266 WiFi Internet Clock with 1.8 TFT Display ⏰📶 #diy #arduino #electronic #esp8266...
 0:05:18
DIY clock with TFT Display and Arduino
 0:24:55
Building an analog clock with a microcontroller
 0:00:39
How to make a clock #arduino #arduinoproject #gadget
 0:00:46
Analog Clock | Arduino Analog Clock
 0:06:42
DIY Smart Table Clock: Arduino-Powered Multi-Color Clock | How to make a smart clock using Arduino
 0:00:10
Crafting an Amazing Analog Clock | DIY Creative Timepiece Tutorial #htmltutorial
 0:15:34
DIY Digital World Clock using Arduino and HMI TFT LCD, IOT Project, iot Clock, diy clock, wall clock
 0:00:47
This clock is lots of clocks pretending to be a clock
 0:00:10
Maximizing Your Arduino Project with 2.4 TFT LCD Shield - Unpacking Tour 😲😍😉 #diy #lcd #arduino #how...
 0:05:11
Arduino Clock - Analogue & Digital
 0:52:30
How to program an analog clock with a microcontroller
 0:00:17
digital/analog watch on ESP32
 0:15:34
How to use DS3231 RTC module to build OLED clock
 0:00:16
Arduino LCD ST756x Clock #arduino
 0:00:21
DIY#_how to Wall Clock #shorts
 0:00:10
Digital clock #arduino #iot #stem #robotics
 0:08:08
Unlocking Innovation: DIY Arduino Hollow Clock with Magnetic Levitation and 3D Printing
 0:01:20
DIY Project: MIDI Master Clock (Arduino)
 0:00:13
Smart Watch using Arduino
 0:05:57
Arduino CLOCK , how to make
 0:08:12
How to Make Digital Clock | Diy 7 Segment Digital Clock With ATmega328P Chip | Digital Clock
Комментарии