filmov
tv
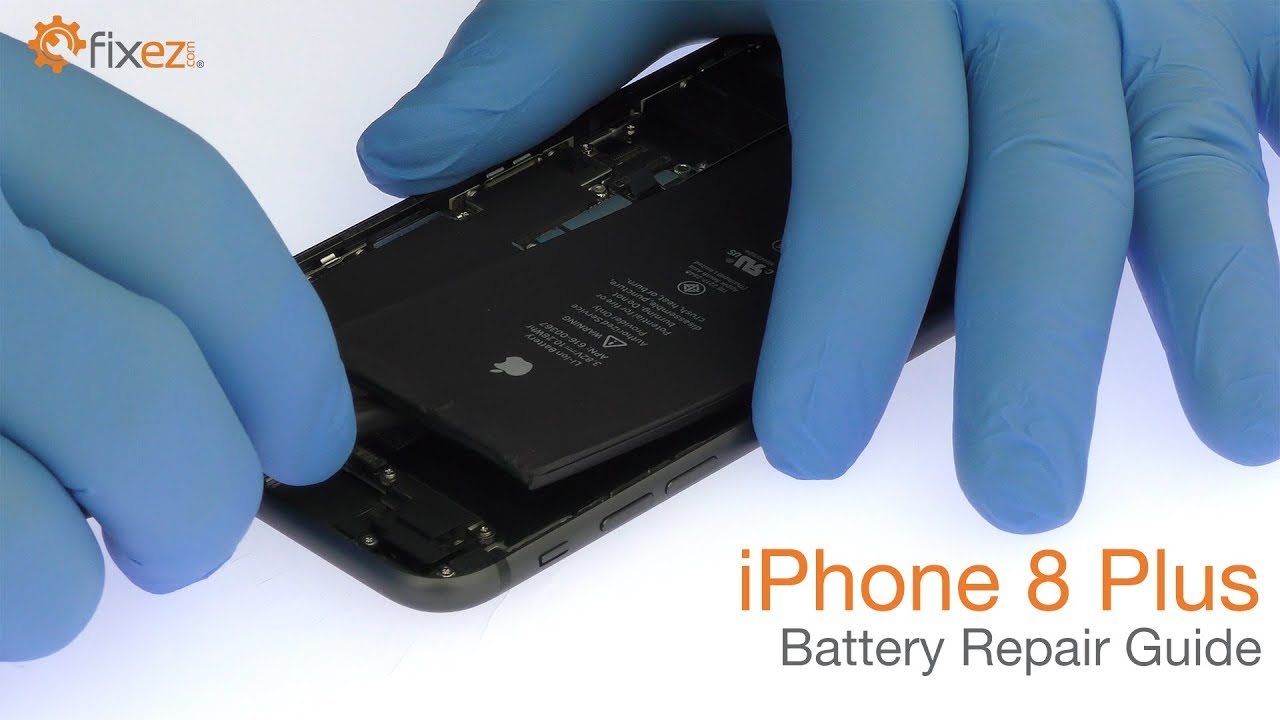
iPhone 8 Plus Battery Repair Guide - Fixez.com
Показать описание
iPhone 8 Plus Battery Repair Guide Video steps:
Step 1
• Power down your Apple iPhone 8 Plus phone.
Step 2
• Eject the Nano-SIM Card Tray.
Step 3 (iPhone 8 Plus Display Assembly)
• Remove the two bottom 3.4mm Pentalobe screws located next to the lightning connector.
• Apply some heat and then use the precision knife to create enough space to insert a triangle opening tool.
• With the opening tool slice through the adhesive and carefully decouple the iPhone 8 Plus display assembly from the rear case. Just like the iPhone 7 Plus, it opens to the side.
• The display assembly is still connected to the iPhone by cables along the middle-right side, so don’t try to remove it entirely just yet.
• Remove the following 4 Phillips screws securing the bracket that covers the battery, display, and home button cables. These screws are different sizes, so be sure to remember where they go.
• With the bracket out of the way pry the cables up from the logic board.
• Remove the following 2 Tri-Point screws that secure the bracket covering the upper component display cable.
• Disconnect the cable and free the iPhone 8 Plus display assembly from the phone.
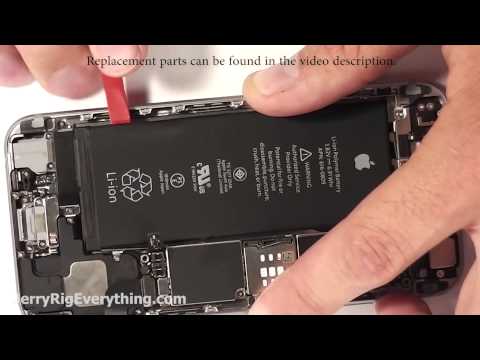
Step 4 (iPhone 8 Plus Battery)
• Locate the 4 peel-to-remove adhesive tabs, 2 at the top and 2 at the bottom of the iPhone 8 Plus battery. Grab the first tab and try to keep the adhesive strip flat and wide.
• Slowly and gently pull each strip up and away from the iPhone 8 Plus. Keep pulling until they come out from between the battery and the rear case.
• With the adhesive removed, the 2691 milliampere-hour (mAh) iPhone 8 Plus battery springs free effortlessly.
* To reassemble your device, follow the steps in reverse order.
 0:07:15
A Complete Guide to Replacing the Battery on Your iPhone 8 Plus (2023)
 0:05:44
iPhone 8 Plus Battery Replacement
 0:07:15
iPhone 8 Battery Replacement - iPhone 8 Battery Repair How To - Simple Guide
 0:15:53
How To Replace iPhone 8 Plus Battery
 0:14:22
How to Replace Your Apple iPhone 8 Plus Battery
 0:01:51
iPhone 8 Plus Battery Replacement- How To
 0:13:38
iPhone 8 plus battery upgrade with 3400mah in 2020
 0:08:52
iPhone 8 Plus Battery Replacement
 0:08:56
iPhone 8 Plus Battery Replacement
 0:08:25
Its all a Scam! - Before Replacing Your Phone Battery Watch This - Scams Explained
 0:10:11
How to Replace iPhone 8 Plus Battery
 0:01:51
iPhone 8 Battery Replacement—How To
 0:17:25
Restore Your iPhone 8 Plus to Perfection...
 0:07:31
iPhone 8 Teardown! - Screen and Battery Replacement Video
 0:07:03
iPhone 8 Plus Battery Repair Guide - Fixez.com
 0:08:21
iPhone 8 Plus Battery Replacement
 0:12:12
iPhone 8 Battery Replacement
 0:14:37
iPhone 8 battery replacement
 0:08:46
iPhone Battery (Aftermarket) - Everything You Need to Know!
 0:03:21
Should You Replace Your iPhone Battery?
 0:08:58
iPhone 8 Battery Replacement Video Guide
 0:02:04
Buy Apple iPhone 8 Plus Battery, Free Delivery High Quality Best Price Maxbhi
 0:09:21
Apple iPhone 8 Plus Battery Replacement #Apple #iphone8plus
 0:04:09
iPhone 6 Plus Battery Replacement in 4 Minutes
Комментарии