filmov
tv
How to Install a Delta® Pop-Up Sink Drain

Показать описание
Follow along as Mike shows how to install, remove and clean a pop-up bathroom sink drain in this easy step-by-step video.
You'll Need:
- Large groove pliers
- Silicone plumbers tape
- Safety Glasses
- Flashlight
Steps:
0:00 Intro
1:43 Disassemble Drain
4:23 Secure Drain to Sink
5:51 Connect Pivot Rod
8:13 Install Stopper
8:58 Check Functionality
9:24 Cleaning Drain
9:54 Uninstall Drain
You'll Need:
- Large groove pliers
- Silicone plumbers tape
- Safety Glasses
- Flashlight
Steps:
0:00 Intro
1:43 Disassemble Drain
4:23 Secure Drain to Sink
5:51 Connect Pivot Rod
8:13 Install Stopper
8:58 Check Functionality
9:24 Cleaning Drain
9:54 Uninstall Drain
 0:04:09
Delta Executor Mobile NEW UPDATE - How To Download Delta Executor Mobile 📱 (Safe)
 0:04:12
Delta Executor iOS / Android Tutorial - The Cleanest Roblox DIRECT Install Delta Executor
 0:00:21
how to download delta executor mobile
 0:04:42
Delta Executor for Roblox - Delta Executor Mobile - How To Download Delta Executor (iOS Android)
 0:04:14
Delta Executor Mobile - How to Download Delta Executor iOS Android Tutorial (2025)
 0:02:19
How To Install Delta Executor on iOS (Latest Version) | Best Roblox Executor For iPhone and iPad
 0:00:32
How to install delta
 0:06:21
Delta Executor Mobile NEW UPDATE ✅ How To Download Delta Executor Mobile - Delta Executor TUTORIAL
 0:11:25
How to Install a Delta® MultiChoice® Integrated Shower Diverter Rough-In Valve
 0:04:57
Delta Executor Mobile NEW UPDATE - How To Download Delta Executor Mobile For Roblox ✅️ (Safe)
 0:03:54
Delta Executor Download iOS/Android - DIRECT INSTALL Delta Executor *LATEST*
 0:00:40
How To Download DELTA EXECUTOR for iOS! No Esign/Scarlet (Direct Install) Updated!
 0:01:00
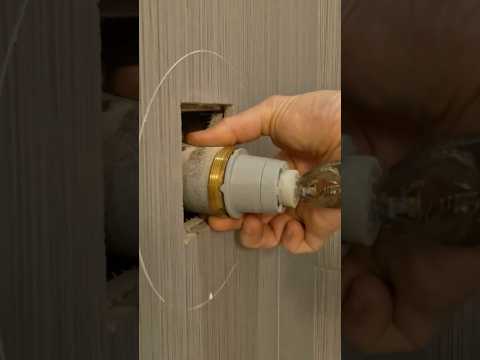
Delta Shower Valve Installation #diy #plumbing #bathroomremodel
 0:00:24
Delta Shower Valve Set Up - Where does the shower cartridge go?
 0:06:33
How to Install a Delta® Single Handle Pull-Out Kitchen Faucet
 0:00:34
How to Install a Bathtub Spout - #shorts
 0:00:23
Delta Shower Cartridge & Trim Installation. #shorts #plumbing #plumber #delta #shower
 0:07:21
How to Install a Delta® Pulldown Kitchen Faucet
 0:02:30
How to Install a Delta Ashton Faucet
 0:04:40
*SECRET* DIRECT Install Delta Executor iOS Android | Best Roblox Executor iPhone IOS & Android
 0:00:24
Shower Valve Install Tip
 0:21:15
How to Install a Delta® SimpleSteam Kit
 0:00:27
Install Delta Trim Kit - Shower Trim and Handle
 0:01:00
Replacing a Delta Monitor shower valve cartridge 🚿💦 #plumbing #plumber #asmr #diy
Комментарии