filmov
tv
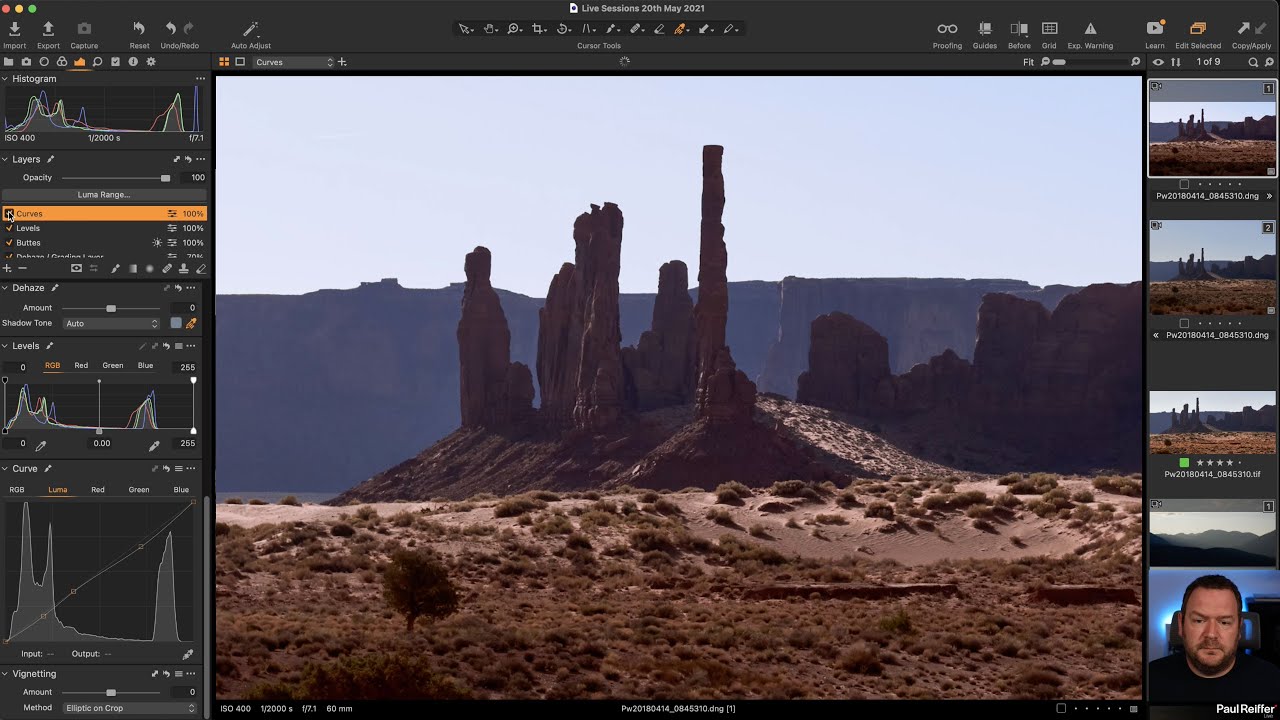
Live Editing Sessions - Capture One 20th May 2021 (Colour Grading, Auto Levels, Luma Ranges, Masks)

Показать описание
We begin today's session by looking at the differences in output from the DeHaze tool vs contrast, curves and HDR adjustments on Pavel's image of Monument Valley, following a review of how to export an EIP file, vs a raw or flattened image from Capture One.
We then go through an explanation of why we'll make changes on layers, filled layers and luma ranges - instead of affecting the background, with the key ability to "back the effect off" if it's overdone without needing to edit every tool setting.
When looking at the feel of the overall image, we take a look at colour grading - where the image has very different zones for highlights, shadows and midtowns and how to bring the red sand and blue skies back to Monument Valley itself.
Following a live question, we look at how the Levels tool works - in terms of auto/wizard levels (magic wand) and the impact the separation of Red Green and Blue channels can have on an image - ultimately, why I trust my own eyes more than that of an automatic tool.
Jarle's image of an old jetty foundation in Skagen, Denmark, came next - and a significant crop and rotation deliver a very different image to the original - along with a description of the difference between the saturation slider in the Exposure tab (which behaves as a vibrancy tool) in comparison to the Advanced Colour Editor's "Saturation tool" which is somewhat more literal.
Francois' image of Alsace is next, and we work backwards to remove the definition from a diffused sun - reviewing the challenges of when it's not possible to recover an image that's recorded beyond its' dynamic range. Looking at the rest of the image, we play with contrast, exposure and reducing clarity in order to balance the shot and bring it back to be closer than how the eye would view the scene.
Finally, we begin looking at Claudiu's sunrise shot - with a strange (motion?) blur to the sharpness, but a fantastic set of golden hour colours nonetheless. We'll pick this up from where we left off in our next session, but we start the process with some gradients and white balance adjustments overall - along with explaining why the choice is to use Shadow recovery vs the Black slider.
__________________________________
Join us live, for an hour of interactive editing with your own images in Capture One Pro.
We recommend requesting the HD option in Chrome via YouTube for full 1440p screen captures.
A trimmed replay will be available in our Facebook Group and YouTube channel following the live stream. (But give those systems a couple of hours to publish the trimmed version!)
Recorded using Capture One Pro 21.1.1 on an Apple Mac Pro 16-core Xeon running Big Sur with 192GB memory, 2x Radeon Pro Vega II Graphics cards and 4TB SSD.
Комментарии
 1:03:53
 1:02:16
 1:09:48
 1:00:15
 1:03:05
 1:02:03
 1:01:57
 1:03:11
 2:30:33
 1:03:57
 1:02:37
 1:09:38
 1:01:53
 1:01:42
 1:03:43
 1:04:13
 1:02:08
 1:01:46
 1:03:27
 1:03:00
 1:01:44
 1:02:11
 1:02:53
 0:58:04