filmov
tv
How to Knit a Fishermans Hat--Short Beanie--Watchmans cap

Показать описание
I've seen this hat everywhere the last few years but for some reason it has a million names. I decided on the Fisherman hat as the final option because I saw that name more often than not. I made this hat in only one size, which is a small, 20" head but you can easily make it bigger. I said 4 sts in the video but I realised it should be 8 added stitches for every extra inch. Pattern is in multiples of 8. The hat stretches a lot so bigger isn't always better. Happy knitting :)
IG* Corduroykidd
Ravelry* Corduroykidd
Ticktock* Corduroykidd
song credit*
If you want a nicer more in depth copy that covers sizing issues and with better math skills feel free to check that out here.
Resources*
How to knit*
How to purl*
Long Tail Cast On*
decreases*
*Old Pattern*
-Cast on 100 sts onto a 16" 4mm circular needle with worsted weight yarn
-knit 7 inches in k1p1 ribbing
-knit 21,k2tog, ssk, repeat until end of row
-knit20, k2tog, ssk, knit 19, k2tog, ssk, etc
-once it gets tight, switch to 4 4mm double pointed needles
-When you can't decrease anymore (10 st) cut your yarn and pull the end through the remaining stitches, tie off the tail on the inside and weave in all ends.
*2023 EDIT* I realised that my math was off lol and I legit did it wrong in the video. The other pattern is fine, it's just not what I intended. I can't believe I never noticed until now.
-Cast on 104 sts onto a 16" 4.5mm circular needle with worsted weight yarn
-knit 7 inches in k1, p1 ribbing with you first St of the round being a knit.
-*knit 21, k2tog, p1, SSk, repeat until end of row* Move stitch marker one stitch to the left every decrease round or take off entirely. Up to you. The extra St at the beginning of the round is needed for the last SSk at the end of the round which is why you need to move the marker or take it off.
-knit 19, k2tog, p1, SSK repeat until end of round
-Continue decreasing in this manner every round with two Sts less between "corners"
-once it gets tight, switch to 4 4.5mm double pointed needles
-When you have 16 Sts left, K2tog all around
-When you can't decrease anymore (8 Sts) cut your yarn and pull the end through the remaining stitches, tie off the tail on the inside and weave in all ends.
 0:05:15
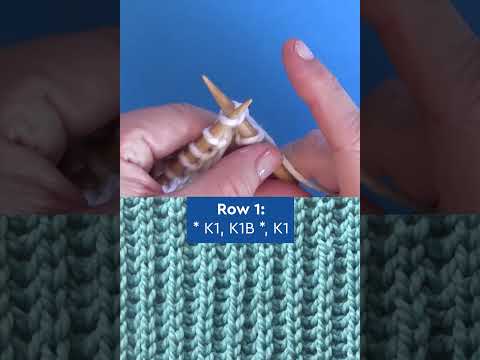
HOW TO KNIT FISHERMAN'S RIB - KNITTING TUTORIAL
 0:15:29
How to Knit a Fishermans Hat--Short Beanie--Watchmans cap
 0:01:00
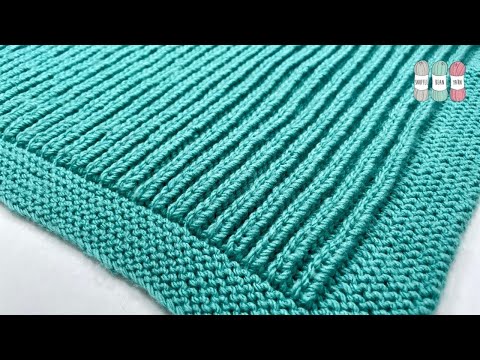
Your Easy 2-Row Thick Fisherman's Rib
 0:07:33
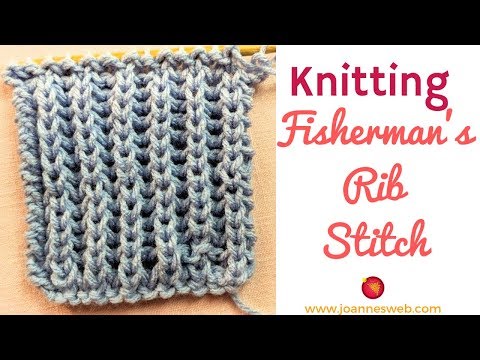
Fisherman's Rib Knit Stitch -How to Knit the Fisherman's Rib Pattern
 0:42:47
How to knit the fisherman's rib - The ultimate tutorial [how to decrease, fix mistakes, etc]
 0:09:07
How to knit the Fisherman's Rib using knit stitches only. No purling! (One-row repeat) - So Woo...
 0:00:51
Step by step tutorial how to knit the Fisherman’s Rib scarf #knittingpattern #knittingtechnique ng
 0:12:15
Fisherman's Rib Free Knit Scarf Pattern for Beginners
 0:03:01
How to Knit the Fisherman's Rib in the Round || Easy Knit Stitch Tutorial
 0:00:16
AWESOME knitting pattern / how to knit fisherman rib stitch / Brioche stitch ? #knit
 0:01:00
Fisherman’s rib: a scarf-worthy stitch #knitting
 0:05:32
How To Knit A Fisherman's Rib
 0:04:50
Half-Fisherman’s Rib Tutorial
 0:00:13
mock fishermans rib, but inside out, and in the round #knit #knitting #knittok
 0:04:34
How To knit Fisherman's Rib in the round
 0:08:02
Fisherman’s Rib Knit Stitch Flat & In-the-Round (2 Row Repeat)
 0:03:28
How to knit the Fisherman's Rib in the round (two rows)- So Woolly
 0:05:20
How to knit the Fisherman's Rib Stitch!
 0:04:52
How to Knit: The Fisherman's Rib Stitch | Knitting Pattern & Tutorial for Chunky Ribbing
 0:07:40
Knitting Help - Slow-Motion Fisherman's Rib
 0:03:44
How to Knit One Color Fisherman's Rib
 0:17:48
ULTIMATE Fisherman's Rib Stitch Learn 3 ways || Knit Version || Purl Version || K1 P1 Version
 0:05:50
Shaker stitch (Half Fisherman's Rib): A two-row repeat knitting pattern, easy and reversible,
 0:11:36
How to Knit a Fisherman's Rib Baby Blanket
Комментарии