filmov
tv
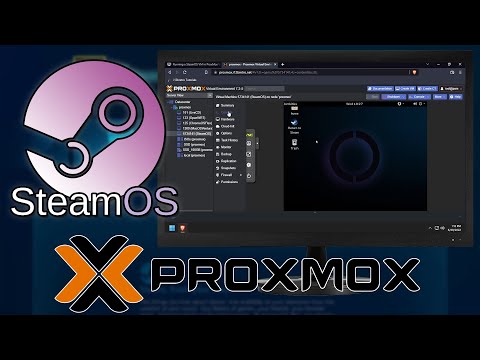
Running a SteamOS VM in ProxMox VE

Показать описание
#SteamOS #Proxmox #VirtualMachine
--------------------------------------------------------------------
What is SteamOS?
--------------------------------------------------------------------
01. Log into the ProxMox web UI
02. Select a storage from the left navigation pane to download the .iso to
03. Select ISO Images in the left sub-navigation pane
05. If running ProxMox 7, click Download from URL and paste the download URL from above ≫ Click Query URL ≫ Click Download
06. Right click the ProxMox node name ≫ Create VM
07. Give the VM a unique ID and Name ≫ Next
08. On the OS tab, Select the SteamOS installation .iso file, leave the Type as Linux and the Version as 5.x - 2.6 Kernel ≫ Next
09. On the System tab, set the BIOS field to OVMF (UEFI), Check the Add EFI Disk checkbox, Uncheck the Pre-Enroll Keys checkbox, Machine field to q35 and the SCSI Controller to VirtIO SCSI ≫ Next
10. On the Hard Disk tab, set the Disk size to 16 GiB or more ≫ Next
11. On the CPU tab, set Cores to 2 or more and Type to host ≫ Next
12. On the Memory tab, set the Memory to 4096 or more ≫ Next
13. Leave the defaults on the Network tab ≫ Next
14. Verify the summary and click Finish
15. Right click the SteamOS VM in the left navigation pane ≫ Start
16. Click console in the left sub-navigation menu
17. Press Enter to select Automated install (WILL ERASE DISK!)
18. Wait while SteamOS copies and installs files
19. Once the installation completes a desktop environment will display and SteamOS will check for and install updates
20. After updates are installed the VM will reboot
21. The first reboot can take several minutes, so be patient (You can send CTRL+ALT+F2 to the VM to view the boot progress)
--------------------------------------------------------------------
Post-Installation Steps (Optional, but recommended)
--------------------------------------------------------------------
01. At the black screen, Send CTRL+ALT+F2
02. Enter the username desktop
03. Run the following command to set a password
# set desktop user password
passwd
# enter and confirm a password for the desktop user
# start the desktop environment
startx
04. Shutdown the VM
--------------------------------------------------------------------
Setting Up Steam in SteamOS
--------------------------------------------------------------------
01. Select a language ≫ Click Next
02. Select I Agree on the EULA screen
03. Click Next at the screen calibration
04. Select a timezone ≫ Click Next
05. Click the Run Steam Now button
06. Select Login
07. Log in with an existing Steam account
### Connect with me and others ###
--------------------------------------------------------------------
What is SteamOS?
--------------------------------------------------------------------
01. Log into the ProxMox web UI
02. Select a storage from the left navigation pane to download the .iso to
03. Select ISO Images in the left sub-navigation pane
05. If running ProxMox 7, click Download from URL and paste the download URL from above ≫ Click Query URL ≫ Click Download
06. Right click the ProxMox node name ≫ Create VM
07. Give the VM a unique ID and Name ≫ Next
08. On the OS tab, Select the SteamOS installation .iso file, leave the Type as Linux and the Version as 5.x - 2.6 Kernel ≫ Next
09. On the System tab, set the BIOS field to OVMF (UEFI), Check the Add EFI Disk checkbox, Uncheck the Pre-Enroll Keys checkbox, Machine field to q35 and the SCSI Controller to VirtIO SCSI ≫ Next
10. On the Hard Disk tab, set the Disk size to 16 GiB or more ≫ Next
11. On the CPU tab, set Cores to 2 or more and Type to host ≫ Next
12. On the Memory tab, set the Memory to 4096 or more ≫ Next
13. Leave the defaults on the Network tab ≫ Next
14. Verify the summary and click Finish
15. Right click the SteamOS VM in the left navigation pane ≫ Start
16. Click console in the left sub-navigation menu
17. Press Enter to select Automated install (WILL ERASE DISK!)
18. Wait while SteamOS copies and installs files
19. Once the installation completes a desktop environment will display and SteamOS will check for and install updates
20. After updates are installed the VM will reboot
21. The first reboot can take several minutes, so be patient (You can send CTRL+ALT+F2 to the VM to view the boot progress)
--------------------------------------------------------------------
Post-Installation Steps (Optional, but recommended)
--------------------------------------------------------------------
01. At the black screen, Send CTRL+ALT+F2
02. Enter the username desktop
03. Run the following command to set a password
# set desktop user password
passwd
# enter and confirm a password for the desktop user
# start the desktop environment
startx
04. Shutdown the VM
--------------------------------------------------------------------
Setting Up Steam in SteamOS
--------------------------------------------------------------------
01. Select a language ≫ Click Next
02. Select I Agree on the EULA screen
03. Click Next at the screen calibration
04. Select a timezone ≫ Click Next
05. Click the Run Steam Now button
06. Select Login
07. Log in with an existing Steam account
### Connect with me and others ###
 0:06:01
Running a SteamOS VM in VirtualBox
 0:05:31
Running a SteamOS VM in ProxMox VE
 0:07:41
SteamOS 3.0 on your Desktop PC
 0:04:33
How to Install SteamOS on your Desktop PC
 0:00:14
Virtualbox on the steamdeck running windows!
 0:12:09
Official SteamOS 3.8 On A Super Cheap Budget Gaming PC Runs Amazingly!
 0:26:26
HOW TO INSTALL STEAMOS ON ANY DRIVE!
 0:11:01
How to Install SteamOS on a VMware Virtual Machine
 0:24:02
How install Steam OS in a virtual machine
 0:05:41
Running a SteamOS 3 Holo VM in ProxMox VE with HoloISO
 0:08:31
Set up steamOS on VirtualBox tutorial
 0:11:04
SteamOS Install into Virtualbox Demo
 0:09:35
How To Install STEAMOS On Any PC Or Laptop || New STEAM OS Installation GUIDE 2023
 0:07:39
Using The Steam Deck as a Desktop PC ...
 0:00:16
Turn PC into Console #shorts #pc #console #gaming #steam #pcgaming #consolegaming #gamer #gamingtips
 0:00:15
How to open steamOS on pc!
 0:00:10
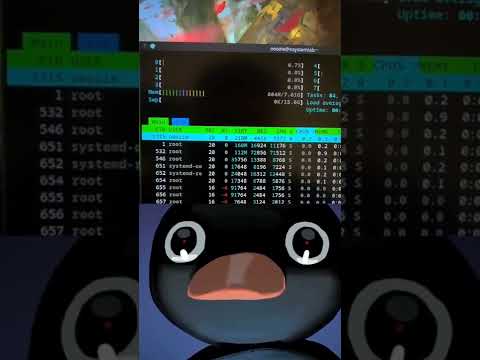
Ram usage on windows compared to Linux
 0:21:50
How To Install SteamOs 64bit Full Complete On VirtualBox
 0:08:38
Gaming On Linux - Everything You Need To Know ..
 0:00:11
Windows VS Linux #linux #windows
 0:05:27
How to Install Steam OS to a Virtual Machine
 0:06:37
SteamOS 3 Will KILL Gaming on Windows
 0:07:40
Is Dual Booting Really Worth It?
 0:05:39
How to Build a Steam Machine on a Virtual PC
Комментарии