filmov
tv
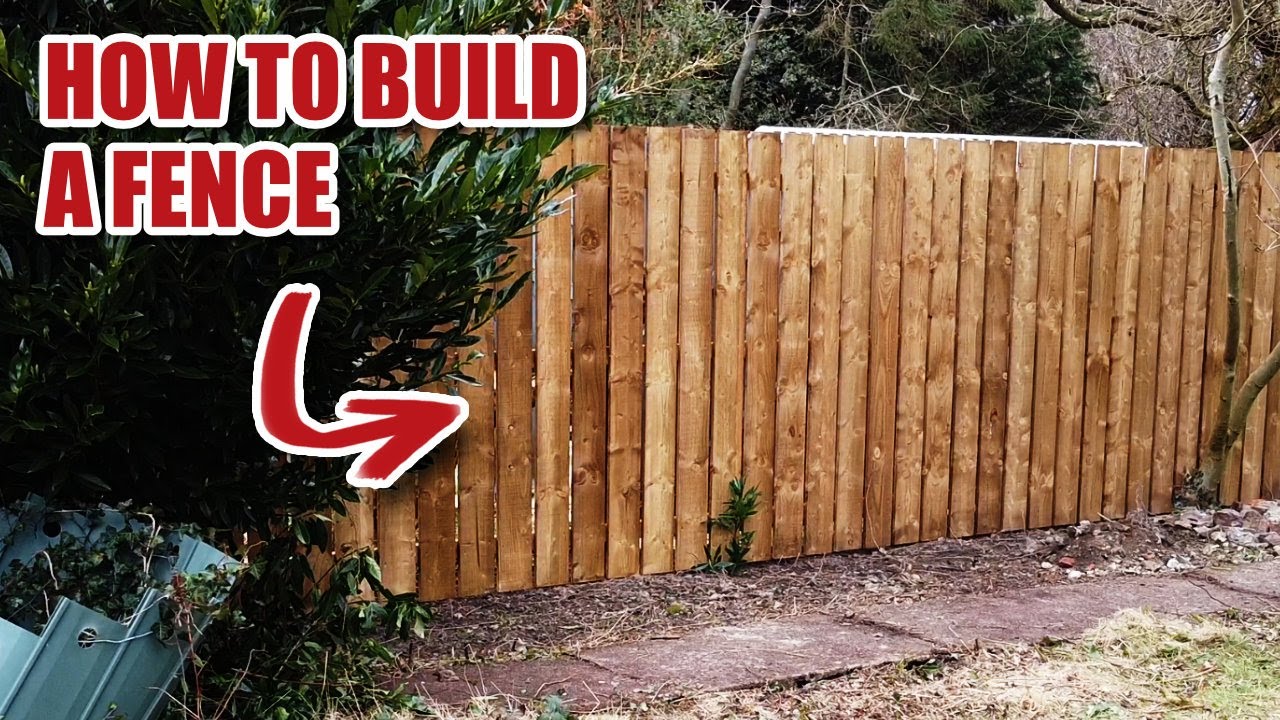
How I make a SIMPLE DIY fence
Показать описание
In this video I’m showing you my approach to making a simple British fence. You see this open board design all around the UK - no idea how popular it is in other parts of the world. The advantage being the open board design lets wind pass through so it puts less strain on the posts. This is a SIMPLE fence but it does the job if it’s not in a too exposed location. Obviously you can push this as far as you want if budget permits.
A few other excellent fence-related vids:
Also check out these great fence-related vids:
Here’s the full 1920’s semi renovation playlist:
Budget, projects costs and more over on the Member Zone:
Buy locally sourced T-shirts and other lovely stuff from our little shop:
Help me let you know about new vids - subscribe to my free newsletter here:
All content on this channel is exclusively owned by MacLellan Creative Limited. Copyright (c) 2021. All rights reserved.
#Fence #Woodworking #DIY
 0:00:25
3-Ingredient Oreo Cake! tutorial #Shorts
 0:00:17
How to Make a Simple Paper Airplane
 0:00:58
Step by step tutorial for beginners!
 0:00:12
How to make simple easy bow 🎀 How to tie a perfect bow!
 0:00:28
how i make a simple 3 egg omelette
 0:04:02
How To Make Simple Pencil Welding Machine At Home for soldering | practical invention
 0:02:30
How to Make a Simple Kite
 0:03:37
cake in 2 minutes! you will make this cake every day! easy and quick to prepare
 0:00:25
How to make a simple synth pluck 🎹
 0:00:29
NO GLUE SLIME Recipes That ACTUALLY WORK! 😱🤫 *How to Make Slime WITHOUT Glue and Activator DIY*...
 0:00:20
Make simple toys using school supplies! #shorts
 0:03:39
How To Make Simple Pencil Welding Machine At Home With Blade | practical invention
 0:00:55
How to Make a Simple Spot Welder from a Pencil 😱
 0:00:31
How To Make Easy Caramel Sauce | Eitan Bernath
 0:00:10
Origami Simple Gun Tutorial l How To Make Simple Paper Gun Easy #shortsvideo #shortfeed #shorts
 0:01:51
How to Make an Easy Paper Airplane in 1 Minute! (60 Seconds) Competition Winner — Flies 100+ Feet!
 0:00:45
How to Make Simple Syrup | Patrón Tequila
 0:00:35
TRYING VIRAL NO GLUE NO ACTIVATOR SLIME RECIPES 😱 DIY how to make slime tutorial
 0:00:27
How to Make Slime AT HOME! 😱🧴🧼 DIY Slime Tutorial
 0:00:35
How To Make Simple Pencil Welding Machine with battery #viral #shorts #science #experiment #trending
 0:00:20
How To Make Squid Game DDAKJI Easy Way | Diy Ddakji #shorts #squidgame 🟦🟥
 0:00:21
How to make a simple cardboard ship #diy #shorts #sailboat
 0:00:24
How to Make Simple Sautéed Spinach
 0:00:26
How to make easy egg fried rice at home
Комментарии