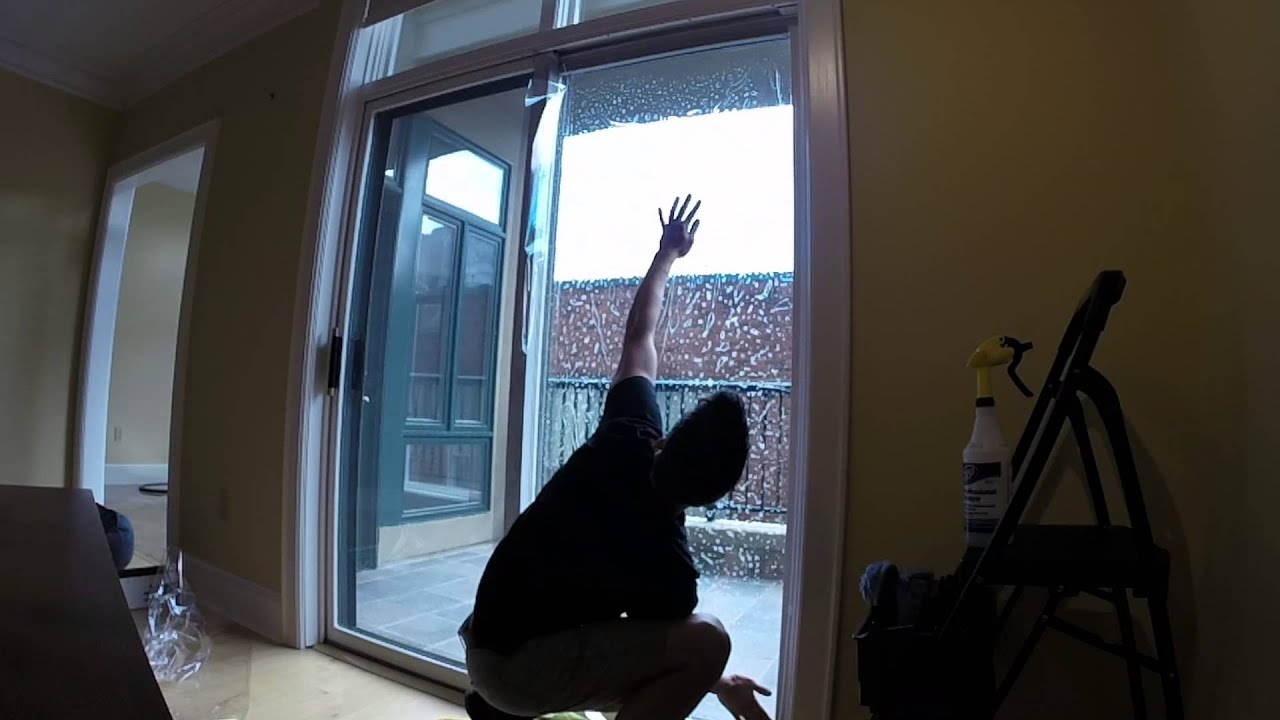
How to tint residential Flat Glass like a pro By: Best Reflections Window Tinting

preview_player
Показать описание
This is a tutorial on how to tint windows like a pro. From beginning to end. This will be covering how to tint Flat Glass or residential windows.
This is a job that we did on a condo in Downtown Asheville, NC.

This is for demonstration purposes and meant to only help other professionals in the field.

If a customer wants to see how we tint windows and also to see what Johnson window films DN60 looks like, this is the video for you.
Please "like" and "subscribe" it would mean a lot to us and will help us to get more videos out there for you!

This video is filmed with a GoPro 3+ hero silver

Рекомендации по теме
Комментарии
Автор

Love this video. What I learnt!!!
Only ever touch the border of the tint which will be cut away.
You cannot have too much cleaning fluid. Window cleaner is good. I bought bulk and it says on the container, good for tinted windows. Im sure they all are.
Cut your tint first by using the upside down method with the clear protector facing up. Only make it have 2cm border room all around as the tint sticks to everything. (cheers +WAYNE JOHNSON)
Peel the backing straight away using the sticky tape method on both sides of a corner, then pull them apart. (cheers +Tim Spriggs). Just leave the tint nearby ready for grabbing.
Now go ahead and do your cleaning.
When prep-ing the glass with cleaner, spray beyond the glass aggressively as if the tint touches, it wont stick there. E.g. the whole window frame.
I squeegee the edges firmly (with 5-way tool) before cutting, not loosely like in the video.
Lastly, if you take too long and the cleaning fluid dries a bit before applying the tint. Clean the window and start again as you may get the cloudy look. Happened to my first window as i took longer to prepare the tint, not too bad).

Additional...
Have pets? Vacuum the area thoroughly. I mean, the floor, the frame and even running across the glass. Then, change clothes. Then start the razor blade wet clean process.
Spray the tint! if it touches itself or something else, you are screwed. Spraying greatly reduces the risk.
When the tint was at the end of roll and would not lie flat, I would weight down one side with a couple of weights (sprayed with window cleaner) and a couple of large bull dog clips on the far side. The bull dog clips allowed me to move the tint into position without it rolling back up from the bottom up while carrying. Once touching on the window, bye bye clips.
I did not use the production edge as my frame rubber was never even. I just centred the sheet and cut all 4 sides. Also, I cut the corners from the window out so the film would come straight off after doing a full axis cut.
Starting with the 5-way tool... I always started in the middle and went up, then down, then side to side. A cross. I then worked each quadrant towards its respective corners. I found I had much less chance of creases. Actually, ended up being zero.

mikevanderkley
Автор

Gotta say that this video is awesome. My hubby and I tinted our house windows after watching this video about 3-4 times. The finished result is not as professional as we would like but we are 1st timers and there are a couple of mistakes we made. However, it looks good and the house is much cooler because we have double glass doors and a kitchen window that catches the most sun until it goes down. Rooms with windows facing a different direction are much cooler. Now I can stand to sit in my living room from 2-5pm. Thank you for this very detailed and easy to follow video. We would have still been sweating had it not been for your step-by-step video. We are so appreciative. 😊😁🤸🏾‍♀️🤸

that.fablife
Автор

Great video. I hyperventilate at the thought of beginning this project. I'm a perfectionist and this will go on the window I sit next to all day. I don't want to end up with a goof that haunts me every time I look at or out the window.

lorrainehutter
Автор

Man I’m glad I found this video. That and all the comments. I’ve tinted cars and vans before. I’ve got a job for a storefront. By myself and I’m 60. Going to be fun. Like the idea of the tape on the backer.

chrisrasmussen
Автор

So very helpful for a beginner... my husband did the small windows (either side of the front door) without watching, and "gifted" me the larger windows in the gym / office. I really got great input from this and can't wait to have beautiful windows!

lledds
Автор

Thank you so so much, great job you made it easier for us non-pros 🙏🏻

beckylockamy
Автор

Awesome job bro! Look into reverse rolling when removing the film. I usually make my cuts with the protective liner on. Then peel liner back half way while it is still on the glass and wet it then lay liner back down. Do it on both sides to get all the glue side wet. Then roll it up and prep your glass. And you can reverse roll back on the glass allowing the liner to come unrolled as you go. This way your glue side is never without the liner until it hits the glass. Has been very helpful to me. Hope it helps someone else.

jimjones
Автор

Thanks dude! I am about to tint all of the windows in the back of my house. I will be using this video as my bible!

jayhall
Автор

you can tell this guy is a pro and he does this for a living!

reconforsales
Автор

WOW!!!! Thank you.... Looking at your video, I did it by myself and it turned out Thank you again....

williamcook
Автор

When I install flat glass film I usually use a paper towel with the hard card or squeegee on all the edges.  this is so that the paper towel catches the extra water and doesn't go back into the film with dirt.  pretty good video

raiderman
Автор

Stoned watching this. Appreciate it. Doing some residential windows soon. Needed some info on it

bsac
Автор

Thanks for making the video. I should have watched this video before I did my floor to ceiling balcony sliding door. I didn’t clean the glass well and have many small imperfections on between glass and film

shafi
Автор

Hey i just followed your example, awesome thankyou!!. Job done and not bad for a first effort. No bubbles at least.
Would add though to wash the edges thoroughly before starting. My old doors had collected alot of grime over the years.👍

davidhamden
Автор

Thanks for this great tutorial. I'm off to fck up the tint going on my bathroom windows now!

HellenaHanbasquet
Автор

Did it! Not 100% perfect though, only 99% but that's good enough for the first try. One tiny, little piece of dirt got stuck underneath.
Thanks for this video, it was very helpful!

Ricardo-clvs
Автор

I like the way you've shown people the hardest way to do it so they call in a professional.

rustyswindowtinting
Автор

Here is another tip--to start the separation of the film, use two small sections of clear tape, put them on both sides, briefly squeeze together, then pull apart.

tspriggsabq
Автор

im a beginner and he just showed me a very simple easy way to do this thanks so much

Lifewitmari
Автор

Wow, you made that look easy. The cutting the corners is the hardest for me, the film trimming tool Gila gives you in the installation kit for trimming is crap, I'm gonna use a razor blade like you did.

Jane_Snow_