filmov
tv
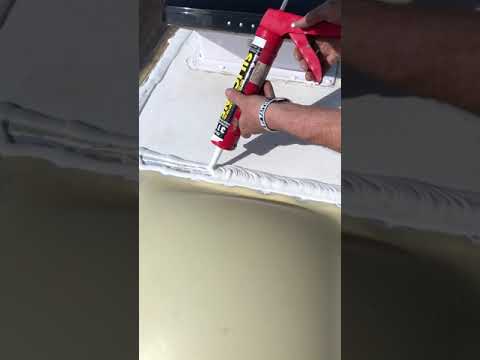
RV Delamination Repair Tips // How To

Показать описание
I successfully completed the delamination repair on my 11 year old RV and it looks great now. Here are my top tips and tricks I learned that may help you with your delamination repair. It took a full week to complete the job, but only cost me around $200 in additional materials. I also share my delamination repair kit below. If you do ever have this problem, know that it's not the end of the world.
*GOING SOLAR? You DO NOT need to Start from Scratch*
*Video Topics*
00:00 Intro
02:11 The Delamination Repair Process
05:17 10 Tips For a Successful Delamination Repair
12:11 Before and After Results
*Materials and Parts You'll Need for this Project*
*More about this project*
My delamination was located on the rear side-panel of my RV where rain regularly runs off from the rain gutter. I typically keep the RV covered during the rainy months in the Northwest, but I'm guessing some rain had gotten behind the seam and softened the wood backing along the edge early on. Once a bubble starts, it just continues to grow through temperature changes of the seasons.
I only noticed the damage in the last two years, but the problem probably started many years ago.
Here's the the general process I followed to repair the delamination:
1. Remove edging, compartments and windows to get behind delaminated surfaces
2. Tape a large syringe and plastic tube to a long stick (injector)
3. Mix epoxy and load injector
4. Insert injector behind delaminated area
5. Push syringe to inject epoxy while slowly pulling the injector out
6. Press down on surface immediately after injecting to spread and bond epoxy to sides
7. Apply temporary clamp if possible
8. Repeat until you’ve treated a section
9. Clamp treated section until cured (15-24 hours)
10. Repeat for all sections
Here are some tips and tricks to increase the success rate of your repair:
1. Work from the bottom up
2. Mark the area to be treated with blue tape
3. Cover with plastic (drips and oozing)
4. Inject above area to be treated
5. Apply pressure after each injection (to spread epoxy, keep from collecting at bottom)
6. Buy the pump kit (mix quicker and accurately)
7. Mix small batches of epoxy (4-5 pumps)
8. Do not reuse injector for multiple days. Build a clean and fresh one each time
9. Have plenty of wedges ready and shims (I made eight, then another eight. It never seemed that I had enough)
10. Do a test run before treating each area
#rvwithtito #rvrepairs #rvdiy #rvlife #doityourself
*Disclaimer*
The opinions expressed in our videos are our own or from a contributor. Before taking on any project or making a large purchase, we recommend you do your own research and consult a professional for advice. We are NOT liable for any damage to your RV or injury incurred as a result of following our tips, advice or instructions. We are not RV professionals or certified technicians. We are simply RV owners who work on our own RVs and have a desire to share what we learn with others. Be responsible and know your limits.
*Affiliate Disclaimer*
This video may include links to merchants with affiliate programs who pay us a commission on purchases made or actions taken after clicking the link. We are a participant in the Amazon Services LLC Associates Program. As an Amazon Associate we earn from qualifying purchases.
 0:13:45
RV Delamination Repair Tips // How To
 0:30:46
How to fix RV Delamination//Repair Tips & Supplies EASY step by step guide
 0:07:32
Repairing a delaminated RV wall and bubbled Fiberglass
 0:03:35
RV Wall & Siding Repair- What is Delamination and How to Fix It for Do It Yourself & RV Shop...
 0:02:50
RV & Motorhome Delamination! What it is and how to spot it!
 0:00:19
Repairing a Rotten RV Wall #RV Repair #diy
 0:14:25
CHEAP RV Fiberglass Delamination Repair Video
 0:00:21
Replacing an RV siding panel
 0:00:37
You Won't Believe How Easy It Is to Reseal Your RV Roof!
 0:10:58
RV delamination - Repair from inside
 0:03:35
Fix RV, Camper, & Motorhome Water Damage Delaminated Siding. Fiberglass Skin & Wall Repair M...
 0:05:54
RV Delamination Information Nobody Tells You
 0:10:23
How to fix RV or Travel Trailer Delamination Without Using Epoxy
 0:09:16
RV Delamination Repair Nobody Tells You
 0:04:59
RV Repair Masters Answer Your Burning Questions LIVE
 0:00:24
Water damage and Delamination Repairs
 0:01:46
RV delamination fix.
 0:00:19
Always Check This Before Buying an RV! Delamination! #shorts #rv
 0:00:45
Common corner delamination issue
 0:05:03
MAX GPE RV Panel Delamination Repair -Injectable Epoxy Resin To Glue RV Panel & Harden Soggy Flo...
 0:21:26
RV Delamination Repair
 0:00:11
RV Camper Motorhome Overhead Water Damage Repair #rvrepair #michigan #campers
 0:00:59
Repairing fiberglass on 5th wheel RV #fiberglass #fiberglasssheet #rvlife #oxidation
 0:02:24
How to fix RV Wall Delamination- DIY Fiberglass Siding Fix
Комментарии