filmov
tv
How To Construct A Trussed Garage Roof

Показать описание
In this video How To Construct a Trussed Garage Roof Tony and Matt work together to install a roof truss in 2 days!
First Tony takes a look at the truss drawing and discusses all the details about how it will all be laid out
Tony then measures and marks out all the trusses on both sides prior to getting the straps on.
Then he uses Dan’s Roofing Square to mark out the birds mouth on the trusses. Tony and Matt then start loading the Trusses on the roof with the truss clips and lateral straps.
Tony then secures the trusses in place with his Paslode Nail Gun, goes over the diagram of the garage roof to determine what needs to be done next.
Tony and Matt begin securing the ridges on the trusses, Matt finally cuts off the ends of the Truss.
Tools
_________________________________
_________________________________
_________________________________
#constructionuk #constructionvlog #trusses #roofing #garage #garageconversion #installationguide #howto #howtoinstall #diy
 0:06:03
DIY 👍 Trusses 🏠 Site Built / Building A Workshop Shed
 0:08:51
Floor and Roof Trusses - 'How it's Made'
 0:03:03
How to Make Cheap Strong Trusses Easy
 0:18:10
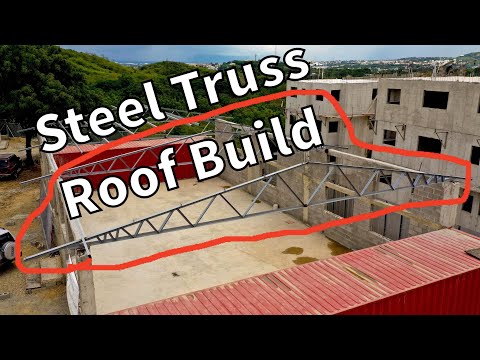
Building & Installing 40' Steel Roof Trusses
 0:06:15
Beginner Rafter Layout | Speed Square | Common Rafter
 0:18:41
How To Construct A Trussed Garage Roof
 0:05:53
DIY How to Build Trusses Yourself
 0:11:56
You Asked...We Did it...Building the trusses
 0:00:10
Miniature Grill !! 🧮👨🍳 #diy #contruccion #construction #tools#parilla #cocina
 0:17:41
Understanding and Analysing Trusses
 0:13:00
Build your own wood trusses
 0:22:49
How to install Roof Trusses
 0:04:26
Understanding Trusses
 0:24:11
Setting 16 Trusses Alone - Build a 20x30 Workshop
 0:07:34
TRUSSES...Was it worth making them instead of buying them?
 0:16:53
How to Build a Pole Barn - Building the Trusses
 0:13:24
How to build Gambrel Trusses | Barn Style Rafters | Shed Build Part 3
 0:40:58
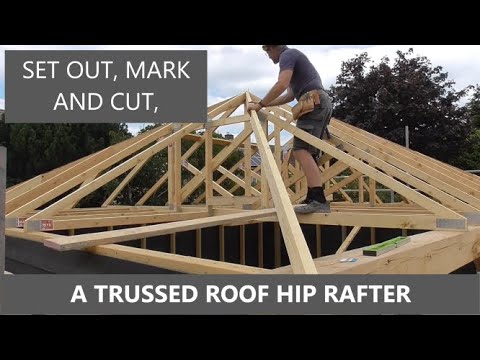
How to mark and cut hip rafters on a trussed roof. ***(with splayed birdsmouth cut)***
 0:09:41
Erecting a roof Part 2 - Installing the trusses
 0:07:08
How To Build A Shed - Part 4 - Building Roof Rafters
 0:14:12
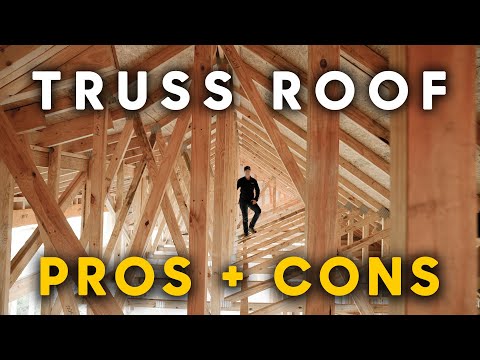
ROOF TRUSSES: Pros, cons, and costs!
 0:02:18
Building Roof Trusses
 0:02:41
Fort Worth Lumber Rafters Trusses Design And Build
 0:18:50
Building Roof Trusses
Комментарии