filmov
tv
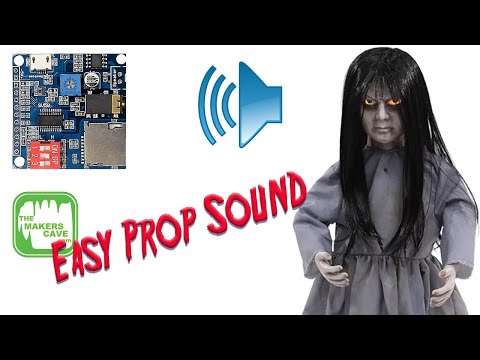
Mastering MP3 Player Busy Pin with Arduino & Audio-Visual Synchronization

Показать описание
Explore the often-overlooked busy pin feature of the MP3 player module (MP3-TF-16P or DFPlayer mini) in this comprehensive tutorail, ideal for hobbyists and Arduino enthusiasts.
This third installment in our MP3 module series delves into practical applications like audio-visual synchronization, playback management, and user interface feedback, elevating your DIY projects to new heights.
Follow step-by-step instructions for wiring, coding, and integrating components like Neopixels for dynamic audio-responsive displays. Whether you're a beginner or an experienced tinkerer, this video will unlock new possibilities in your creative journey with microcontrollers.
Links:
Components:
🔔 Support the channel🔔
Please note that the product links are Amazon affiliate links. As an Amazon Associate, I earn from qualifying purchases at no additional cost to you. This helps support the channel and allows me to continue creating content for you. Thank you for your support!
Chapters:
0:00 Introduction to the Project
0:56 Step-by-Step Wiring: MP3 Module, Speaker, and Arduino Uno
1:50 Preparing the Micro SD Card for Use
3:49 Programming Tutorial: Playing an Audio File
6:56 Understanding the Busy Pin: A Guide
7:34 Detailed Wiring Guide for the Busy Pin
7:47 Programming Insights: Reading the Busy Pin
8:40 Implementing Code for LED Indicators During Audio Playback
10:00 Connecting Neopixels: Wiring Instructions
11:02 Programming Neopixels: Syncing Lights with Audio Playback
#ArduinoProjects #MP3Module #Microcontrollers #DIYElectronics #ArduinoUno #AudioVisualSync #HobbyistElectronics #MakerCommunity #CodingTutorial #TechDIY #tutorial
 0:13:26
Mastering MP3 Player Busy Pin with Arduino & Audio-Visual Synchronization
 0:08:13
Fungsi Menarik Pin BUSY DFPlayer mini !
 0:00:54
#MP3AudioModule
 0:00:09
Worlds Largest toilet handstand #shorts
 0:13:19
Arduino based music player using DFPlayer Mini
 0:08:08
DFPlayer MP3 Module Troubleshooting: SD Card and Code
 0:00:16
From an IKEA Vackis Alarm Clock to a Cool MP3 Player With USB Cable Using a DFPlayer Sound Module
 0:04:39
Arduino-Based MP3 Player via DFPlayer Mini Module
 0:08:01
DFPlayer Mini Tanpa Arduino, Tanpa PC | ada FITUR 'Repeat' yang tersembunyi !
 0:15:14
A compete guide to mp3 Module using Arduino & ESP32 board | DFPlayer Mini | Arduino Projects
 0:26:29
Simple Way To Add Sound & Relay Control To Your Prop or Model
 0:03:23
mp3 tf 16p Dfplayer not working
 0:00:17
Eating Colorful Chocolate M&M's Candy in Toilet #shorts
 0:05:26
Fungsi Menarik Pin 'USB' DFPlayer Mini | Bisakah untuk mengisi Daya Baterai ?
 0:00:09
DF player mini
 0:05:49
DFPlayer Mini Interface with ESP32: Audio Playback Tutorial | Add voice to ESP32
 0:13:53
Pretty cool Audio Playback Module Review
 0:06:46
How to play audio with Arduino by using MP3 TF module
 0:00:30
Do NOT try this on your toilet! 🚽⚠️
 0:02:28
DFPLAYER DF PLAYER MINI MP3 PLAYER MODULE FOR ARDUINO MP3-TF-16P
 0:00:16
Mini DFPlayer MP3
 0:00:14
Did you know this secret hack on your laptop?
 0:00:16
Pinout df player rx tx dan arduino nano.
 0:12:57
Arduino Tutorial - Thunderous MP3 Audio with DFPlayer Mini and Op Amp
Комментарии