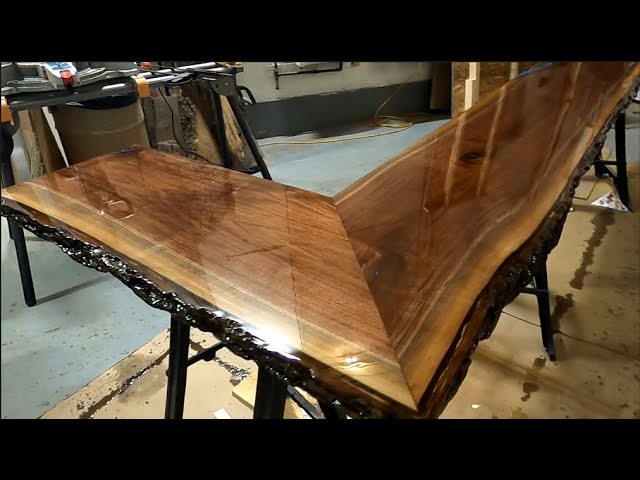
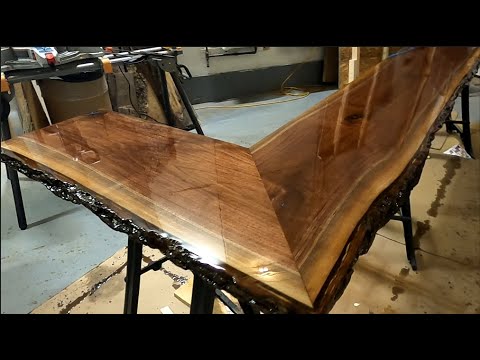
The SECRET to a Bubble-Free Epoxy Finish

preview_player
Показать описание
This video demonstrates the importance of doing multiple seal coats when using epoxy on wood slabs. If you skip the seal coating steps, you will more than likely have bubbles in your epoxy finish.

This description contains affiliate links. An affiliate link means I may earn commissions for items you purchase through links in this post (at no additional cost to you). As an Amazon Associate I earn from qualifying purchases.

Some of the products used in finishing this bar top:

Alumilite Dye
Рекомендации по теме
Комментарии
Автор

Man did I need this video! Most others gloss over the seal coat process and I never quite understood what is was supposed to look like. Really appreciate it, beautiful bar top too!

hudsonmueller
Автор

I've watched this video so many times, perfect guide for my bar top project. Same wood, same shape, same finish. Thanks for the guidance!!

youknowthevies
Автор

As the rest of the people commenting on your tutorial I found your video to be very informative and I can't thank you enough for you taking the time and effort to help us beginners. It's very refreshing to see that there are still many kind hearted people out in this crazy world we all live in. Many Thanks!

rickhasting
Автор

I really hesitate on my first time and thought that I was doing somemething wrong. Now I am more confident that ever ! TY for sharing this video, it really help alot !

BlastarX
Автор

Excellent video man. I'm about to do my first epoxy project for a bar top I built and had no idea what I was getting into. This was an incredible instructional video. Thanks for taking the time to make this. And by the way, good job on this project, it looks amazing!

travisrasmussen
Автор

I build wooden boats here on my farm in Tasmania. I totally agree with the 3-5 times longer spent on the prep work than the final finish.
I generally put my initial fill coat on just after the heat of the day is passing. Get the wood nice and warm in the sun, then as the afternoon progresses and my shed gets shaded, I paint it on. I find this facilitates the drawing in of the epoxy. I add a timber preservative and thinning agent to my epoxy to the first two coats to facilitate further absorption, not really needed on furniture projects.
Great video.

andrewallason
Автор

I just wanted to say that this is an excellent video and thank you for making it. I am about to redo my bar top outside and watched hundreds of videos, but this one made the most sense of all. None of them spread them around and or explained as you did. Thank you for making this. I have just been waiting for the temps to drop to start mine in 2 weeks.

ErikSamaro
Автор

Thanks for the video and comments from Joseph D (I think it was Joseph). I just used your process on a cracked butcher's block I purchased from Lowe's at a huge discount. I repaired the crack with deep pour epoxy. (final flood coat poured on May 2, 2022.) I used your process and the results blew me away for my first table top pour. I have to say it was your video in conjunction with another video that gave me the info for such a good result. The other video went over the trowel and chop brush procedure. I did find out you need an almost sterile environment when pouring but the few blemishes are miniscule compared to the over-all job. Thanks again for the video and never underestimate that beginners may be clinging to every word you are saying!! Thanks again.

garyhelms
Автор

Incredible. Love the detail you give in the explanation, and how concise you are too. Finished product is beautiful too.

per_sev
Автор

This video saved my project from going to the dumpster to sanding and trying it again. I really appreciate this video

daniellane
Автор

I had no reason to watch this but I stayed for the whole thing. Great video!

thatgyy
Автор

So many videos on epoxy but yours actually had relative information which answered all the questions on why you applied this method have saved for future reference thank you.

gumy
Автор

Damn good video man you have explained a lot more than most. I have done a few personal projects and now I see what I did wrong and why my finish wasn't exactly what I wanted. Plan on doing a river type table for my dining room table and plan on using some of your technics now. Again great video and I very much appreciate your hard work.

arinmastalski
Автор

BEST instructions for a PERFECT finish I've seen, with endless CLOSEUPS that really prove the point of your method. Thanks very much. Just wish you'd told the brand epoxy. . .

plarisey
Автор

I made a table like this for a very long sectional Furniture piece . I laid it out upside down and I needed it to have a 45° angle instead of a 90° angle . I was kind of proud that I got it cut so fast until I put it together and I had the 45° coming out the opposite way that I needed it. Oh well I had to make two smaller tables out of it. Not the first mistake I ever made and also not the last table either

ntom
Автор

MAN, I always say people making videos need to do exactly what you are going to be making this incredible piece of art!! Start with the images of the end result, awesome video and craftsmanship!!!

JulioCandelaria
Автор

Just got my first 8ft 20inch slab. Amazing work here, thank you for sharing !

armanrivard
Автор

I'm renovating 2 44x107 custom exterior doors and plan to apply epoxy finish to both interior and exterior...your video is very helpful in planning my process

leopeters
Автор

Wow! The detail that you went into really helped me build the courage to pursue projects like this. Seal coats make a huge difference. Well done!

larspeterson
Автор

Thanks for appropriate details for a beginner. I'm excited rather than intimidated after watching your work!

chrisgering