filmov
tv
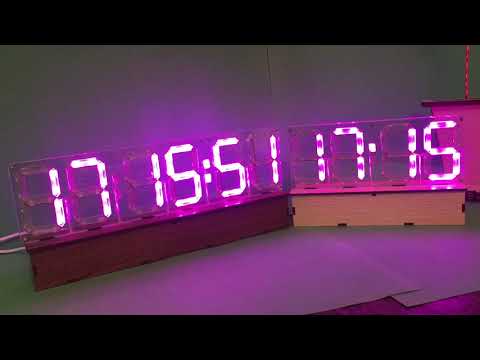
Edge-lit 7-Segment Display Clock Using Raspberry Pi Pico

Показать описание
In Episode 600 becon_dave on the community site commented that along with the cuckoo clock, a miniature 3D diorama scene could be added (like a traditional cuckoo clock), and suggested that a edge-lit multi-layered laser engraved scene could be used.
So, in this episode of Element14 Presents, Katie introduces us to her latest project: creating an acrylic edge-lit clock.
The inspiration stemmed from discussions in the community about edge-lit dioramas, sparking Katie's interest in utilizing a laser cutter for this endeavor. Beginning with a simple etched acrylic design, she outlines her vision for illuminating each number on the clock face.
Katie experiments with edge-lit laser engraved acrylic by making a clock with a Raspberry Pi Pico, but ensure that it could be a platform that can be changed in the future, so maybe one day we’ll see a scene!
#0:00 Welcome to element14 presents
#0:18 Overview
#1:18 The Plan
#4:33 The Schematic And Design
#10:22 Assembly
#13:58 Time To Test!
#15:27 Give your Feedback
#homeautomation #raspberrypi #arduinoproject #smartroom #tutorial
Visit the element14 Community for more great activities and free hardware:
 0:16:58
Edge-lit 7-Segment Display Clock Using Raspberry Pi Pico
 0:00:19
Edge-Lit Acrylic 7-Segment Display
 0:01:06
Edge-Lit Seven Segment Clocks
 0:01:42
Clock with Vintage Edge Lit Displays
 0:11:41
Homemade LED edgelit display
 0:30:31
Transparent Edgelit Display
 0:01:55
Edge-lit Arduino clock
 0:02:26
'Lixie' Edge-lit Numeric Display for Arduino
 0:00:20
Homemade seven segment display clock
 0:00:10
RGB led 7 segment clock
 0:01:28
7 segment RGB digital clock & temperature display v2 TEST BUILD
 0:00:32
Ivan Miranda's 7 Segment Clock
 0:00:39
multicolored 7 segment clock
 0:00:37
Animated RGB LED Clock (work in progress)
 0:26:20
DIY Vixie Clock - Final
 0:00:14
stop watch with acrylic 7 segment display
 0:00:34
Arduino clock and weather 7 segments bulb
 0:02:21
Arduino nano + rtc + 7segment = Clock Tube
 0:01:30
DIY 7 Segment LED Clock
 0:00:36
Digital Clock with Hours, Minutes and Seconds on SSD(Seven Segment Display) using PIC18F2550 uc
 0:00:12
DIY 29 segment digit
 0:08:06
XXL 7 segment display as a 100K FOLLOWERCOUNTER | makermoekoe
 0:16:49
Panaplex Clock
 0:00:38
Digital Clock Display Of Sixteen Segments
Комментарии